bâàwÉÉÜ fÑxxw WÉÅx fxÜ|xá |Ñ@åÇxà
9
2. Installation
⊙
DIP Switch Setup
■ Before installing the camera, you should set the DIP switches to configure the camera ID, communication protocol. Do not use the system upgrade
terminal.
■ Input Sensor Active Type
• When a sensor input is used, its functional type should be set.
There are two types; Normal Open type and Normal Close type.
-Normal Open
: Voltage is let out when the sensor is activated
-Normal Close
: Voltage is let out when the sensor is not activated
Pin
Switch position
Sensor type
ST1 (Pin 4)
ON
Sensor 1 Normal Close
OFF
Sensor 1 Normal Open
ST2 (Pin 5)
ON
Sensor 2 Normal Close
OFF
Sensor 2 Normal Open
ST3 (Pin 6)
ON
Sensor 3 Normal Close
OFF
Sensor 3 Normal Open
ST4 (Pin 7)
ON
Sensor 4 Normal Close
OFF
Sensor 4 Normal Open
• If a wrong type of sensor is selected, it activates in the opposite way to the sensor input.
Summary of Contents for IS2765N
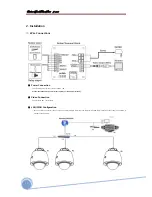
Page 10: ...b w f xxw W x fx x x 10 General LAN WAN Configuration...
Page 11: ...b w f xxw W x fx x x 11 2 Installation Installation Using the Wall Mount...
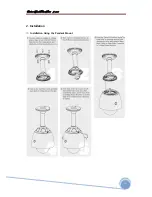
Page 12: ...b w f xxw W x fx x x 12 2 Installation Installation Using the Pendant Mount...
Page 16: ...b w f xxw W x fx x x 16 Figure 3 1 Log in window...
Page 46: ...b w f xxw W x fx x x 46 MEMO...
Page 86: ...b w f xxw W x fx x x 86 MEMO...
Page 89: ...b w f xxw W x fx x x 89 6 Specifications Dimensional Drawings unit mm...
Page 90: ...b w f xxw W x fx x x 90 6 Specifications Dimensional Drawings Unit mm...
Page 92: ...b w f xxw W x fx x x 92 MEMO...


