Pr
ps .........................................................................3
Connecting with special terminals .........................................4
Special operation(
.....6
......................................................7~8
Operation via equipment
15~18
Operation via touch screen......................................19~24
Main page,
...19
Radio1,Radio2 mode operation intructions ........................ 20
TV,DVD mode operation intructions .................................... 21
Bluetooth mode operation intructions .................................22
AV,USB/SD,ipod mode operation intructions .....................23
Audio and video set mode operation intructions.............24
How to install..........................................................25~28
Specifications..............................................................29
Troubleshooting.....................................................30~31
.......................................................................................5
9~10
alibrate screen/Navigation/
Operating Instructions............................................10~15
(Radio
DVD
TV
USV/SD
AUX)
............................................................................................
ecautions...............................................................................3
Installation ti
Connect
Remote controller
Parameter setup mode operation intructions
Equipment operation................................................
C
USB/SD)
Contents
-2-
Please ignore the contents on remote controller if the functions of remote
controller are not available in the model you use.
Please do not try to reform the player. Otherwise, unexpected accidents may
occur.
If any operation on the Player affects your driving, please stop the car in a
safe place before operating.
Please do not operate this player under extremely high or low temperature.
Before turning on the Player, make sure the temperature inside the car is
60 c~-10 c. Temperature over the range may result in abnormal
working.
The fan for the player will be automatically turned on when the surrounding
temperature is over 65 c, if below this temperature, the fan won't act.
Precautions, Installation Tips
Precautions
Installation Tips
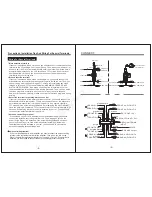
This Player is only compatible with negative grounding system with 12V-14V
DC power. Before installation, check whether such a negative grounding
system is set in your car. (Range for voltage protection: 10.8V- 16V)
Before installation, please remove the power from (-) polar of the battery
terminal so as to reduce the chance of damaging the player caused by short
circuit.
Wiring must be done according to the colors indicated on the cables as
specified in the installation guide. Wrong connection may result in player
damage or damage of the car's electric system.
The (-) lead wire of the speaker must be connected to the (-) terminal for the
speaker. Never connect it to the car body nor to other speakers.
Please do not block the ventilation opening or the heat sink to avoid fire
caused by the over heat inside the player.
After the installation and before using the Car Player (including changing the
battery for the car), use a round-head tool (like a ball-point pen) to press the
button 'RESET" on the panel so as to initialize the system.
During installation, if the brake line is not used, it should be grounded.
Otherwise, there will be no video output on the device (no image).
-3-
When installing, please remove sticker on the player housing. Otherwise, it
will affect the heat radiation.
When installing, please remove the protective film on TFT screen to avoid
affecting the operations via touch screen.
CnBuyNet.com
Summary of Contents for CBNJBLJ7685
Page 1: ...C n B u y N e t c o m...

