eVenue Thunder
13
H a r d w a r e I n s t a l l a t i o n
Hardware Installation
This section outlines how to connect and power your eVenue system.
CAUTION:
When connecting, all volume controls should be turned down to prevent possible equipment damage;
then, adjust to the desired level after the inputs/outputs are connected.
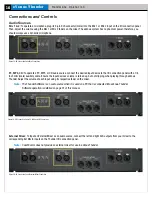
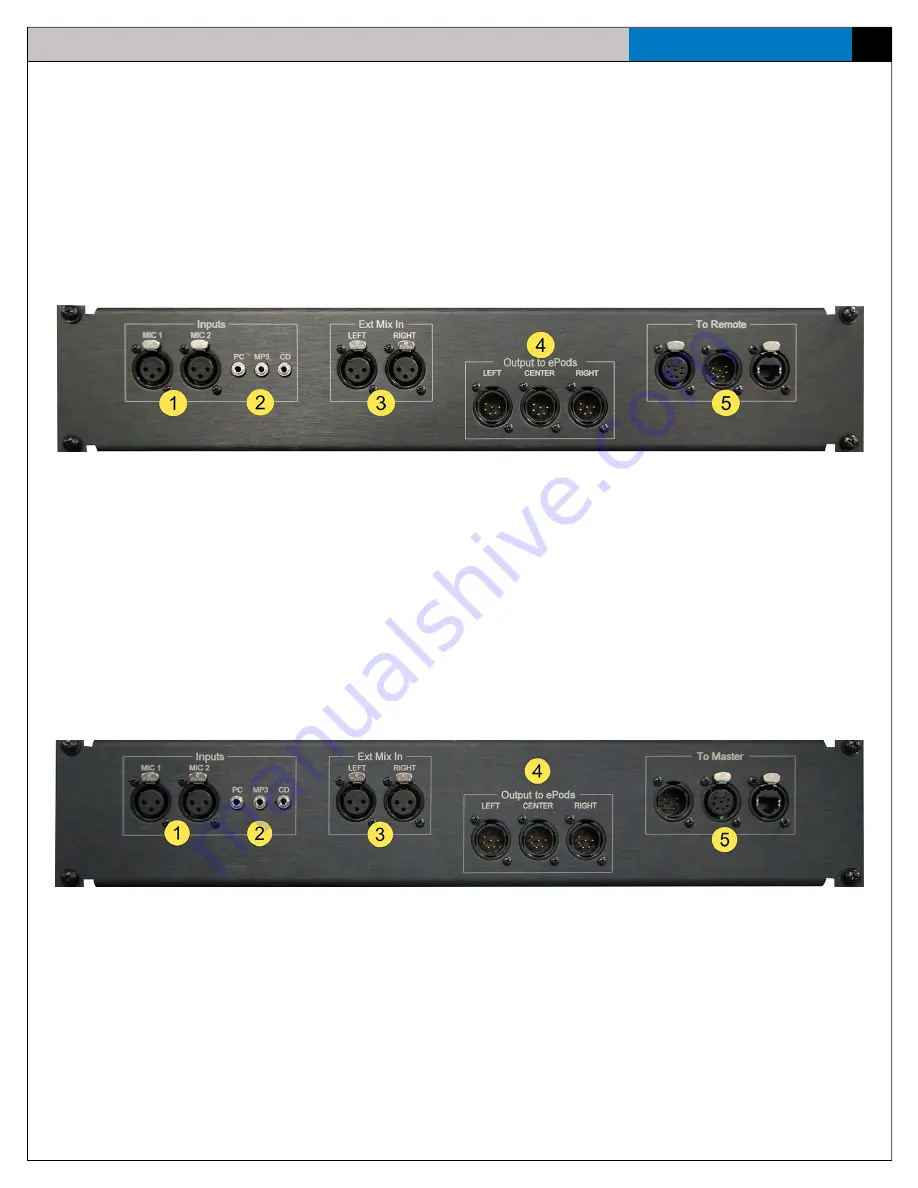
Thunder Master I/O Connection Panel
This section outlines the I/O connection panel to utilize your eVenue Thunder Master.
1.
Mic 1 & 2:
T
wo microphone-level inputs (balanced; female)
2.
PC, MP3, CD:
Audio input (line-level; stereo; unbalanced; female)
3.
External Mix In (Left, Right):
Audio input (line-level; balanced; +4 dB; female)
4.
Output to ePods (Left, Center, Right):
Audio 6-pin XLR connections to ePods (male)
5.
From Remote:
Bundled, redundant, paired 7-pin XLR with a Cat 5 cable; allows simultaneous control from the Thunder
Remote to the Thunder Master.
Thunder Remote I/O Connection Panel
This section outlines the I/O connection panel to utilize your eVenue Thunder Remote.
1.
Mic 1 & 2:
Two microphone-level inputs (balanced; female)
2.
PC, MP3, CD:
Audio input (line-level; stereo; unbalanced; female)
3.
External Mix In (Left, Right):
Audio input from an External Mixer (line-level; balanced; +4 dB; female)
4.
Output to ePods (Left, Center, Right):
Audio 6-pin XLR connections to ePods (male). Use not required unless Thunder
Remote is used alone with ePods.
5.
To Master:
Allows simultaneous control from the Thunder Remote to the Thunder Master. This is a bundled,
redundant, paired 7-pin XLR with a Cat 5 cable.
Figure 14: Thunder Master I/O Connection Panel
Figure 15: Thunder Remote I/O Connection Panel


