eVenue Thunder
36
S o f t w a r e I n s t a l l a t i o n a n d O p e r a t i o n
Volume Master Panel
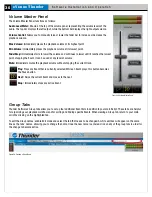
The Volume Master Panel functions as follows:
Audio Level Meter:
Shown at the top of the volume panel, representing the volume levels of the
audio. The top bar displays the left output, while the bottom bar displays the right output volume.
Volume Control:
Allows you to manually raise or lower the fader bar to increase or decrease the
playback volume.
Max Volume:
Immediately places the playback volume at its highest point.
Min Volume:
Immediately places the playback volume at its lowest point.
Fade/Stop:
Immediately starts to lower the volume and continues to lower until it reaches the lowest
point, stopping the Event. It can be used at any level of volume.
Mute:
Immediately mutes the playback volume without stopping the current track.
Play:
Plays any Event that is currently selected. While an Event plays, this button becomes
the Pause button.
Next:
Skips the current Event and moves to the next.
Stop:
Immediately stops any active Event.
Group Tabs
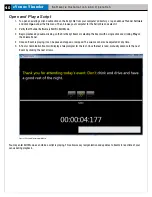
Thunder Software’s Group tabs allow you to set up four additional Event lists in addition to your main Script. These tabs are helpful
for organizing your playback workflow and for sorting and finding specific Events. When viewing a Group tab, return to your main
script by clicking on the highlighted tab.
To edit the Group names, enable Edit mode and select the tab that needs to be changed. A white edit box will appear on the same
line as the tabs’ names, allowing you to change the name. Once the new name is entered, click on any of the group tabs in order for
the change to become active.
Figure 49: Volume Master Panel
Figure 50: Entering a Group Name


