17
CSA ENCLOSURE: TYPE 2
Refer to Wiring Diagram inside the cover of the control
enclosure. Refer to Installation and Safety Instructions provided
by the spa manufacturer.
WARNING!
GFCI OR RCD PROTECTION.
The Owner should test and reset the GFCI or RCD on a regular
basis to verify its function.
WARNING!
SHOCK HAZARD! NO USER SERVICEABLE PARTS.
Do not attempt service of this control system. Contact your dealer
or service organization for assistance. Follow all owner’s manual
power connection instructions. Installation must be performed by a
licensed electrician and all grounding connections must be properly
installed. Disconnect the electric power before servicing. Keep
access door closed.
CSA COMPLIANCE
CAUTION:
•
Test the ground fault circuit interrupter before each use of
the spa.
•
Read the instruction manual.
•
Adequate drainage must be provided if the equipment is to
be installed in a pit.
•
For use only within an enclosure rated CSA Enclosure 3.
•
Connect only to a circuit protected by a Class A ground
fault circuit interrupter or residual current device.
•
To ensure continued protection against shock hazard, use
only identical replacement parts when servicing.
•
Install a suitably rated suction guard to match the maximum
flow rate marked.
WARNING:
•
Water temperature in excess of 38°C (100.4°F) may be
injurious to your health.
•
Disconnect the electrical power before servicing.
CLEANING AND REPLACING FILTER CARTRIDGE
Your spa filter has been designed for quick and easy
maintenance. The filter cartridge should be rinsed by hose once
a week and cleaned with a cartridge cleaner once a month. A
second filter cartridge is recommended and will speed up this
process. This can be purchased from your local dealer.
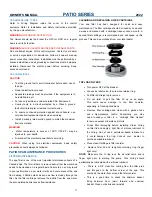
TOP LOAD FILTERS
•
Turn power OFF at the breaker.
•
Loosen air relief valve, then remove retainer ring.
•
Pull filter lid straight up to remove.
•
Do not twist or pull the filter lid up on an angle.
This
could cause damage to the filter canister,
especially in
freezing conditions.
•
Remove filter cartridge and clean with a garden hose
and
a high-pressure nozzle. Periodically you may
need to
soak your filter in a “cartridge filter cleaner”
to remove
excess minerals and/or oils.
•
Rinse filter thoroughly before installing. Clean O-ring
on
filter lid and apply a light film of silicone lubricant to
the O-ring. Do not use a petroleum-based lubricant as
it could
damage the
ring. Consult your dealer to
purchase suitable lubricant.
•
Place clean Cartridge in filter canister.
•
Replace filter lid and re-tighten retaining ring (finger
tight
only)
NOTE:
Make sure the O-ring is on the air relief valve, and is
finger tight prior to starting the pump. This O-ring should
periodically be lubricated with a silicone lubricant.
•
There is a 3/8” clear line coming from the filter area
and
this goes to the bottom corner of the spa. This
drains
all the water from around the filter canister.
•
This is a good time to check the skimmer basket.
Bring skimmer door (weir) forward and unscrew
basket.
Clean out debris and reinstall.
CAUTION:
When using this electrical equipment, basic safety
precautions should always be followed.
PATIO
SPA MAINTENANCE PROCEDURES
FILTER MAINTENANCE
The spa filter is one of the most important maintenance items of a
Cascade Spa. The filter is there to remove debris from the water and
needs to be cleaned on a regular basis. Failure to do so may result
in poor performance, poor water clarity and could prevent the spa
from heating. Filtration starts as soon as flow is steady through the
filter. As the filter cartridge removes the debris from the spa water,
the accumulated debris causes flow resistance.
OWNER’S MANUAL
2022
PATIO
S
ERIES
Summary of Contents for Patio Element Bench
Page 2: ...OWNER S MANUAL 2022 2 PATIO SERIES ...
Page 37: ...WORLD S BEST BUILT SPAS ...


