background image


USB UPDATING 


(make sure module is also connected to Lockpick harness and vehicle) 


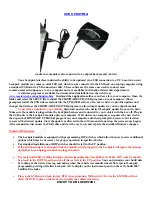
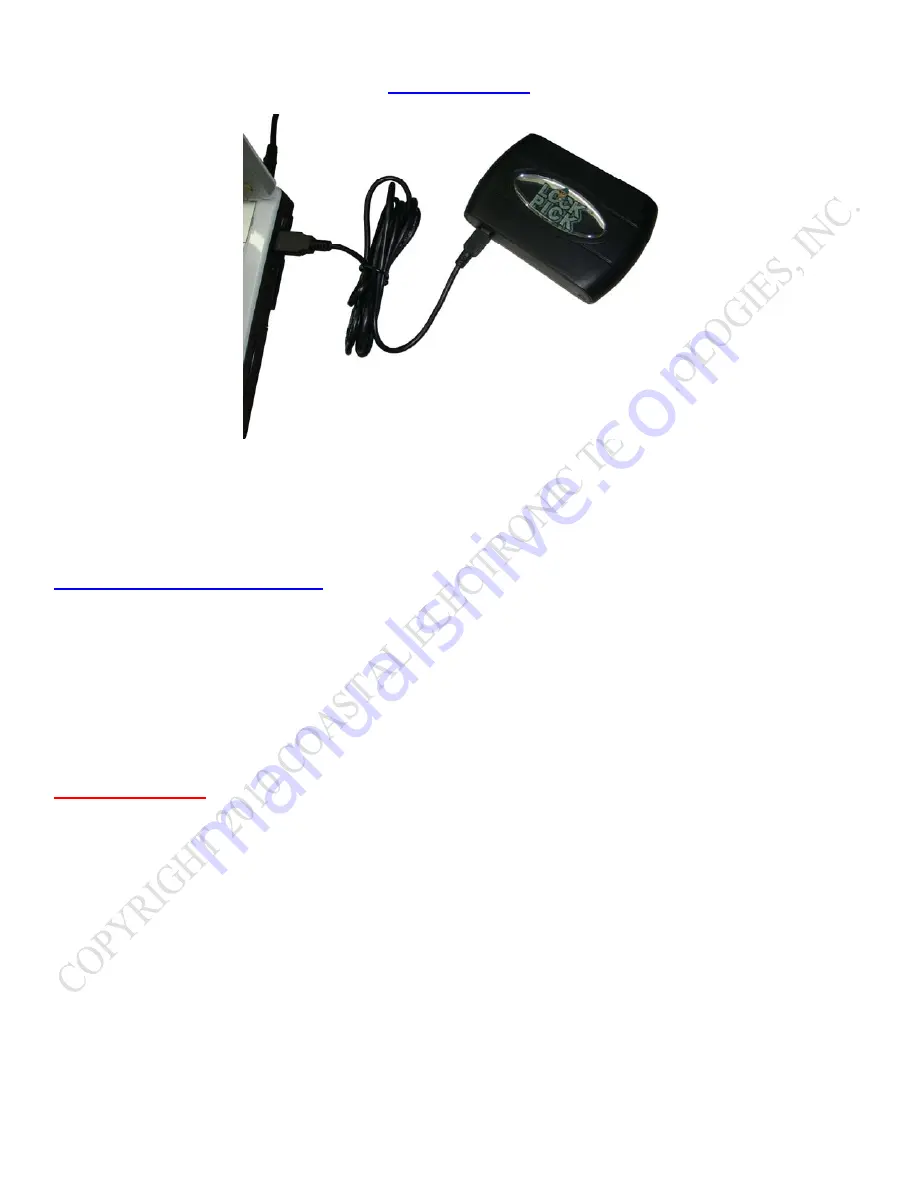
Your Lockpick interface includes the ability to be updated via a USB connection to a PC. Located on your 

Lockpick module is a common  mini USB jack which can be connected to the USB jack on a laptop computer using 
a standard USB mini to USB connection cable . These cables are the same ones used to connect most 
camaras/camcorder/phones, etc. to a computer and are available in virtually all electronic departments.     
 

A software program is available for download and installation on our website at 

www.coastaletech.com/usbupdate.htm

   Download the application software and save it to your computer. Open the 

folder and select the SETUP file to install the FIRMWARE UPDATER program on your computer. When 
prompted, install the USB drivers included in the UPDATER software. On our website we provide updates and 
changes that will use the FIRMWARE UPDATER program to allow simple updates to your Lockpick module.  
 

To perform an update to your module, 

download and save the desired Lockpick update from our website. 

Make sure the module is plugged into the Lockpick harness and connected to your vehicle with the key off. Plug in 
the USB cable to the Lockpick module and your computer. Wait while your computer recognizes the new device, 
then open the FIRMWARE UPDATER program on your computer and when prompted, browse to the location 
you saved the desired update. Start the update as directed in the software and do not stop the process once begun. 
After completion, disconnect the USB cable and start the car to use and explore the installed firmware changes. 
 

Module DIP Switches: 


The Lockpick module is equipped with programming DIP switches which allow the user to select additional 
options which may be necessary for proper operation in specific vehicles.   


For standard installations, all DIP switches should be left in the UP position. 


If the switch settings are changed while the module is still plugged in, the Lockpick will ignore the changes 
until it has been unplugged and then plugged back in. 


For early build 2007 Cadillac Escalade vehicles (manufacture date 2005-early 2006),  DIP switch 1 should 
be placed in the DOWN position with all the rest left in the UP position.

 You can determine your build date 

by looking at the driver door tag and noting when the vehicle was manufactured. This special Lockpick 
programming setting will allow Lockpick text to display on the instrument panel on the early build 2007 
Cadillac Escalades. 


Place switch 5 Down to block factory DVD video in motion. With switch 5 Down, the GMX550 will not 
allow the DVD to play on the front screen while the vehicle is moving. 

ENJOY YOUR LOCKPICK! 

Summary of Contents for GMX550 LOCKPICK

Page 1: ...MMING DIP SWITCHES OPTIONAL A V OUTPUT AUX A V INPUT IPOD IPHONE ITOUCH IPAD CONNECTION UNPLUG ORIGINAL RADIO CONNECTORS THEN PLUG IN HERE PLUG AND PLAY NO OTHER CONNECTIONS ARE NECESSARY USB INPUT GMX550 LOCKPICK INSTALLATION OPTIONS COPYRIGHT 2010 COASTAL ELECTRONIC TECHNOLOGIES INC ADD YOUR BLUETOOTH HANDSFREE KIT CONNECTIONS BUILT INTO GMX550 HARNESS USE HANDSFREE KIT MICROPHONE REAR CAM POWER...

Page 2: ...gnifies user acceptance of this term of use Please adhere to all driving laws in your state INSTALLATION OVERVIEW 1 Remove radio trim panels to gain access to radio mounting screws 2 Remove the radio partially to expose rear connectors 3 Unplug factory connectors from radio and then plug them into Lockpick harness connectors 4 Plug in Lockpick harness connectors to radio 5 Connect camera s power a...

Page 3: ... the wire in the factory harness should be insulated and left disconnected Do not connect the Lockpick Orange w black stripe wire without cutting the BLUE factory wire or improper operation will occur Also early year Enclave and Acadias may place the camera module in the rear instead of under the passenger seat Refer to website at http coastaletech Acadia htm for installation help For 2008 and lat...

Page 4: ... OPERATION To activate the GMX550 LOCKPICK press the MUTE VOICE button on your steering wheel 4 four times within 4 seconds as demonstrated below Text with menus and options will appear on your instrument panel The menus of the GMX550 are controlled using your steering wheel NEXT UP and NEXT DOWN buttons to scroll up and down through the Lockpick menus Select any item or option using the SEEK butt...

Page 5: ...Activates Front camera if installed Camera must be powered by the GMX550 for this function VIEW FRONT CAM PRESS TO TURN ON Activates Rear camera factory or aftermarket Camera must be powered by the GMX550 for this function See installation options step 3 VIEW REAR CAM PRESS TO TURN ON Automatically places the radio in the XM mode and activates audio AUX A V text on screen If AUX video is selected ...

Page 6: ...ch your vehicle or desires ADDITIONAL OPTIONS This displays the current software revision The GMX550 can be updated by the user via USB when desired SOFTWARE REVISION 1 XXXXXX Select to Exit Headrest Output Options and return to beginning of menus EXIT Select to send Right Camera Video to an external screen or headrests HROUT RIGHT CAM TO SELECT Select to send Left Camera Video to an external scre...

Page 7: ...thout button presses for Cadillac and early 2007 GM radios OVERRIDE MODE 4 PRESS TO TURN ON Override MODE 3 is used for Cadillac applications where the user wants to press a button before DVD override OVERRIDE MODE 3 PRESS TO TURN ON Override MODE 2 is used for many GMC and Acadia models OVERRIDE MODE 2 PRESS TO TURN ON MODE 1 is the default DVD and NAV override compatible with most vehicles OVERR...

Page 8: ...computer Wait while your computer recognizes the new device then open the FIRMWARE UPDATER program on your computer and when prompted browse to the location you saved the desired update Start the update as directed in the software and do not stop the process once begun After completion disconnect the USB cable and start the car to use and explore the installed firmware changes Module DIP Switches ...

Page 9: ...ption is selected from the GMX550 text the GMX550 will advance the radio automatically to the XM mode on your radio current XM subscription is not necessary If the connected device is an iPhone or iTouch with software 4 0 or greater the radio video will activate and display the iPod OUT audio control graphical interface as shown below After a song is playing turn tuning knob to advance forward or ...

Page 10: ...ice does not support iPod OUT audio graphical searches the GMX550 will automatically detect this when the iPod mode is selected and display the above screen o The audio manually selected from your iPod will automatically play through your factory sound system o You may also manually search your iPod for music videos personal videos as well as full length movies To display your selection on the fro...

Reviews: