86
Changing the modem settings
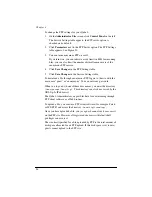
To enter or change the modem settings for the Qube 2:
1.
On the
Administrator Site
screen, click
Network
on the left. The
settings tables for the network configuration appear.
2.
Click
Modem
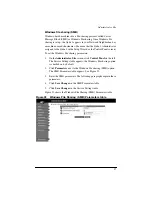
at the top. The Modem Dial-out Settings table
3.
Modify the one or all of the following fields.
Note:
For help with a particular field, move the mouse pointer
over the Active Assist
icon adjacent to the field. Help text
appears in a window at the bottom of the screen.
•
Connection mode
The connection mode determines when the
modem connects to the PPP account.
•
Phone number
This is the phone number to dial to access the
PPP account for the given user. Do not include spaces in the
phone number.
•
User name
This is the user name used to log into the
PPP account. This is set by the provider of the PPP account, for
example your ISP.
•
New password
This is the password used to authenticate the
PPP connection for the given user. Enter the password twice for
verification.
•
Modem initialization string (optional)
Just before dialing, the
initialization string is sent to the modem to initialize the
modem, for example ATZ. The Qube 2 brings the modem to its
default factory settings.
•
Local IP address (optional)
This is the IP address for the
PPP link if you are using a fixed IP address assigned by your
provider. If the IP address for the PPP link is assigned
dynamically by the connecting server, leave this field blank.
•
Local subnet mask (optional)
This is the netmask for the
PPP link if you are using a fixed IP address assigned by your
provider. If the IP address for the PPP link is assigned
dynamically by the connecting server, leave this field blank.
4.
Click
Save Changes
.
Summary of Contents for Cobalt Qube 2
Page 1: ...Cobalt QubeTM 2 User Manual...
Page 6: ...vi...
Page 20: ...Chapter 1 6 Figure 3 Administrator Site screen Figure 4 Public Site screen...
Page 26: ...Chapter 1 12...
Page 68: ...Chapter 3 54...
Page 70: ...Chapter 4 56 Figure 17 Administrator Site screen...
Page 76: ...Chapter 4 62 Figure 19 shows the User Defaults table Figure 19 User Defaults table...
Page 78: ...Chapter 4 64 Figure 20 shows the Add New User table Figure 20 Add New User table...
Page 87: ...Administrator Site 73 Figure 24 shows the Add New Group table Figure 24 Add New Group table...
Page 184: ...Appendix B 170...
Page 206: ...Appendix E 192...
Page 218: ...Appendix F 204...


