background image

M o d e l   Y e a r   2 0 1 6                                                                                                                                                                                                   p a g e  

!

7

M a v e r i c k   B o a t   C o m p a n y ,   I n c .     •   3 2 0 7   I n d u s t r i a l   2 9 t h   S t .   •   F o r t   P i e r c e ,  

F l o r i d a   3 4 9 4 6   •   ( 7 7 2 ) - 4 6 5 - 0 6 3 1   o r   ( 8 8 8 ) - s h a l l o w   •   F a x :   ( 7 7 2 )   4 8 9 - 2 1 6 8

BILGE 

Bilge  

The bilge of your Cobia should always be checked before 

and after a launch. While checking the bilge, note that a 

small amount of water in the bilge is normal. However, a 

large amount of water or any signs of fuel or oil requires 

immediate attention. 

If such a situation exists, the boat 

should be taken to a certified marine technician 

immediately.  Never pump fuel or oil overboard while 

your boat is in the water.


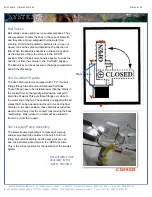
Large quantities of water in the bilge may be an indication 

of a leak or that the bilge pump and/or automatic float 

switch is not functioning properly due to a jam, clog or 

electrical issue. The automatic float switches are wired to 

the hot side of the battery switch through the “BILGE” 

fuse at the battery switch panel. When functioning 

properly, the float switch activates the bilge pump to pump 

water overboard once water in the bilge reaches a level 

that submerges the switch.  

If your bilge pump does not come on when the float 

switch is submerged or lifted to stimulate being 

submerged, attempt to manually turn on the bilge pump 

on your switch panel. If the bilge pump comes on and 

evacuates the water, it is likely that the float switch is not 

functioning properly. If the bilge pump does not come on 

via the switch panel, check the breaker panel inside the 

console to see if the breaker has been tripped (for 

additional information see breaker panel on page 35). If 

the breaker has been tripped, reset it by pressing the 

breaker button, and turn the switch on again, listening for 

the bilge pump to turn on. 


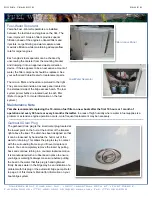
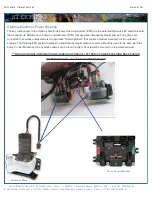
If the bilge pump fails to turn on, turn the battery switch to the OFF position, then unhook the bilge pump from its cradle 

by pressing the locking tab and twist the motor housing counter-clockwise. You will feel the pump release from the cradle. 

The entire bilge pump and wiring should release from the cradle. After removing the pump, check the underside and 

impeller areas for miscellaneous items that might clog the pump. If any obstructions are present remove the debris and 

set the pump back into the cradle. Once set back in the cradle, press the pump down on the base then twist until the lock 

button snaps it into place. Once this is completed you can try to turn the pump on again.  

If the bilge pump still does not turn on, it likely needs to be replaced. It is not recommended to use your boat if the bilge 

pump and/or float switch are not functioning properly. 


Automatic Float Switches

Bilge Pumps

Summary of Contents for 344 CC

Page 1: ...a Owner On behalf of Cobia Boats I would like to congratulate you on your purchase We at Cobia strive to build the best products possible and wish you years of trouble free enjoyment There are many th...

Page 2: ...ing Ladder 13 Props 13 Fuel System 14 Steering 15 16 Self Bailing Cockpit 17 Livewell System 17 18 Rod Lockers 19 20 Fish Lockers 20 Macerator Access Operation 21 Anchor Locker Rode Storage 22 Trim Ta...

Page 3: ...c 3 2 0 7 I n d u s t r i a l 2 9 t h S t F o r t P i e r c e F l o r i d a 3 4 9 4 6 7 7 2 4 6 5 0 6 3 1 o r 8 8 8 s h a l l o w F a x 7 7 2 4 8 9 2 1 6 8 BOATING SAFETY CHECKLIST PRE OPERATION CHECK...

Page 4: ...d or unattended operation Certain emergency conditions e g turbulent water wakes unanticipated movement may impair a person s ability to operate the craft safely The switch located on the helm must ha...

Page 5: ...ou that the associated accessory should be functioning and also reminds you to turn it off during boat shutdown When the NAV light switch is in the on position the labels for the switches will be illu...

Page 6: ...bulbs are located next to each filter Refer to page 14 for more information on the fuel system Maintenance Note Yamaha recommends replacing the 10 micron fuel filter on new boats after the first 10 ho...

Page 7: ...eing submerged attempt to manually turn on the bilge pump on your switch panel If the bilge pump comes on and evacuates the water it is likely that the float switch is not functioning properly If the...

Page 8: ...44 is made easy First locate the controls for the electronic lift assist labelled hatch mounted on the starboard side of the tackle center Next press and hold the top button on the controls This will...

Page 9: ...an be accessed in the bilge compartment behind the aft seating 344 Deckdrain System The deck drain system is equipped with 1 1 2 thru hull fittings through the aft port and starboard hull sides These...

Page 10: ...uses an electric head fresh water sink with spray nozzle for rinsing off switch panel for flushing head and on off switch for the macerator There is a DC breaker panel inside See page 35 and also two...

Page 11: ...e access in the console on the aft bulkhead This supplies your head with the water it will need to operate correctly Then press the toilet switch and the waste is pushed into the holding tank The mace...

Page 12: ...tted Some near shore areas and inland areas are designated as No Discharge Zones where the discharge of any onboard waste even treated waste is strictly prohibited Many of these areas require a waste...

Page 13: ...ect the engine and prop prior to launching your boat with the engine off Key prop issues include tangled fishing line or other types of debris cracked blades or fluid leaking out of the seal Look for...

Page 14: ...one on the port gunnel and one on the starboard gunnel Every fuel tank is pressure tested at the factory before and after installation Should you experience any fuel related problems or suspect proble...

Page 15: ...ects via CAN Bus to a Pump Control Module PCM that operates individual hydraulic pumps The pumps are connected to specially engineered electro hydraulic SmartCylinders that control individual movement...

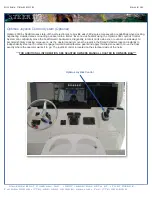
Page 16: ...a vessel onto a trailer Even novice boaters using the Optimus 360 Joystick Control System can confidently move the boat forward backwards diagonally rotate it on its own axis or even move sideways to...

Page 17: ...f the automatic bilge pump may be an indication of a hose leak or break in a seal and should be investigated by a Cobia Dealer immediately Refer to page 9 for further information regarding bilge pump...

Page 18: ...only water No Air enters the pumps or the livewell preventing any air locking issues This both increases the life of your baitfish by further reducing wave action in your livewell tanks and greatly e...

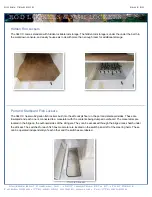
Page 19: ...s h a l l o w F a x 7 7 2 4 8 9 2 1 6 8 ROD LOCKERS FISH LOCKERS Rod Racks The 344 center console model comes standard with under gunnel rod racks on both the port and starboard sides These give you s...

Page 20: ...nected to a macerator with the contents being dumped overboard The macerators are located in the bilge on the outboard sides of the stringers They can be accessed through the bilge access hatch under...

Page 21: ...5 0 6 3 1 o r 8 8 8 s h a l l o w F a x 7 7 2 4 8 9 2 1 6 8 MACERATOR ACCESS OPERATION Macerator Access In order to access the macerators go to the aft seating and press and hold the top button on the...

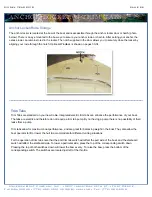
Page 22: ...is shown on pages 33 34 Trim Tabs Trim Tabs are standard on your new Cobia Integrated electric trim tabs can enhance the performance of your boat The tabs are electric and therefore do not require a...

Page 23: ...lt water receptacle located by the transom gate above the port deck drain Flip the switch labeled Saltwater Washdown on your switch panel The pump will pressurize the system with salt water Once the s...

Page 24: ...u can leave this switch in the ON position while the boat is in use The pump has an internal pressure switch that allows the pump to turn on and off as needed This model has a 25 gallon fresh water ta...

Page 25: ...in the leaning post on the starboard bulkhead and can be accessed through the hatch on the forward side of the leaning post There is a receptacle to plug a 110v cord into The receptacle is located on...

Page 26: ...ost The helm seat tackle center for the 344 CC is home to the double bolstered helm seats that lock into the seated position or flip down independently for the boater s preference Underneath the aft c...

Page 27: ...ntil it locks into place Bow Cushion Set Your 344 CC comes with an eight piece bow cushion set This also includes a cushion that can be added to the top of the retractable bow table to turn the whole...

Page 28: ...d is equipped with all white detachable cushions standard This seat also houses a large insulated cooler Optional Additional Forward Seating The additional forward seating turns the standard forward c...

Page 29: ...Tuna Door Boarding Door The tuna door boarding door is located in the starboard gunnel To open the door slide the lever located under the gunnel on the forward side of the tuna door into the unlocked...

Page 30: ...Rope Chocks The bow light cleats and rope chocks are stainless steel pull up and can remain hidden when not in use This is especially helpful while fishing It leaves nothing in the bow to interfere U...

Page 31: ...ith the deck it also doubles as a lounge when the table is elevated to the hight of the surrounding seating area Bow Table Operation To raise or lower the bow table simply press and hold the top or bo...

Page 32: ...a l l o w F a x 7 7 2 4 8 9 2 1 6 8 HARD TOP Hard Top The optional 344 hard top comes with forward and aft spreader lights recessed LED down lighting recessed speakers and two storage boxes for addit...

Page 33: ...reo Controls In Electrons Package Optional Windlass Deluxe The windlass is used to lower and raise your anchor assembly The switch is mounted at the helm station to the left of the steering wheel The...

Page 34: ...sten the chain with a chain locker or secure it in place with a rope Hauling the Anchor Turn on the engine Make sure the clutch is engaged and remove the handle Press the UP button on the control prov...

Page 35: ...their systems and have the proper amperage size Those labeled ACC are left open for adding additional accessories The windlass system is tied to the House battery switch and utilizes a reset breaker t...

Page 36: ...i c k B o a t C o m p a n y I n c 3 2 0 7 I n d u s t r i a l 2 9 t h S t F o r t P i e r c e F l o r i d a 3 4 9 4 6 7 7 2 4 6 5 0 6 3 1 o r 8 8 8 s h a l l o w F a x 7 7 2 4 8 9 2 1 6 8 BATTERY SWIT...

Page 37: ...i c k B o a t C o m p a n y I n c 3 2 0 7 I n d u s t r i a l 2 9 t h S t F o r t P i e r c e F l o r i d a 3 4 9 4 6 7 7 2 4 6 5 0 6 3 1 o r 8 8 8 s h a l l o w F a x 7 7 2 4 8 9 2 1 6 8 BATTERY SWIT...

Page 38: ...344 Wiring Harnesses...

Page 39: ......

Page 40: ......

Page 41: ......

Page 42: ......

Page 43: ......

Page 44: ......

Page 45: ......

Page 46: ......

Page 47: ......

Page 48: ......

Page 49: ...344 Power distribution from stern to helm...

Page 50: ...344 Power distribution diagram for aft bilge...

Page 51: ...344 Power distribution diagram for console...

Page 52: ...344 Power distribution diagram for leaning post batteries...

Page 53: ...is general in nature and should not be considered a repair manual or guidelines set forth by Cobia Boat Company Cleaning Each Cobia Boat is constructed using the finest material and components availab...

Reviews: