background image

Nothing

Comes Close to a Cobra

®

27

26 English

Settings

Your Detector

Auto Mute Mode

When

Auto Mute

is on, it automatically reduces the audio volume of all

alerts after they have sounded for four seconds. The signals will remain
muted for as long as the signal is detected. When Auto Mute is off, the
alerts will sound at full volume for as long as the signal is detected.
The factory setting for Auto Mute is On. Press MUTE/

to toggle

between Auto Mute vs. Manual Mute.

Voice or Tone Mode

Set detector to sound alerts and confirm program settings with a Voice or a
Tone. Voice Alert provides voice messages in addition to tones. Tone Alert
provides tones only. Factory setting is Voice Alert.

Remote Display Unit (RDU) Beep Level

RDU Beep sets the volume level for the keypad confirmation tones of the
RDU. Choose from Low, High or Off RDU beep level volumes.

RDU Display Color

The RDU screen color theme is customizable to match your personal
preference or your vehicle’s dash illumination. Choices include Multi-Color,
Red, Blue, Orange or Green. Factory setting is Multi-Color.

Display Timeout

Display Timeout determines how long RDU button backlight and display stays
On before RDU screen switches to Auto Dark mode. Set RDU display time for
15 seconds, 30 seconds, one minute, three minutes or Always On. Factory
default is 30 seconds.

NOTE:

If selecting “Always On” setting, RDU battery will need charging

more frequently.

Frequency Display Mode

Different Ka radar and LIDAR (Laser) guns operate at various frequencies
within their assigned spectrums. When Frequency Display is turned On,
the signal frequency will be added to the alert. The factory setting for
Frequency Display is Off.

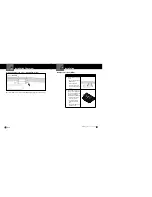
Settings

Your Detector

Set Activation Point

After the detector is installed in your vehicle and

IntelliMute

or

IntelliMute Pro

is turned On using Menu mode, press the

City

button to advance to the

IntelliMute Set Point screen where the Activation Point can be set.

At the Set Point screen:

1.

Press the

Mute

button to advance to the Setup screen.

2.

Press and hold the vehicle accelerator at the desired engine RPMs.

3.

Press the

Mute

button to complete the setting process.

The system will store the engine RPM setting and provide a completion
message on the display as well as a tone or voice message.

NOTE

: If the unit is unable to sense usable pulses within three seconds

or if you do not set a rev point within 30 seconds of beginning the
setup, IntelliMute or IntelliMute Pro will indicate an error. If you do
not try again within five seconds, it will automatically turn Off. The
unit will provide corresponding messages for these conditions

.

Once an activation point has been set, you can easily change it by going
to IntelliMute / IntelliMute Pro in User Settings Menu and repeating the
three-step setup process.

If, for any reason, the unit stops sensing your engine’s revs, IntelliMute or
IntelliMute Pro will indicate an error and automatically turn Off.

CAUTION

Do not attempt to set the rev point while driving. Your vehicle should
be parked and idling to avoid a collision during the process.

NOTE:

The rev point must be reset if you use your detector in a

different vehicle.

NOTE:

When initially choosing your IntelliMute or IntelliMute Pro

Activation Point, a setting of approximately 300 to 600 RPMs above
idle is recommended.

Summary of Contents for 15 BAND XRS R8/R106

Page 1: ...t is only intended to alert the motorist that an emergency vehicle equipped with a Cobra Safety Alert 3M or Tomar strobe transmitter is within range as defined by that product Please call local fire a...

Page 2: ...peed cameras and caution areas such as a high accident intersection The XRS R10G can store up to 1 000 additional user programmable Location Alerts USB Port for Connection of GPS Locator MDU 12V Power...

Page 3: ...lation Overview 4 Your Detector Installation 7 Controls and Display 15 Getting Started 17 Programming 21 Program Navigation 22 Settings 24 Detection Alerts 29 Radar and Laser 36 Maintenance 38 Specifi...

Page 4: ...ed by the MDU The RDU display uses an Extreme Bright DataGrafix Organic Light Emitting Diode Display to show large graphical alerts as signals are detected The RDU uses a rechargeable lithium ion LiON...

Page 5: ...of the two power cords provided See Page A3 12V Power Cord with In line Fuse for Hardwired Installation For connection to vehicle s fuse box or battery or 12V Power Cord with In line Fuse and Cigarett...

Page 6: ...off film from two piece fastener strips Align with two corner markings made in step 1 Press MDU bracket against windshield Fastener strips cannot easily be removed Strength of adhesive strips increas...

Page 7: ...to a position parallel to the road 3 Tighten knob to set proper horizontal detection position The MDU mounting bracket has two detent positions one for detection operation horizontal position one for...

Page 8: ...ter to vehicle accessory outlet cigarette lighter plug 3 Initial charge for battery is two 2 hours RDU may be used while charging 1 Turn RDU over and slide battery cover off the RDU body 2 Carefully p...

Page 9: ...ter A holster is provided to allow you to position the RDU for best driver visibility and for access while charging the battery A vent or visor clip will attach to the rear of the holster Self adhesiv...

Page 10: ...st 15 minutes This will allow fast satellite acquisition in subsequent power ups Controls and Display DIM Button Press for display brightness Navigates Menu Screens Adjusts volume DOWN in Volume mode...

Page 11: ...l changes to indicate activated alert filtering mode GPS icon indicates GPS satellite lock Icon changes to indicate lost signal condition Compass indicator uses GPS Locator to indicate direction of tr...

Page 12: ...ass Compass Speed and Latitude Longitude screens display only if GPSL is connected NOTE Last Standby screen viewed will be displayed when exiting Auto Dark mode Getting Started I Mute I Mute Pro and C...

Page 13: ...er whichever city default mode is set at the time Programming Overview Begin all programming or setup with MENU SAVE button Select this to change USER or ALERT settings USER settings customize how sys...

Page 14: ...ng order when cycling through User Settings menu Speed Units screen displays only if GPS Locator is connected to system Pair RDU screen displays only if system detects a missing RDU connection Alert S...

Page 15: ...elliMute Pro Modes IntelliMute and IntelliMute Pro are two features that are active at slow speeds and when your vehicle is stopped Both depend on your detector sensing the vehicle s engine revs RPMs...

Page 16: ...Display is turned On the signal frequency will be added to the alert The factory setting for Frequency Display is Off Settings Your Detector Set Activation Point After the detector is installed in yo...

Page 17: ...s battery To avoid this XRS R8 R10G comes with SmartPower and Low Car Voltage Warning features The detector emits a car battery low alert when voltage drops below 11 9 volts The detector enters Smart...

Page 18: ...ll user programmed location alerts with this screen Detection Alerts Alert Screens All alerts have a unique tone and a vocal alert if the Voice Alert feature is activated The numbers from 1 to 5 next...

Page 19: ...seconds NOTE A particular User Location can be deleted only when the vehicle returns to that location and receives a User Location Alert Press MENU SAVE to delete that location A confirmation screen...

Page 20: ...ntinuous part of the sequence will repeat as long as the alert is active Screen Sequence In Zone 1 For Location Straight Ahead As a location is approached the arrows will point to the location while a...

Page 21: ...It is legal in all 50 states Understanding Radar and Laser Radar Speed Monitoring Systems Three band frequencies have been approved by the Federal Communications Commission FCC for use by speed monito...

Page 22: ...nit is not operating properly Make sure power cord is properly connected Make sure lighter accessory outlet of vehicle is clean and free of corrosion Make sure power cord s accessory adapter is firmly...

Page 23: ...of an implied warranty and or do not allow the exclusion or limitation of incidental or consequential damages so the above limitations may not apply to some consumers It is the user s responsibility t...

Page 24: ...are furnished under license and may be used or copied only in accordance with such license Except as permitted by such license the contents of this document software and data may not be disclosed to...

Page 25: ...ower Adapter Includes adjustable plug up to 90 and fuse Item CLP 2B Plug in GPS Locator Unit for Model XRS R8 Only Item RDA GPSL55 Optional Accessories Optional Accessories LiON Replacement Battery Pa...

Reviews: