EN
G
LI
S
H
7
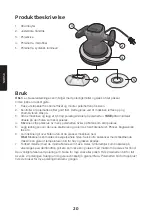
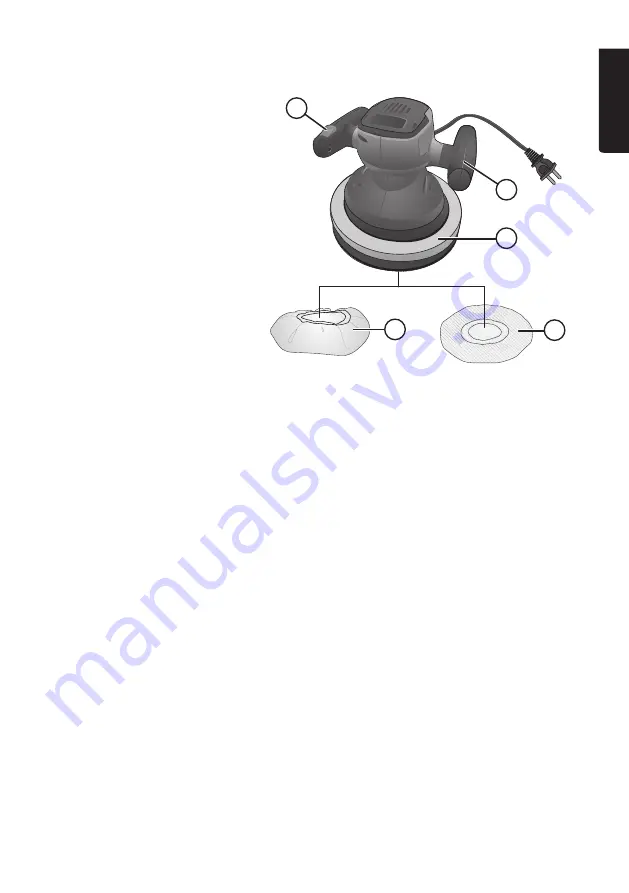
Product description
1. Power switch
2. Adjustable handle
3. Backing pad
4. Microfibre polishing bonnet
5. Synthetic wool polishing bonnet
Operating instructions
Note:
Read the polishing compound’s instructions before beginning work in order to ensure that
the compound is appropriate for the surface that you intend to polish.
1. Make sure the product is unplugged from the wall socket before mounting the polishing
bonnet onto the backing plate.
2. Make sure that the polishing bonnet is securely in place by lifting the power tool and turning
on the switch.
3. Turn off the machine and apply a thin layer of polishing compound onto the polishing bonnet.
DO NOT
apply polishing compound directly onto the surface to be polished.
4. Always rest the machine on the surface to be polished whenever you are starting or stopping
the polisher.
5. Drape the mains lead over your shoulder and begin by polishing large flat surfaces first e.g.
car-bonnets, -boots, -roofs, etc.
6. Let the weight of the machine do the work. Do not apply pressure.
Note:
Make sure to keep the machine in constant motion. Pausing shortly over a painted
area can produce extremely high temperatures that may cause possible damage to
the painted surface.
7. Next, work on smaller surfaces such as car doors. Detail and trim surfaces such as
wing mirrors, door handles, grilles and other surfaces cannot be accessed effectively by
the machine and must therefore be hand polished.
The most common mistake made when polishing is the use of too much wax or polish. Soaking
the polishing bonnet with polish will make polishing more difficult and increase polishing time.
Using too much polish will shorten the useful life of the polishing bonnet.
1
2
4
5
3
Summary of Contents for 18-3578
Page 2: ...2...


