background image

3

2017 Voxx Electronics Corporation. All rights reserved.

  Using Your Remote Control

 Using the Keyless Entry

 The 

 button is used to lock the vehicle’s doors, the   button is used to unlock the 

vehicle’s doors. To lock or unlock the doors simply press and release the desired 

function button one time. For your convenience, the parking lights will flash once when 

the doors are unlocked and twice when the door are locked.


NOTE:

 The system is equipped with a feature called Silent Choice. If enabled, the 

system requires a second press of the 

 or 

 button to activate an audible locking/

unlocking response from the vehicle. If your system is set up for 2 step unlock, a third 

press of unlock will activate the audible response.

 Two Stage Door Unlock (Optional) 


If this feature is enabled on your system, pressing the    button one time will unlock 

only the driver’s door. Press   again within three seconds to unlock the remaining 

doors.

 Activating the Trunk Release Feature (Optional) 


If this feature is enabled on your system, pressing and holding the 

 button for 3 

seconds will open the vehicle’s trunk or hatch.

 Activating the AUX 1 Output (Optional) 


If this feature is enabled on your system, pressing the 

 and   buttons 

simultaneously will activate an optional feature. This feature can be programmed for a 

wide range of functions like power window or sunroof automation, please consult your 

installing dealer to determine the functionality of your system.

 Using the Progressive Car Finder Feature 


Press the 

 button to locate your vehicle. The system will flash the parking lights 

and sound 5 times at low volume, increasing in volume each time the button is 

pressed.

 Using the Personal Protection Alarm (Panic) 


Press and hold the 

 button for 3 seconds to activate the personal protection alarm. 

During panic mode, the normal function of the transmitter buttons will be suspended. 

The transmitter’s 

 and 

 buttons can be used to lock and unlock the door (if the 

option is installed). To stop the alarm, press and hold the 

 button on the transmitter 

again for 3 seconds. The system will automatically stop after 30 seconds.

Summary of Contents for CA RS

Page 1: ...e operation of the Security and Convenience System as described in this manual is applicable to most vehicles However due to the configuration of some vehicles some functions AND OR SAFETY PRECAUTIONS...

Page 2: ...System 5 Using Your Remote Vehicle Starter 6 Remote Start Ready Mode 6 Cancelling Remote Start Ready Mode 6 Remote Starting Your Vehicle 7 Remote Start Shutdown 7 Entering Your Vehicle while it is Run...

Page 3: ...ase Feature Optional If this feature is enabled on your system pressing and holding the button for 3 seconds will open the vehicle s trunk or hatch Activating the AUX 1 Output Optional If this feature...

Page 4: ...low 1 Turn the vehicle s ignition ON 2 Push and hold the programming valet button 3 The LED will turn on solid when valet mode is active 4 Release the programming valet button Eliminating Arm Disarm N...

Page 5: ...ted NOTE The system is equipped with a feature called Silent Choice If enabled the system requires a second press of the button to activate an audible disarming response from the vehicle If your syste...

Page 6: ...ights will turn on to confirm the system has remote started 3 Remove the keys from the ignition the vehicle will remain running 4 Exit the vehicle and close all vehicle doors 5 Within 1 minute of step...

Page 7: ...vehicle s doors 2 Enter the vehicle DO NOT PRESS THE BRAKE PEDAL 3 Insert the key into the ignition switch and turn to the ON or RUN position 4 Press the brake pedal The remote vehicle starter will di...

Page 8: ...Stop Manual Transmission Vehicles 1 With the vehicle running foot off the brake parking brake set ON 2 Press and release the button to activate remote start 3 Exit the vehicle close all doors Door Op...

Page 9: ...ote while in range of the vehicle pressing both the buttons together will activate the 24 hour countdown timer the vehicle will start 24 hours from this time Next When you are finished operating the v...

Page 10: ...ctivating if any of the following occur 1 The vehicle s hood is open 2 The brake pedal is pressed prior to turning the ignition key to the ON position 3 The engine is over revved tach checking only 4...

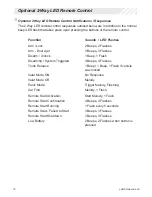
Page 11: ...ions Chirps Function 1 Disarm Unlock 2 Arm Lock 3 Door Ajar Upon Arming 4 Disarm Triggered 5 Car Find Parking Light Flash Indications Flashes Function 1 Disarm Unlock 2 Arm Lock 3 Disarm Triggered 5 C...

Page 12: ...r Ajar 3 Beeps 3 Flashes Disarm Unlock 1 Beep 1 Flash Disarming System Triggered 4 Beeps 4 Flashes Trunk Release 1 Beep 1 Beep 1 Flash if vehicle was locked Valet Mode ON No Response Valet Mode Off Me...

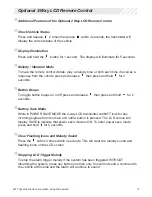
Page 13: ...onds Battery Save Mode While in POWER SAVE MODE the 2 way LCD transmitter will NOT look for any incoming signals from the main unit until a button is pressed The LCD screen will display SAVE to indica...

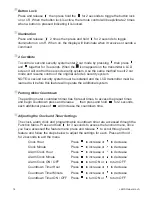
Page 14: ...perate the additional system Parking Meter Countdown The parking meter countdown timer has 6 preset times to access the preset times and begin countdown press and release then press and hold for 2 sec...

Page 15: ...reserved LCD Remote Control ICON s LOCK UNLOCK VALET MODE TRANSMITTING TRUNK RELEASE ENGINE RUNNING 2 CAR MODE BATTERY INDICATOR BATTERY SAVE MODE VIBRATE SILENT MODE PANIC TIME COUNT DOWN MELODY MODE...

Page 16: ...and Release 4 times Daily Start Timer X X Press Lock Start Temperature Start X X Press Unlock Start While Armed LCD 5 Button Transmitter Lock Unlock Car Find Panic Start Function Operation Method Lock...

Page 17: ...ves of the remote control and reinstall 1 screw 4 Test operation of the remote control 2 Way LCD Remote Control Model CATLCD The AAA battery inside the 2 way LCD remote control should last approximate...

Page 18: ...the Company has suffered or been damaged through alteration improper installation mishandling misuse abuse neglect accident or by removal or defacement of the factory serial number bar code label s Th...

Page 19: ...19 2017 Voxx Electronics Corporation All rights reserved...

Page 20: ...ion is subject to the following two conditions 1 This device may not cause harmful interference and 2 This device must accept any interference received including any interference that may cause undesi...

Reviews: