Out of the box the CR2300 will read the following bar codes:
Suffix Enter
The default setting on the CR2300 has Suffix Enter disabled. To enable
Suffix Enter, scan the following configuration code. For RS232 Settings,
please refer to the CR2300 Configuration Guide.
Press and hold a button or trigger on the CR2300, the two blue bars
emitting from the reader are used for targeting. Center the blue bars in
the middle of a bar code. When the bar code is in the reader’s field of
view and at the optimal distance (4” from the bar code) , the reader will
automatically read the code.
The CR2300 will beep and the good read indicator will flash green to
indicate a ‘good read’ has occurred. (Figure 12)
Using the CR2300
CR2300 Default Settings
Aztec
Codabar
Code 39
Code 93
Code 128
Data Matrix
Data Matrix Rectangle
GS1 DataBar
Int 2 of 5
MSI Plessey
PDF417
QR Code
UPC/EAN/JAN
Suffix Enter - USB
Fuel Gauge Battery Status
Check Battery Life
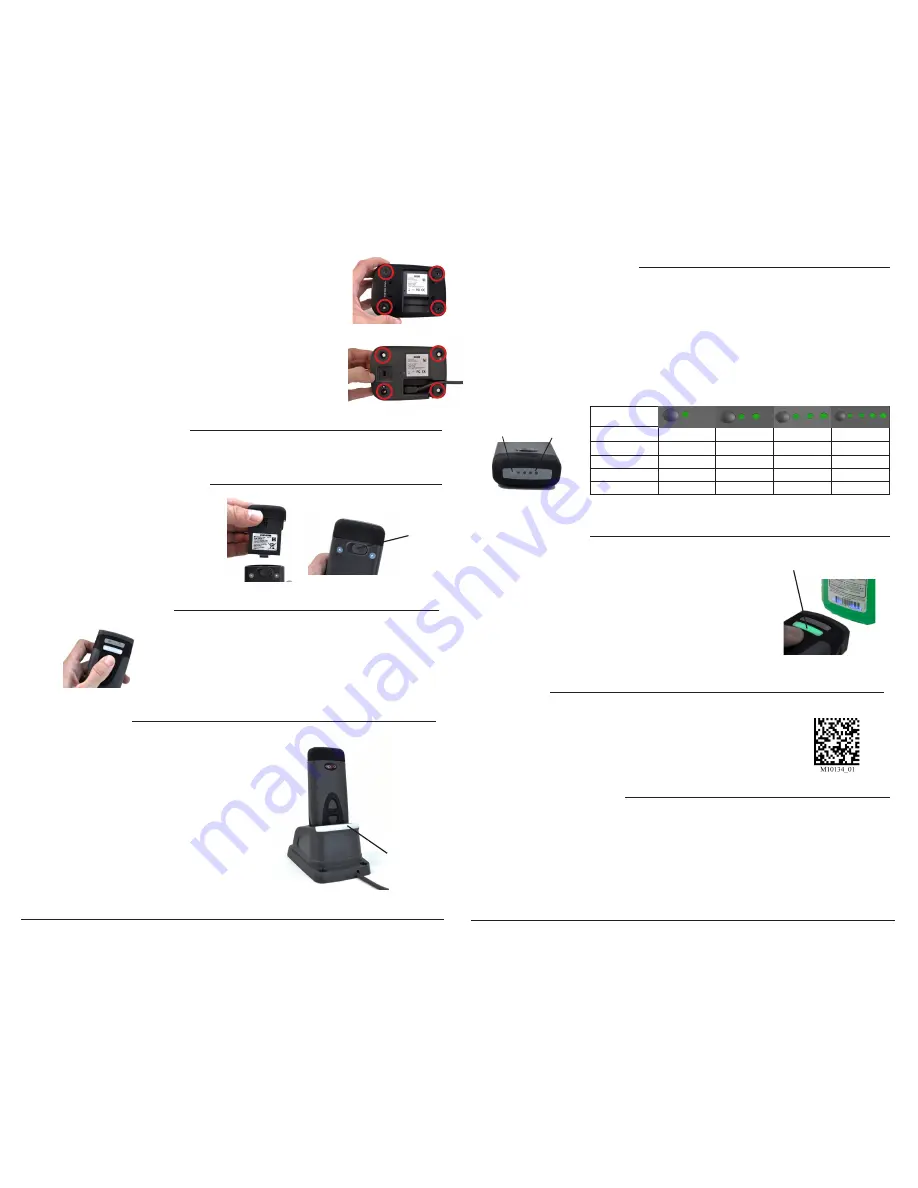
Press the fuel gauge button (Figure 10) to determine remaining battery life.
If the battery has less
then 10% capacity, the first LED will flash rapidly. For 25% or greater capacity, the LEDs will flash
ON for 4 seconds.
Fuel Gauge Status Indicator While Charging
If the battery has less then 10% capacity, the first LED will flash rapidly while charging. For 25% or
greater capacity, the LEDs will flash ON for 4 seconds and OFF for 1 second. (Figure 11)
Fuel Gauge
Indicators
Figure 10
Fuel Gauge
Button
Battery Life
<10%
Rapid Flashing
<25%
ON
25-50%
ON
ON
50-75%
ON
ON
ON
75%+
ON
ON
ON
ON
To configure a CR2300 to read bar codes not
listed, download the CR2300 Configuration
Guide from www.codecorp.com and scan
the appropriate ‘Enable’ bar code reading
symbology configuration code.
Figure 11
Figure 12
Charge
Indicator
Battery Installation and Removal
Place the battery into the reader as shown in
Figure 6. Once in place, the battery will snap
and lock to indicate proper installation. For
battery removal, slide the latch (Figure 7), to
unlock and release the battery.
Figure 6
Figure 7
Latch
Powering on the Reader
Press and hold either of the buttons or
trigger for one second, to power on.
4. (Optional) To mount the Charging Station to a surface place the ‘This Side
Down’ (Figure 4) side of the weighted base onto the surface and secure
with screws. Note: Because surface types differ, screws are not included
to mount a Charging Station to a surface. Place the Charging Station on
top of the secured weighted base (Figure 3) and secure to the base with
the screws provided (Figure 3)
5. Plug the USB cable into the computer’s USB port or the power adapter
into the wall outlet.
Charging a CR2300
Batteries ship with approximately 50% battery life
and should be completely charged before initial use.
Approximate time to charge a depleted battery is 4
hours via USB cable and 2 1/2 hours via AC power
supply.
To charge a reader,
remove the plastic ‘Remove
Before Use’ cap, and place the reader into the
Charging Station. (Figure 9)
When the reader is seated correctly, the Charging
Indicator LED (Figure 9) will turn green.
Weighted Base Adapter Plate
The weighted base has the same pre-drilled mounting holes as the ECS-H and UMC Chargers.
Figure 4
Figure 5
Figure 8
Figure 9
www.codecorp.com
www.codecorp.com
Good Read
Indicator


