21
In music mode, programs may be changed via the built-in microphone unit or via an external source through the audio input.
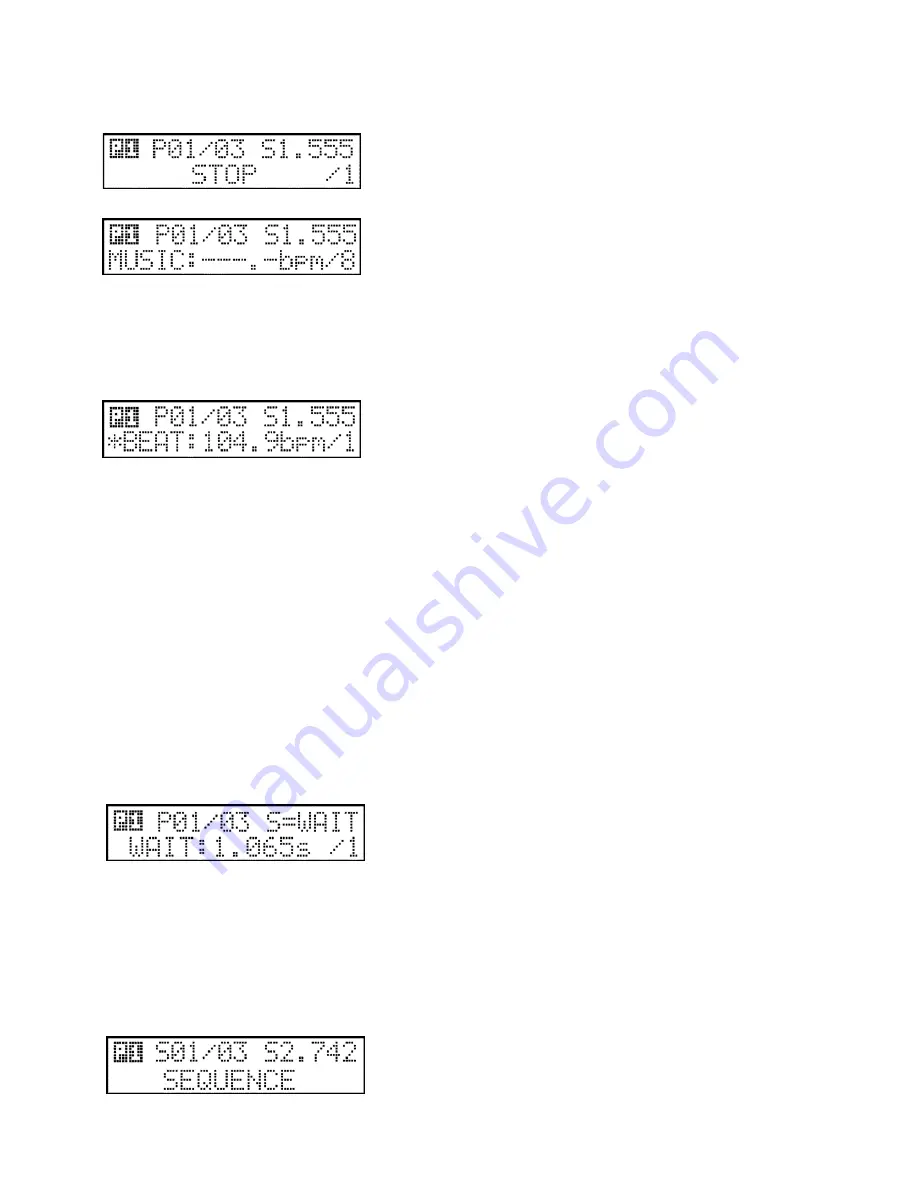
1. STOP mode:
Turning the WAIT slider to its minimum position turns on the stop mode. The
lower line of the display will show the STOP caption. In the current group no
scene changes occur until stop mode is altered.
2. MUSIC mode:
Setting the WAIT slider to music signalling activates music mode. The lower
line of the display shows the MUSIC caption, and the perceived rate in bpm.
The controller is able to indicate microphone input rates between 60.0-
200.0bpm. In this mode, scenes are shifted when a microphone impulse
arrives from the audio source. The controller has an inbuilt automatic microphone sensitivity setup, which is very sensitive to
varied volume inputs. If the rate is outside the given range, scene are still shifted, but the display indicates horizontal lines.
3. WAIT mode:
In the intermediate positions between STOP and MUSIC, the WAIT slider sets a time value in the range of 0.300s-5.000s.
Changes progress according to a logarithmic scale so scene changes time should be as smooth as possible. The display will
show the current time to the nearest thousandth of a second. This setup applies only the current group.
4. AUTO BPM mode:
In automatic mode, moving the PAN scroll wheel assigns a bmp value in the
range of 60.0-200-0bpm. If you are aware of the bpm value of the current
music being played, then setting this value and pressing the BPM button once
can synchronize scene with the music being played. A marker can be set
using the TILT scroll disc. This means that scene changes will happen at the number of steps determined by this value, in the
range: 1-8.
5. SPECIAL mode:
Rotate the TILT jog wheel until you see in the upper line right side of the display the ‘S’ letter (it means Special). In this
mode the program scene changing will work others.
Now if you start a program, only the first unit channels will load. After wait time the program scene number will not change,
but the second unit channel will load. And so on. After the last unit channel loaded, the program scene number will increase
by one.
With this mode you can make great effects also with simple programs. Try to change in special mode the wait and speed time.
If the speed time is higher then wait time, one of the beam moving when a new beam will start move.
6. SCENE mode:
When pressing the SCENE button shifting of the programmes stops on the actual group, and step shifting will happen by
pressing the SCENE button again, or pressing button 1-24. This mode can be switched off only by pressing an another event
group button: RECORD, PROGRAM, PRESET, SEQUENCE.
6.4 Control of the head movement and mirror movement speed:
In automatic mode the speed of the beam movement can be controlled by the SPEED and WAIT sliders.
1. SPEED setup:
Using the SPEED slider, the movement time can be set in a range of 0.300s-5.000s.
2. SPEED set for wait time:
Moving the SPEED slider to its maximum value results in a speed time that
match the scene change time. Consequently, speeds can be adjusted using
the WAIT slider and beams of light move to their new position within the
same timeframe as scene changes. The top line of the display indicates in the
right upper corner that the SPEED value is the same as the WAIT value.
6.5 Launching the sequences:
Pressing the SEQUENCE button allows sequences to be launched using buttons 1-24. The top line of the display indicates the
number of the sequence currently being run and its step number, with the current speed on the right. The bottom line
indicates the current position of the sequence and which units are on or off open or closed at the time. Holding down the
sequence button and pressing any of the 1-24 buttons will put this new sequence on hold. The controller’s display will show
the name (entered by the user at the time of creating the sequence) of the new sequence in its bottom line for a short time,
thus allowing the new sequence to be easily identified and reducing the possibility of initiating the wrong sequence.
The sequence speed control offers several features. With the wait slider in the minimum position the sequence will stop. In the
maximum position the sequence will run in time to any input music. In
addition, it is possible to use an AUTO BPM value using the PAN scroll
wheel, or to set a manual bpm value with BPM button.


