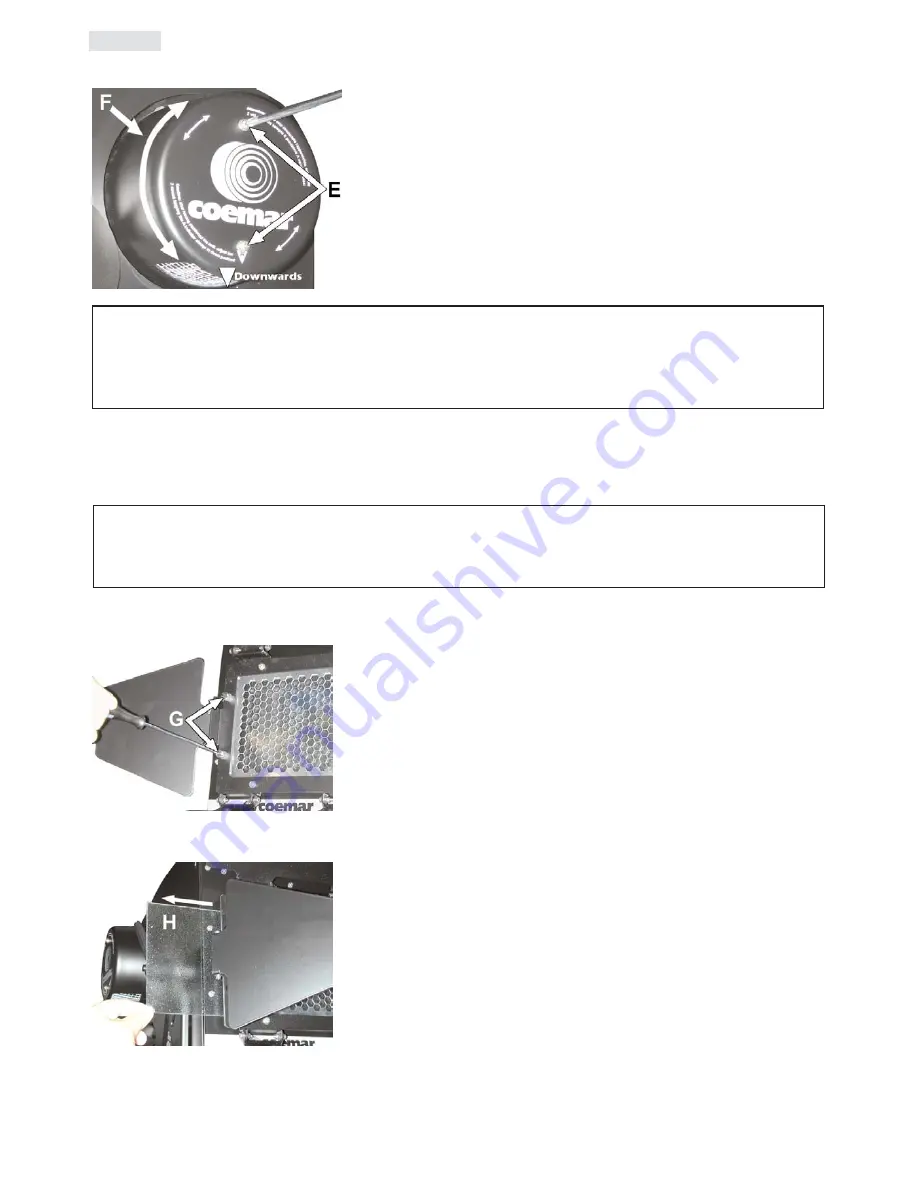
4.4. Adjusting fan shrouds
After having adjusted the angle of inclination of the projector, you should follow these instructions to adjust the fan shrouds.
1.
Loosen the two screws
“E”
which affix the shrouds to the sides of the projector.
2.
Rotate the shroud
“F”
so that the intake port is pointing downwards. The shrouds
may rotate through 150°. In applications where the projector is installed base up,
completely remove the shrouds and refit them in an appropriate position.
3.
Refasten the screws.
4.5. Adjusting beam angles
The
Panorama Power MK2
has 4 different diffusion filters available which can be used to alter the dimensions and shape of the beam
output, thus making it suitable for a variety of situations.
Prior to undertaking the following procedure, ensure that either the projector is switched off or its dimmer is fully on.
The following pictures indicate the correct procedure for replacing the various diffusion filters.
1.
Using a suitable tool remove the two fasteners
“G”
which affix the filters.
2.
Remove the filter
“H”
currently in position
3.
Insert the appropriate filter to suit the beam dimensions you wish to achieve.
Select from filter which alter different diffusion patterns and those which alter the
vertical or horizontal output angles.
4.
When you have inserted the appropriate filter, replace and secure the two faste-
ners previously removed.
A range of filters are available, as well as a diffusion kit (
cod. 9822
) to achieve maxi-
mum beam dimensions.
ATTENTION!!
Direct exposure to the output beam of the projector is not recommended.
ATTENTION!!
The process of adjusting the fan shroud position is imperitive in ensuring that the projector receives sufficient air
flow whilst maintaining its protection rating against penetration by both liquids and solids.
8
English


