background image

Service manual

Your Dealer

COFFEE QUEEN

CATER SINGLE (Cater Train)

S / EN

Rev 100104

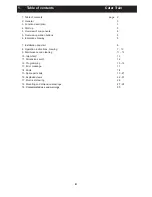
Summary of Contents for CATER

Page 1: ...Service manual Your Dealer COFFEE QUEEN CATER SINGLE Cater Train S EN Rev 100104 ...

Page 2: ...allation and start 6 8 Operation instructions brewing 7 10 9 Maintenance and cleaning 11 13 10 Important 13 11 Dimension sketch 14 12 Programming 15 16 13 Error message 17 14 Facts 18 15 Spare parts lists 19 21 16 Exploded views 22 25 17 Electrical drawing 26 18 Mounting and dimension drawings 27 29 18 Contemplated use and warnings 30 1 Table of contents Cater Train ...

Page 3: ...d filter holder Coffee Queen AB is certified ISO 9001 and 14001 and therefore a minimal stress of the enviroment 3 Function description Coffee brewer with automatic water supply It is also equipped with a separate outlet for hot water Brewing takes place in a removable serving station Brewing is carried out in paper filters Brew time 5 6 min 4 Start up Turn on the main switch A The machine will no...

Page 4: ...machine must be connected correctly for your safety Read the manual before using the machine Tap for Hot water Upper lid Display Handle Serving station Level tube ON OFF switch Tap for coffee Drip tray insert Drip tray Filter holder Programming buttons ...

Page 5: ...dications when brewing Cater Train 1 1 Brewing 1 2 Brewing PAUSE STOP While machine is brewing Full brew Display shows see A While machine is brewing Half brew Display shows see B A B 1 1 Brewing 1 2 Brewing Full brew 2 5 litre Half brew 1 25 litre ...

Page 6: ...mmended Water pressure shall be 14 5 72 5 PSI 1 5 bar for a correct operation Water supply to the machine is the customer s responsibility according to instruction and advice from the supplier In areas with high level lime problem a descaling filter should be mounted 7 3 Electrical connection CAUTION Connect the plug to a separate wall socket 230 V 10 ampere Train version see electrical drawing pa...

Page 7: ...a filter in the filter holder 8 3 Place a filter in the filter holder Always use Coffee Queen s recommended coffee filter Filter type 110mm filter Article no 110110 8 2 Machine starts heating water While machine is heating the water display is blinking When water has reached the right temperature Display will light up Machine is now ready to use ...

Page 8: ...rving station 1 Place the filter holder A 2 Loosen upper lid B on the serving station and then place the serving station C A B C 8 4 Brewing Add coffee Add coffee 115 135 gram restaurant catering grounded coffee This is recommended for full brewing Make sure that the coffee is evenly spread ...

Page 9: ...2 Half brew 1 25 litre 3 STOP PAUSE button Press button once for stand by Press button twice to stop brewing To complete brewing press alt 1 1 TAPING HOT WATER Recommended Not taping hot water while machine is brewing 1 1 Full brew 2 5 litre 1 2 Half brew 1 25 litre PAUSE STOP 2 When Brewing is ready The Brewing indicator lamp will lit ...

Page 10: ...wing Pour out water and do a brewing 8 8 Empty the filter holder from filter and coffee grounds and clean the filter holder Machine is now ready for the next brew Some tips for best coffee quality 1 Do not change the recommended portion of coffee 2 Do not mix freshly brewed coffee with old coffee 3 Always rinse the serving station beforenext brew 8 Operating instructions Brewing with coffee Cater ...

Page 11: ...utside cleaning use a soft rag and liquid solution that not prevent scratches CAUTION The machine should not be submerged in water or been washed in a dishwasher Clean and dry this surfaces A Each day Clean the bottom plate A Clean the spray nozzle B and the surrounding area B EACH DAY When needed Clean the spray nozzles hole If necessary loosen spray nozzle and clean de scaling ...

Page 12: ...he cleaning solution and use the cleaning brush to wash out any remaining cleaning agent IMPORTANT Carefully rinse the inside of the serving station several times with clean water Cleaning serving station Dismount the level tube and clean it every week with the enclosed brush Turn off the bigger lid and clean the mixer tube EACH WEEK Mixer tube Options Cleaning parts Cleaning powder can be ordered...

Page 13: ...ly The machine should be placed on a water proof surface so that any leakage is easily noticeable Make sure there is no bendage on the connection tube when machine is pushed into its place The tube connections should be regularly checked Make sure that no leakage has occurred in connection with installation Do not leave the machine unattended while using Close water connection when not using machi...

Page 14: ...14 11 Dimension sketch Cater Train ...

Page 15: ...rm the new settings by pressing button Stop Pause 70 C min temperature 96 C max temperature 1 Press buttons full brew and Stop Pause at the same time for 5 seconds until you hear 3 beeps Display shows present setting 2 Adjust with the buttons full brew increase and half brew decrease 3 Confirm the new settings by pressing button Stop Pause ADJUSTING OF WATER TEMP ADJUSTING OF WATER QUANTITY Adjust...

Page 16: ...op Pause Adjust Signal Off 6 25 5 20 4 15 3 10 2 5 1 0 0 5 1 10 2 15 3 20 4 25 5 CALIBRATE TEMP SENSOR 1 Press buttons full brew and half brew and stop pause att the same time for 5 seconds until you hear 3 beeps Display shows present setting 2 Adjust with the buttons full brew increase and half brew decrease 3 Confirm the new settings by pressing button Stop Pause Adjust Signal 98 2 97 1 96 0 95 ...

Page 17: ... coupled Display shows E4 Filling time too long Restart machine Low pressure on water Water tap not open Display shows E2 Temp sensor out of range 5 C 105 C Temp sensor failure Change temp sensor Cable is loose Connect cable Display shows E3 Heating time too long Restart machine Solid state defect Change solid state Element defect Change heating element High limit control defect IMPORTANT All main...

Page 18: ... Facts Height 701mm Width 205 mm Depth 420 mm Weight Tank volume 5 litre Electricity 2x230VAC 1N 230VAC 1N Water connection outside thread Drain connection 3 8 outside thread Capacity 6 minutes to brew 17 cups 20 L hour 18 ...

Page 19: ... 150501 Silicon Hose Cold Long L 390 mm sales by metre 1 17 1603863 Membrane switch cater singel 1 18 1603865 Overlay cater with hole 1 19 1603866 Overlay cater without hole 1 20 1403400 Nylon plug for drainage hose 1 21 1206123 Non return valve 1 22 150541 Inlet hose water main 3 4 x 1 2 1 23 1031646 Electronic box 1 24 160193 Regulator PDS 1 25 1561009 Silicone tube braided 1 26 1364004 Clamp 16...

Page 20: ...valve 230V AC DELTROL 9 1561009 Silicone tube braided ID 9 53MM 10 1364004 Hose clamp ID 16MM 11 160549 Connector FV 122 B 12 S302258 Rubber grommet YD25MM 160521 Flexibel cord 5 x 1 5kv H07RN F 1603686 Round pin 1 5MM HA 1603687 Protection hood without locking 1603685 Connector 7 POL HA 1605641 Restrainer M20 160555 Flexibel cord 3 x 2 5kv H07RN F 1603684 Round pin 2 5MM HA 1603687 Protection hoo...

Page 21: ...S Tube 1 3 1103453 Main housing 1 4 1103455 Lower Housing 1 5 1103456 Outlet Tube Jacket 1 6 1103457 Stand 1 7 1103458 Drip Tray 1 8 1103459 Glass Tube 1 9 1103360 Brush glass tube 1 10 1103461 Water Indicator Lens 1 11 1103462 Outlet Tube 1 12 1103363 Faucet complete 1 13 1103371 Decor lid 2 5 litre 1 14 1103364 Feet rubber 5 15 1103303 Serving station complete 1 16 1103366 Outlet connector 1 ...

Page 22: ...16 Exploded view Cater Train 22 2 18 20 21 4 17 6 3 11 13 19 14 Overlay with hole Overlay without hole Membrane switch 15 Drainage hose 16 12 10 22 23 9 8 7 5 25 26 24 ...

Page 23: ...16 Exploded view Tank Cater Train 23 32 34 35 30 38 36 41 39 40 33 31 37 42 ...

Page 24: ...16 Exploded view Train components Cater Train 24 8 10 2 6 5 1 9 4 3 11 7 12 ...

Page 25: ...25 16 Exploded view Serveringsstation 2 5 litre Cater Train 1 2 3 10 9 8 4 5 6 7 11 12 15 13 14 14 16 ...

Page 26: ...17 Electrical drawing 2x230VAC 1N 230VAC 1NCater train version 26 ...

Page 27: ...18 Mounting and dimension drawings Cater train version 27 Mounting and dimensions bottom ...

Page 28: ... Threads 4 Air Ventilation 5 CQ Cater 6 Serving Station 7 Drain Signal 8 Harting HAN Q 5 0 Male Size 3A 9 Harting HAN Q 7 0 male Size 3A 10 Power Cable 3x2 5mm 11 Signal Cable 5x1 5mm 12 Guide Pins Serving station locked by guide pins 13 Distance Between machines 14 Distance to Shelf 15 Power Switch Turns off elements and Control cable ...

Page 29: ...18 Mounting and dimension drawings Cater train version 29 Connections water electricity 1 Drain water outlet 3 8 Outside Threads 2 Inlet valve 3 4 Outside Threads 3 Cable Restrainer ...

Page 30: ...a qualified electrician and within safety regulations that applies for each country where the appliance are installed The manual is dedicated the user and or an authorized personel It will give you information how to use the appliance in a correctly way desirable maintenance and a good safety and security for the user The manufacturer is not responsible for personnel damage or environment damage c...

Page 31: ...aler For Service Please contact Art nr 1740037 CREM International AB Box 10 Viksgränd 2 SE 670 40 Åmotfors Sweden Tel 46 0 570 477 00 Fax 46 0 570 47719 E mail info se creminternational com www creminternational com ...

Reviews: