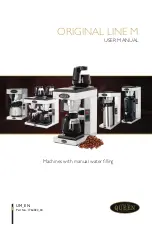
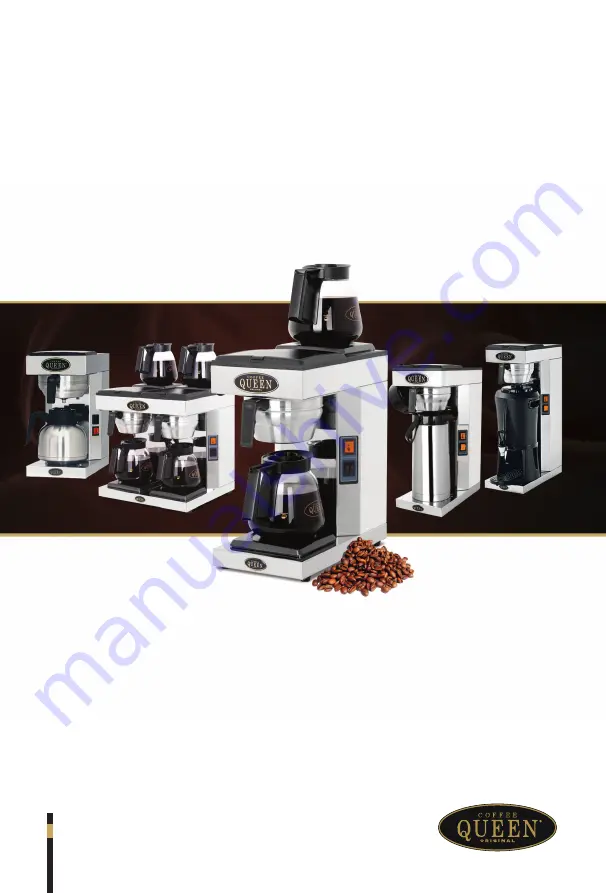
background image

ORIGINAL LINE M

USER MANUAL

UM_EN 

Part No.: 

1764022_04

Machines with manual water filling

Summary of Contents for DM-4

Page 1: ...ORIGINAL LINE M USER MANUAL UM_EN Part No 1764022_04 Machines with manual water filling ...

Page 2: ... TRANSPORT 10 Packaging 10 Delivery inspection 10 STORAGE AND DISPOSAL 11 Long term storage requirements 11 Machine disposal requirements 11 Caution 11 TECHNICAL SPECIFICATIONS 12 Facts weight 12 General function description 12 OVERVIEW OF COMPONENTS 13 Front view 13 M 1 13 M 2 14 DM 4 15 Thermos M 16 Mega Gold M 17 Thermos Office 18 INSTALLATION AND START UP 19 Positioning 19 Electrical connectio...

Page 3: ... maintain temperature and aroma 24 CLEANING AND CARE 25 Rinse thermos decanter and serving station 25 Daily cleaning 26 Weekly cleaning 26 Cleaning serving station 27 Exterior cleaning 27 POSSIBLE SOLUTION 28 Fault and solution 28 DIMENSION 29 M 1 29 M 2 30 DM 4 31 Thermos M 32 Mega Gold M 33 Thermos Office 34 ...

Page 4: ...LINE M 4 Original instructions MANUAL REVISIONS Rev Date TSB Change Description 04 Apr 26 2021 328 Update descaling instructions and general information Add notifications transport storage and disposal sections ...

Page 5: ...t unsafe practices Observe Important notifications to ensure food safety prevent possible minor personal injury or damage to the machine WARNING Indicates a potentially hazardous situation which if the WARNING is ignored could result in serious injury or even death DANGER INDICATES AN IMMINENTLY HAZARDOUS SITUATIONWHICH IF NOT AVOIDED WILL LIKELY RESULT IN SERIOUS INJURY AND EVEN DEATH Note Gives ...

Page 6: ...vice centre Owners are liable for ensuring that users have been properly trained to operate the machine and understand the potential risks involved The owner or installer will be liable for all non authorised modification of the machine Non authorised alteration or modification of the machine will immediately void the manufacturer s warranty This manual references the machine at the time of sale T...

Page 7: ...essure 0 9MPa 9 Bar or 1 0MPa 10 Bar only for Norway Sweden Finland and Denmark Minimum inlet water pressure 0 2MPa 2 Bar Note For a suitable performance of machine maximum inlet water pressure should be kept between 0 8MPa 8 Bar Install a pressure reducer in case water pressure exceeds this range Maximum inlet water temperature 40ºC Ambient temperature between 10ºC min and 40ºC max Install the ma...

Page 8: ...ction must be incorporated in the fixed wiring in accordance with the wiring rules Ensure that the power supply voltage does not fluctuate by more than 6 Position the power cable so that users cannot trip over it Keep the power cable away from sharp edges and heat sources Do not remove or disable any of the mechanical electrical or thermal protection safety equipment If supply cord is damaged it m...

Page 9: ...erson responsible for their safety Note safety regulation not valid for Europe Specific safety regulation for Europe This appliance can be used by children aged from 8 years and above and persons with reduced physical sensory or mental capabilities or lack of experience and knowledge if they have been given supervision or instruction concerning use of the appliance in a safe way and understand the...

Page 10: ...rton and machine from impact drops crushing shocks moisture and exposure to extreme temperature Upon receipt and delivery ensure that the machine is in the exact condition described in the enclosed documentation and that all accessories are included Missing items should be reported to the manufacturer or dealer immediately Damage caused during transport should be reported to the shipping agent and...

Page 11: ...here it will not be exposed to extreme temperatures or humidity When returning the machine to service after long term storage perform all weekly and periodic cleaning procedures and reconnect the water and power supplies this should be performed by a qualified person before use If the machine ever needs to be scrapped and disposed of be sure to Disconnect and roll up the power cord this should be ...

Page 12: ...W 50 60Hz 110 120V IN 3600W 50 60Hz 110 120V IN 1600W 50 60Hz Max number of cups each brew 12 Cups 12 Cups 12 Cups 2x12 Cups 15 Cups 17 Cups Capacity 15 L h 15 L h 15 L h 30 L h 15 L h 19 L h Brew time 6min 6min 6min 6min 7min 8 5min Hot plates 1 2 None 4 None None MODEL NAME M 1 M 2 Office Thermos DM 4 Thermos M Mega Gold M Weight 8 kg 9 kg 9 5 kg 15 5 kg 10 kg 11 5 kg Facts weight The water tank...

Page 13: ...ORIGINAL LINE M 13 Original instructions OVERVIEW OF COMPONENTS M 1 Front view Brewing lamp Power switch Filiter holder Tank lid Glass decanter Hot plate ...

Page 14: ...ORIGINAL LINE M 14 Original instructions OVERVIEW OF COMPONENTS M 2 Front view Brewing lamp Power switch Filiter holder Tank lid Glass decanter Glass decanter Lower hot plate Upper hot plate ...

Page 15: ...ORIGINAL LINE M 15 Original instructions OVERVIEW OF COMPONENTS DM 4 Front view Brewing lamp Power switch Filiter holder Tank lid Glass decanters Glass decanters Lower hot plates Upper hot plates ...

Page 16: ...ORIGINAL LINE M 16 Original instructions OVERVIEW OF COMPONENTS Thermos M Front view Brewing lamp Power switch Filiter holder Thermos Carry handle Tank lid ...

Page 17: ...RIGINAL LINE M 17 Original instructions OVERVIEW OF COMPONENTS Mega Gold M Front view Brewing lamp Power switch Filiter holder Serving station Serving tap Drip tray insert Drip tray Carry handle Tank lid ...

Page 18: ...ORIGINAL LINE M 18 Original instructions OVERVIEW OF COMPONENTS Thermos Office Front view Brewing lamp Power switch Filiter holder Tank lid Thermos ...

Page 19: ...4 The brewer is not reconnectable and may only be installed to the electric supply network with a voltage that is stated on the brewer and shall be carried out by an authorized electrician Recommended install a line circuit breaker and an earth fault breaker to the machine WARNING Brewer should be connected to 110V 220V with neutral and ground Use 10 Amp fuses Important Electrical installations mu...

Page 20: ...tap Only use the decanter WARNING Do not overfill it is recommended that you always use the decanter supplied with the machine to measure the water quantity Never fill the machine with brewed coffee this may result in machine damage First time start up Hot plate function Turn on left power switch I for lower hot plate and right power switch II for upper hot plate Ensure that the lamps turn on and ...

Page 21: ...tch A The brew lamp B will now be lit and indicates that brewing is in porgress After 20 30 seconds water shall start to pour into the filterholder and down in the thermos or decanter When brewing is completed empty the thermos or decanter A whole brew process takes around 6 8 minutes For brewing I left button Brewing lamp will lit A A B B Important A thermos or decanter must always be in the mach...

Page 22: ...mm filter in the filter holder Slide the filter holder into position Add coffee restaurant catering ground coffee Make sure that the coffee is evenly spread Recommended coffee amount is 60g L Lift up the tank lid and pour in a decanter of fresh tap water Brewing with coffee ...

Page 23: ...e brew lamp is lit Place the thermos or decanter under the filterholder Brewing with coffee Pro Tip Do not mix freshly brewed coffee with old It will result in poor tasting coffee I A Turn on power switch I for brewing WARNING Under no circumstances fill brewed coffee or coffee powder into the water tank It may cause machine damage ...

Page 24: ...rature Cups after the first will not be affected of this Note Access to the service area is restricted to persons having knowledge and practical experience of the appliance Do not change the recommended portion of coffee Do not mix freshly brewed coffee with old Always rinse the serving station before next brew Empty the filter holder of used filter and coffee grounds immediately after a brew Disp...

Page 25: ...os decanter or serving station with fresh tap water When cleaning the outside use a soft rag with liquid cleaning agent to prevent scratches Rinse thermos decanter and serving station WARNING The machine should not be submerged in water or washed in a dishwasher it will result in machine damage ...

Page 26: ...hat the particles from descaling solution disappear Regular descaling will ensure optimum brewing performance and a longer life of the machine When cleaning the decanter in a dishwasher remove lid and place decanter upside down in the dishwasher A Pitcher Pt no 110351 A B CLEANING AND CARE Daily cleaning Weekly cleaning Wash the thermos decanter B and the filter holder with liquid solution for cof...

Page 27: ...ap out 2 3 of the cleaning solution Clean the serving station with the cleaning brush Rinse the serving station with fresh tap water several times before next use Cleaning serving station Cleaning of serving station 2 5 L A Important Rinse the inside of the serving station several times with fresh tap water Exterior cleaning When cleaning exterior of the machine use a soft rag with liquid cleaning...

Page 28: ...ozzel may need unblocking Hose may be bent Inlet to boiler may be blocked Descale machine if still defective replace Brewing lamp B does not light machine will not brew Overheating switch is activated reset with button Check microswicth Check float Brewing lamp B is lit but machine will not brew Check connection to boiler Boiler unit may need replacing Fault and solution Important All maintenance ...

Page 29: ...ORIGINAL LINE M 29 Original instructions M 1 DIMENSION A D B C E Model A B C D E M 1 428mm 205mm 410mm 578mm 360mm ...

Page 30: ...ORIGINAL LINE M 30 Original instructions M 2 DIMENSION A D E B C F Model A B C D E F M 2 595mm 205mm 410mm 428mm 578mm 360mm ...

Page 31: ...ORIGINAL LINE M 31 Original instructions DM 4 DIMENSION Model A B C D E F DM 4 410mm 410mm 428mm 595mm 578mm 360mm D C A E B F ...

Page 32: ...ORIGINAL LINE M 32 Original instructions Thermos M DIMENSION Model A B C D F Thermos M 557mm 205mm 410mm 708mm 360mm B A F D C ...

Page 33: ...ORIGINAL LINE M 33 Original instructions Mega Gold M DIMENSION Model A B C D E Mega Gold M 655mm 205mm 445mm 390mm 806mm Serving Station 436mm 273mm 400mm 105mm A E B D C B D A C ...

Page 34: ...ORIGINAL LINE M 34 Original instructions Model A B C D E Thermos Office 205mm 410mm 428mm 360mm 578mm C A B D E Thermos Office DIMENSION ...

Page 35: ......

Page 36: ...thout delay The affected equipment may not be used during awaiting service if there is any risk that the damage or defect would worsen or cause injury The warranty will not cover consumable supplies such as glassware normal maintenance such as cleaning of filters contaminations in water lime incorrect voltages pressure or adjustment of water amounts The warranty will not cover damages of defects c...

Reviews: