Installation Procedure
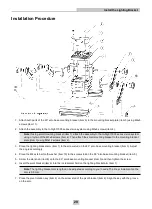
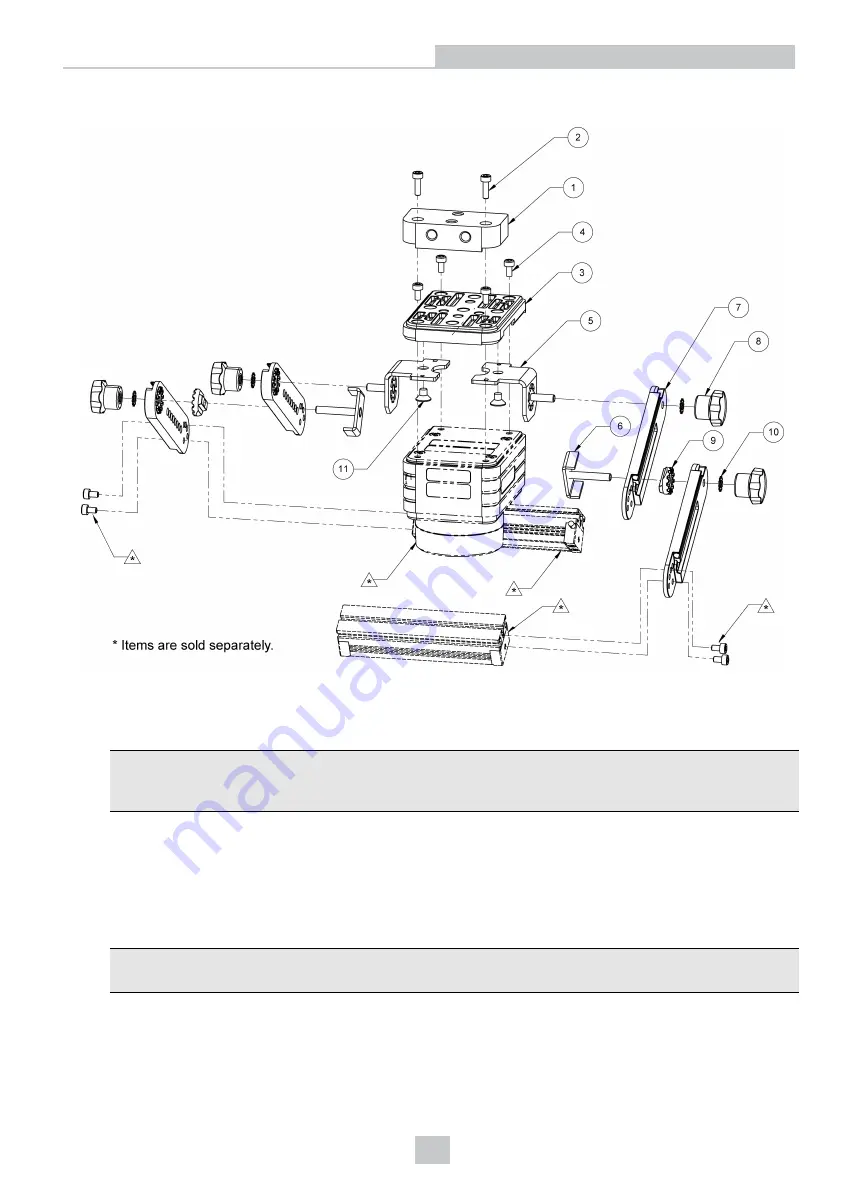
1. Attach both parts of the 90° arm-base mounting bracket (item 5) to the mounting bracket plate (item 3) using M4x5
screws (item 11).
2. Attach the assembly to the In-Sight 7000 series vision system using M3x6 screws (item 4).
Note
: If using small mounting bracket (item 1), attach the assembly to the In-Sight 7000 series vision system
using only two of the M3x6 screws (item 4). Then attach the small mounting bracket to the mounting bracket
plate (item 3) using M3x12 screws (item 2).
3. Place the lighting bracket arm (item 7) to the screw stud on the 90° arm-base mounting bracket (item 5). Adjust
the angle accordingly.
4. Place the M4 external tooth washer (item 10) to the screw stud on the 90° arm-base mounting bracket (item 5).
5. Screw the star knob (item 8) onto the 90° arm-base mounting bracket (item 5) and then tighten the screw.
6. Insert the pivot bracket (item 6) into the incremental hold on the lighting bracket arm (item 7).
Note
: The lighting bracket arm length can be adjusted according to your needs. The linear increment on the
arm is 5.5 mm.
7. Place the pivot rotation key (item 9) on the screw stud of the pivot bracket (item 6). Align the key with the groove
on the arm.
29
Install the Lighting Bracket

