D
OPEN PRINTHEAD
LOAD RIBBON
(Thermal Transfer Only)
LOAD MEDIA
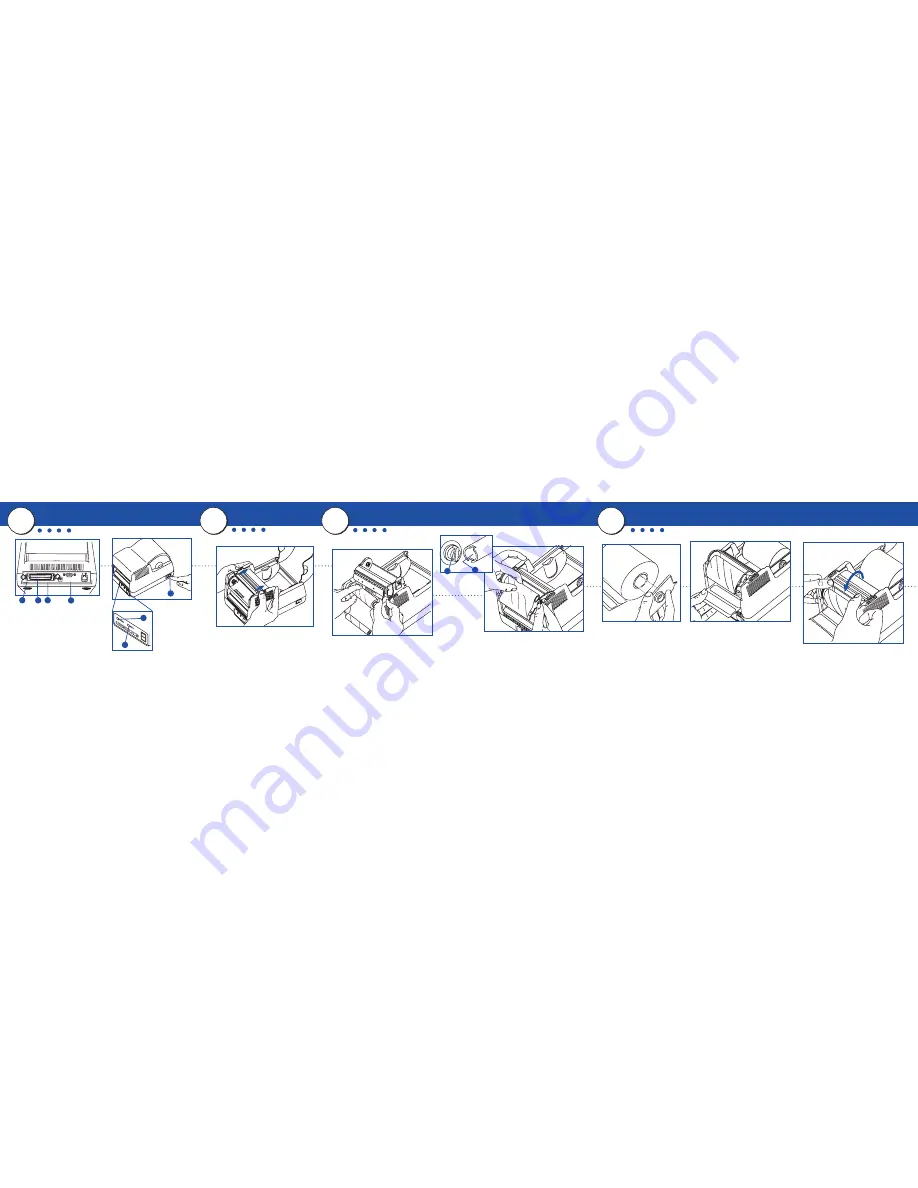
POWER & CABLES
Connect a parallel cable
A
, serial cable
B
or Ethernet cable
C
to the back of the
printer. Connect the power cable
D
to
the back of the printer and plug it in.
IMPORTANT! Use only the 24VDC power
supply provided with the printer.
Note: This guide shows a LBT42 Ethernet
printer. Your printer may look different, but
the operations are the same.
Open the dust cover. Slide back the black latches to
release the print mechanism. Raise the mechanism to
prepare to load print media or ribbon and to clean
the printer.
Place the loaded media spindle in the printer with the
black guide to the right.
Feed the media under the open print mechanism.
Note: The media spindle should fit securely with the
black guide pressed securely against the media roll.
Unwind a few inches of the new ribbon from the
supply core. Pull gently on the supply core mount
flexible arm and insert the ribbon supply roll.
Lower the print mechanism and press down firmly to
secure latches.
Note: The latches click when properly closed. With the
media and ribbon loaded, the Ready light turns green.
Lift out the media spindle. Load the media
onto the spindle, keeping the black media
guide to the right of the media roll.
IMPORTANT! The imaging surface must
face up as it passes under the print
mechanism.
Turn the ribbon takeup core
A
(see inset) to align the slotted end with the
takeup mount
B
. Gently pull the flexible arm out and snap the takeup core into
place.
Note: The printer automatically takes up the slack in the ribbon.
Turn the printer on
A
.
1
2
3
4
The Power light
B
is green
when ready to print.
The Ready light
C
is green
when ready to receive data.
Note: If the Ready light is red, check for printer
error, empty media roll, or paused operation
during batch mode processing.
C
A
B
A
B
C
A
B


