26
Payout Cassette
Payout Cassette
-
-
Coin Tubes & Positions
Coin Tubes & Positions
$2
Canadian
$2
Canadian
$1
$1
25¢
25¢
5¢
5¢
10¢
10¢
Tube #1
Tube #2
Tube #3
Tube #4
Tube #6
A B
A B C
ABCDEF
ABCDEF
A B C D E
C oin
N A
US $1
US 25¢
US 5¢
US 10¢
T ube A ssy #
408832-1
408833-1
408834-1
408836-1
S him C olor
Lt. G ray
B lue
B lue
R ed
C oin
CAD $2
CAD $1
CAD 25¢
CAD 5¢
CAD 10¢
T ube A ssy #
408831-1
408832-1
408833-2
408834-1
408836-2
S him C olor
B lack
Lt. G ray
B lack
B lue
G old
Note:
C oin tube assem blies include the coin tube and shim color noted above.
U S
C anada
P ossible T ube P ositions
N A
Payout Cassette
Payout Cassette
-
-
Coin Tubes & Positions
Coin Tubes & Positions
$2
Canadian
$2
Canadian
$1
$1
25¢
25¢
5¢
5¢
10¢
10¢
Tube #1
Tube #2
Tube #3
Tube #4
Tube #6
A B
A B C
ABCDEF
ABCDEF
A B C D E
C oin
N A
US $1
US 25¢
US 5¢
US 10¢
T ube A ssy #
408832-1
408833-1
408834-1
408836-1
S him C olor
Lt. G ray
B lue
B lue
R ed
C oin
CAD $2
CAD $1
CAD 25¢
CAD 5¢
CAD 10¢
T ube A ssy #
408831-1
408832-1
408833-2
408834-1
408836-2
S him C olor
B lack
Lt. G ray
B lack
B lue
G old
Note:
C oin tube assem blies include the coin tube and shim color noted above.
U S
C anada
P ossible T ube P ositions
N A
SECTION 4: TYPICAL USAGE
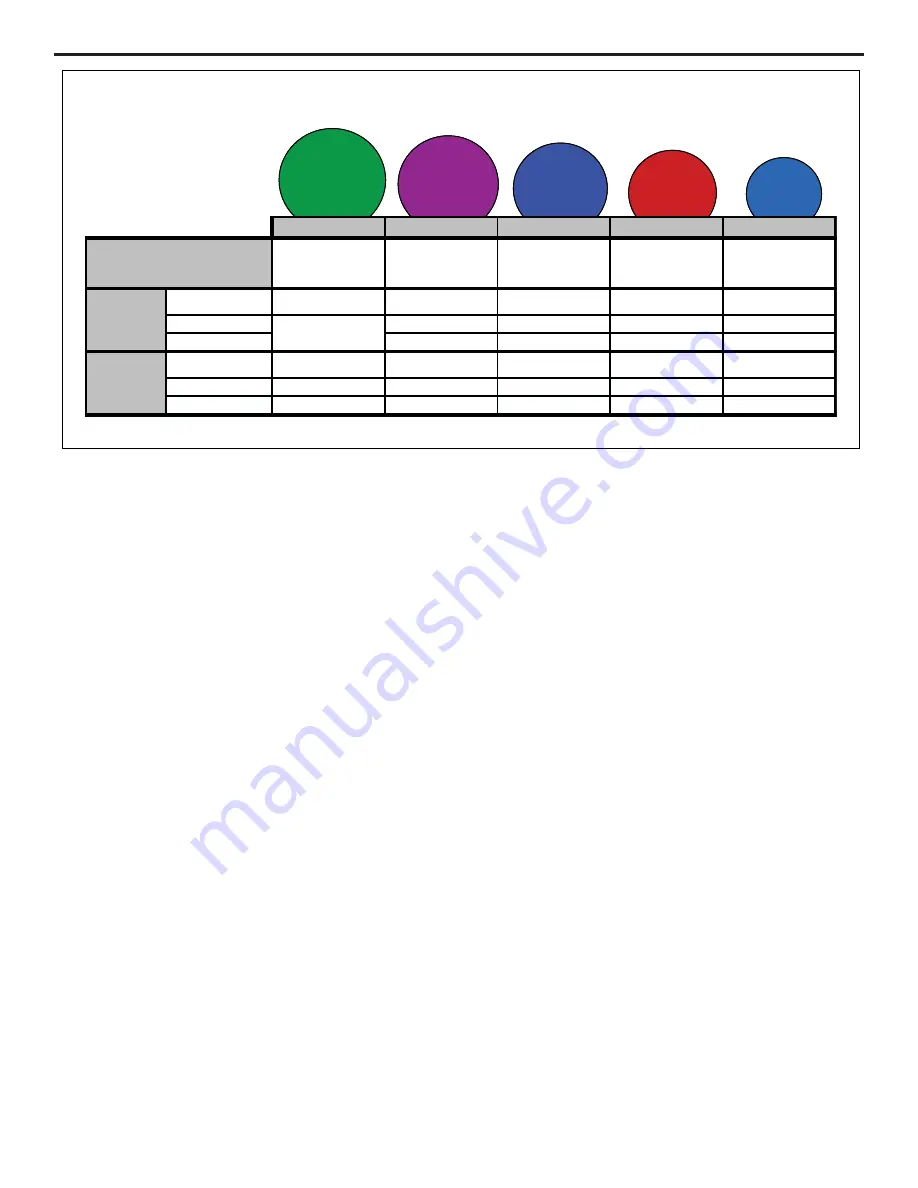
Figure 32
Changing the Coin Tubes
The Guardian Series changers feature the
capability of changing individual coin tubes within
the payout cassette.
There are 5 different tube sizes for the North
American market. Quarter and nickel tubes can
be placed in any of the six payout positions (See
Figure 31). Tubes for dimes, $1 and $2 coins
have restrictions on their placement. Please refer
to Figure 32 for details.
Each coin tube will require a specifi c coin shim in
order to accurately pay out that coin thickness.
Please refer to Figure 32 to ensure the correct
coin shims are installed.
1.
Rotate the Payout Cassette Release
Latch downward to open the coin payout
cassette. Refer to Figure 33.
2.
Pivot the payout cassette out of the
changer housing by pulling on its lower
right corner (See Figure 34). Once the
latch has been depressed, the payout
cassette must be at least partially opened
before it can be closed and reseated
properly.
3.
Lift the cassette straight up to remove it
from the coin changer (See Figure 35).
4.
To remove an individual coin tube,
hold the cassette assembly then
gently pull the top of the coin tube
forward to unsnap the top of the
See Figure 37.
6.
Install the replacement coin tubes and
shim assembly by fi rst inserting the bot-
tom of the tube in the cassette, then pivot
the top of the tube and snap it into the up-
per part of the cassette. Check that all
coin tubes are secured to the cassette.
7.
Reinstall the payout cassette into the
housing.
tube. See Figure 36.
5.
Tilt the top of the tube away from
the cassette and lift the tube out.


