EN
G
LI
SH
SV
EN
SK
A
N
O
RSK
SU
O
M
I
D
EU
TS
C
H
5
19
20
21
22
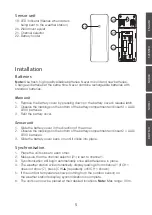
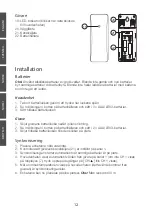
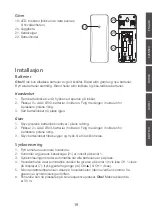
Sensor unit
19. LED indicator (flashes when data is
being sent to the weather station)
20. Wall mount eyelet
21. Channel selector
22. Battery holder
Installation
Batteries
Note:
Use fresh, high quality alkaline batteries. Never mix old and new batteries.
Change all batteries at the same time. Never combine rechargeable batteries with
standard batteries.
Main unit
1. Remove the battery cover by pressing down on the battery cover’s release latch.
2. Observe the markings on the bottom of the battery compartment and insert 3 × AAA/
LR03 batteries.
3. Refit the battery cover.
Sensor unit
1. Slide the battery cover in the direction of the arrow.
2. Observe the markings on the bottom of the battery compartment and insert 2 × AAA/
LR03 batteries.
3. Slide the battery cover back on until it clicks into place.
Synchronisation
1. Place the units close to each other.
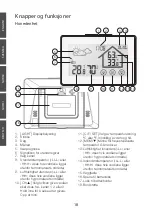
2. Make sure that the channel selector (21) is set to channel 1.
3. Synchronisation will begin automatically once all batteries are in place.
4. The weather station will automatically display readings from channel 1 (if CH 1
does not show (7), press [ CH/
▲
] repeatedly until CH 1 shows).
5. If the outdoor temperature shows (coming from the outdoor sensor) on
the weather station’s display, synchronisation is complete.
6. The units can now be placed at their desired locations.
Note:
Max range: 30 m.

