EN
G
LI
SH
SV
EN
SK
A
N
O
RSK
SU
O
M
I
D
EU
TS
C
H
6
Adding additional sensors using channels 2 and 3
The weather station can be supplemented by the addition of two extra sensors (sold
separately). Make sure that each sensor is assigned its own channel.
1. Choose a sensor that you wish to broadcast on channel 2 and open its battery
compartment.
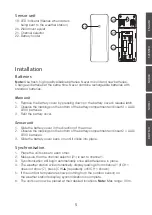
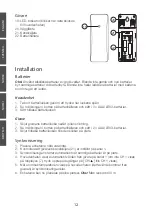
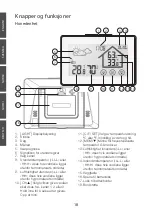
2. Set the channel selector (21) to channel 2.
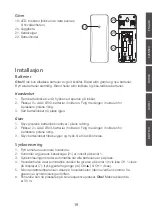
3. Observe the markings on the bottom of the battery compartment and insert
2 × AAA/LR03 batteries.
4. Refit the battery cover.
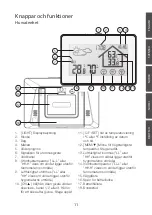
5. Press and hold in [ CH/
▲
] until the signal icon (6) begins to flash. The weather
station will begin searching for the outdoor sensor.
6. Press [ CH/
▲
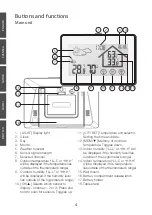
] repeatedly on the weather station until CH 2 appears (7).
7. After a short moment, the readings from channel 2 will appear on the weather station.
8. Repeat the same procedure for setting another sensor to channel 3, if needed.
Placement/mounting
Main unit
• The weather station has integrated temperature and moisture sensors. Be careful
when placing the unit so that it is not located near heaters, cookers, or other heat
sources.
• The weather station can be used with its table stand (18) or hung on a wall using
its eyelet (15).
• Avoid placing the unit next to metal objects such as metal window frames as this
may cause interference with reception.
Sensor unit
• Place the sensor in a location that is protected from direct sunlight and rain.
• Mount the sensor at least 2.5 m above ground, if possible.
• Fasten a screw to the wall and hang up the sensor from its eyelet (20).
Operating instructions
Setting the time and date
Depress the [ C/F /SET ] button for 3 seconds to reach the settings mode. The selected
settings will begin to flash. Press or hold in [ CH/
▲
] or [ MEM/
▼
] to change readings.
Confirm each stage with [ C/F /SET ]. Set the following in sequential order:
• Year: Year setting
• Month: Month setting
• Day: Day setting
• 12H/24H: 12 or 24 hour clock setting
• Hour: Hour setting
• Minute: Minute setting

