COMPONENT GUIDE
9
OM.SS60.20141016
UNIT OPERATION
START UP
Read all safety instructions before operation and follow them closely (p. 1-2)
Always wear proper personal protective equipment including eye protection to guard against flying
objects, ear protection to prevent hearing loss and gloves to protect hands from exposure to
cryogenic temperatures and sharp blade surfaces.
If an air drop is seldom used or is being used with the SDI Select 60 for the first time, water and rust
may have collected in the line. Before connecting to the air supply, purge the line to prevent
contamination of the SDI Select 60.
Before loading dry ice, clean excess moisture from the trough area with compressed air nozzle.
Before starting the SDI Select 60, verify the following parameters:
• The air supply pipe is at least 1" (25 mm) in diameter.
• The air pressure does not exceed the blast hose and blast system pressure ratings.
• The incoming air temperature does not exceed 122 ºF (50 ºC).
• The power switch, bleed valve and applicator safety switch are in the OFF (O) position.
• The dry ice trough is dry, clean and free of debris (use compressed air nozzle if it is not).
To start the SDI Select 60:
1. Securely attach the blast hose and control cable to the SDI Select 60.
2. Securely attach the blast applicator to the blast hose and control cable.
3. Securely attach a nozzle to the blast applicator.
4. Securely attach the air supply hose to the SDI Select 60 and fully extend hose whip check.
5. Securely attach the static bonding cable to the target surface and to an electrically
conductive supporting structure or the blast hose.
6. Turn on the air compressor or open air supply valve and allow the air supply hose to
pressurize.
7. Plug the power cord into an electrical outlet.
•
If an extension cord is necessary, it must comply with the power requirements of
the SDI Select 60 and all governing electrical codes. The SDI Select 60's data plate
indicates the operating voltage and amperage range.
8. Move the power switch to the ON (I) position.
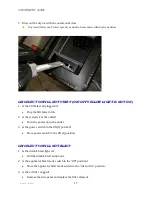
9. Release disable blast button.
•
The light will go off.
10. Move the bleed valve to the ON (I) position to purge water out of the lines.
11. Move the bleed valve to the OFF (O) position.
12. Move the feed rate control to maximum.
13. Move the applicator blast mode switch to the “Air Only” position.
14. Point the nozzle in a safe direction and squeeze the trigger to purge the system.
Summary of Contents for SDI Select 60
Page 3: ...OM SS60 20141016 ...
Page 4: ...OM SS60 20141016 ...
Page 6: ......
Page 26: ......
Page 36: ...SDI SELECT 60 USER MANUAL ...
Page 38: ...SDI SELECT 60 USER MANUAL ...
Page 40: ...SDI SELECT 60 USER MANUAL ...
Page 41: ...TRAINING VIDEO ...
Page 42: ...SDI SELECT 60 USER MANUAL ...


