Heka X2
part number 2000000454
1
2
Layout & Positioning
of Tent, Pole Assembly
– Layout and position tent with door facing
desired direction. (illus. 2)
– For best results in windy conditions, postion
door or back of tent into the wind.
– Stake down tent corners. Keep the floor
taut. Unzip door. (illus. 1, illus. 2)
– Assemble Frame Poles by interlocking the
shock-corded sections. This will make one long
Main Pole and two shorter Crossover Poles.
– Insert the Main Pole (Red) through the pole
sleeves and through the grommet going from
the back of the tent to the front of the vestibule
webbing strap. (illus. 2, illus. 3)
– Insert the silver Crossover Pole in the front set
of pole sleeves going side to side. (illus. 2)
– Insert the gold Crossover Pole in the back set
of pole sleeves going side to side. (illus. 2)
Rainfly
Part No. 9830-1341
Removable Vestibule
Part No. 9850-3071
illus. 2
Crossover Poles through pole sleeves
Back Pole (gold)
Main Pole (red)
illus. 1
Tent stake
through
Loop
illus. 3
Long pole through
grommet
illus.5
Insert Pole Tip into
grommet
POLE ASSEMBLY PARTS
Main Tent Pole (red)
Part No. 9830-1441
Front Crossover Pole (silver)
Part No. 9830-1141
Back Crossover Pole (gold)
Part No. 9830-1241
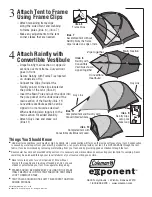
Connect Frame to Tent
– Insert Pole Tip of Main Tent pole into the grommet
on the webbing at the back of the tent (illus. 5).
– Go to opposite end of the Main Pole and
gradually apply pressure to the pole, forming an
arch, until you are able to insert the pole tip
into the pole pocket at the point of the pole flap.
(illus. 4, illus. 5)
– Insert the Crossover Pole into the grommet
on the webbing located on the side of the
tent. The front pole goes toward the back.
The back pole angles toward the front. The
Crossover Poles will cross on each side.
(illus. 4, illus. 5)
illus. 4
Main Pole
Front Crossover Pole
Back
Crossover Pole
Front Pole (silver)


