


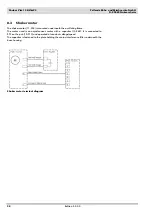


Shaker
V
IBA
15
&
V
IBA
25
Collomix Rühr- und Mischgeräte GmbH
D-85080
Gaimersheim
30
Edition
2.3-05
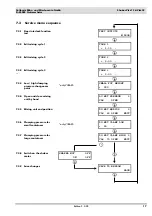
9.2
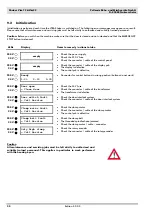
Initialization
Initialization is performed each time the VIBA Shaker is switched on. The following error messages may appear as a result.
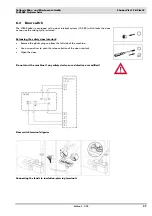
Please note that all maintenance and servicing jobs must be left strictly to authorized and suitably trained personnel.
Caution:
Before you switch on the machine make sure that the door is closed and not unlocked and that the EMERGENCY
STOP button is released!
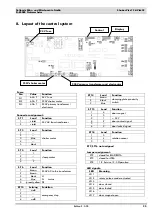
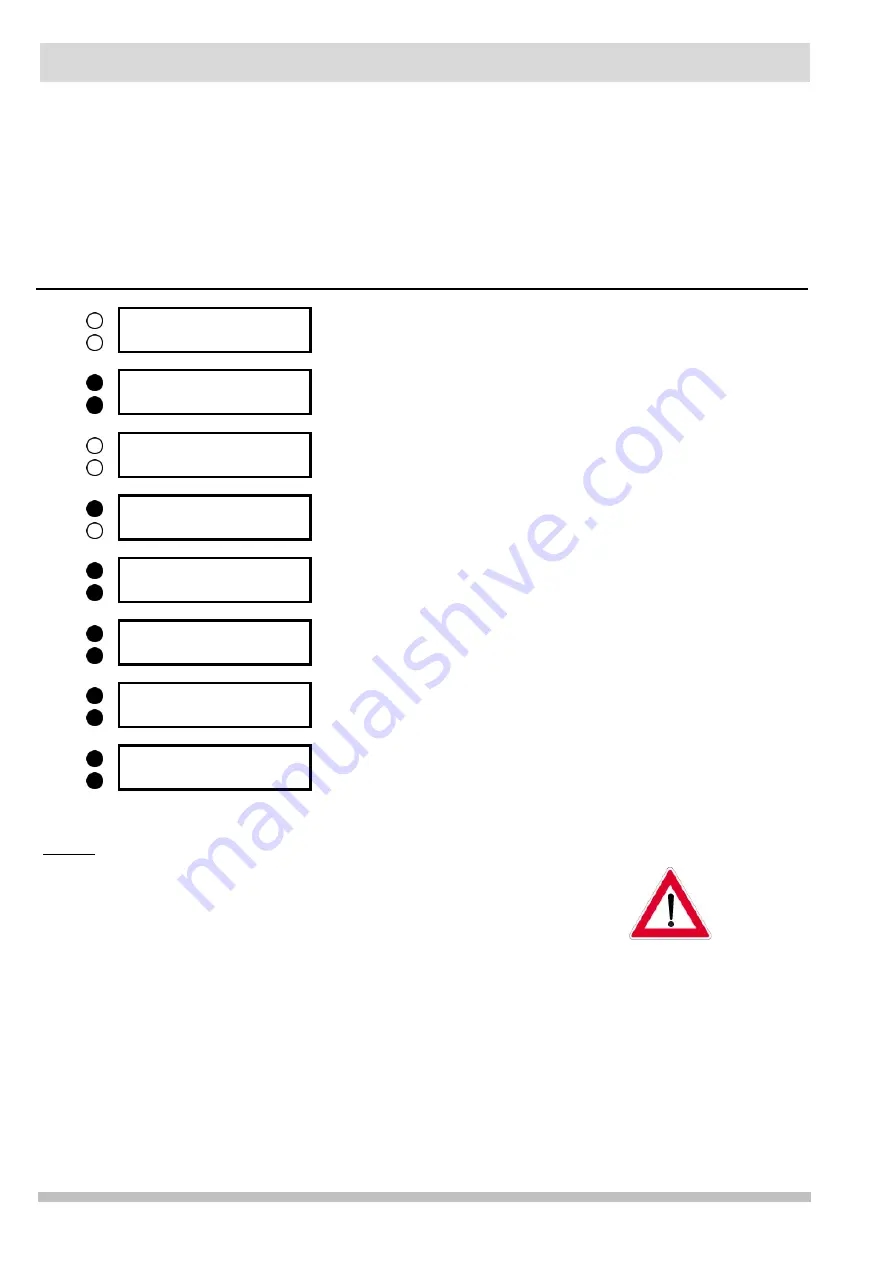
LEDs
Display
Items to remedy / actions to take
230 V
24 V
empty
•
Check the power supply
•
Check the 230 V fuse
•
Check the connector / cable of the control panel
230 V
24 V
empty
•
Check the connector / cable of the display pcb
•
The display is defective
•
The control pcb is defective
230 V
24 V
Ready
1:00 2:20 3:00
•
Connector for control buttons in wrong position (buttons do not work)
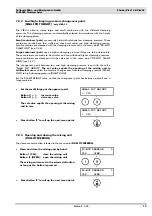
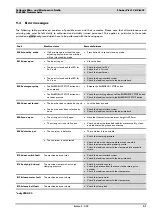
230 V
24 V
Door open
> Close door
•
Check the 24 V fuse
•
Check the connector / cable of the transformer
•
The transformer is defective
230 V
24 V
Door switch fault
> Call Service
•
Check the door interlock system
•
Check the connector / cable of the door interlock system
230 V
24 V
Clamp motor fault
> Call Service
•
Check the clamp motor
•
Check the connector / cable of the clamp motor
•
The control pcb is defective
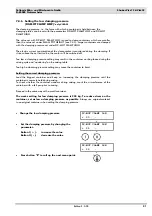
230 V
24 V
Clamp belt fault
> Call Service
•
Check the clamp belt
•
The threaded spindles have jammed
•
Check the clamp motor / cable – connector
230 V
24 V
Only high clamp
> Call Service
•
Check the rotary encoder
•
Check the connector / cable of the rotary encoder
Caution
All maintenance and servicing jobs must be left strictly to authorized and
suitably trained personnel. This applies in particular to work performed
with the housing open.


