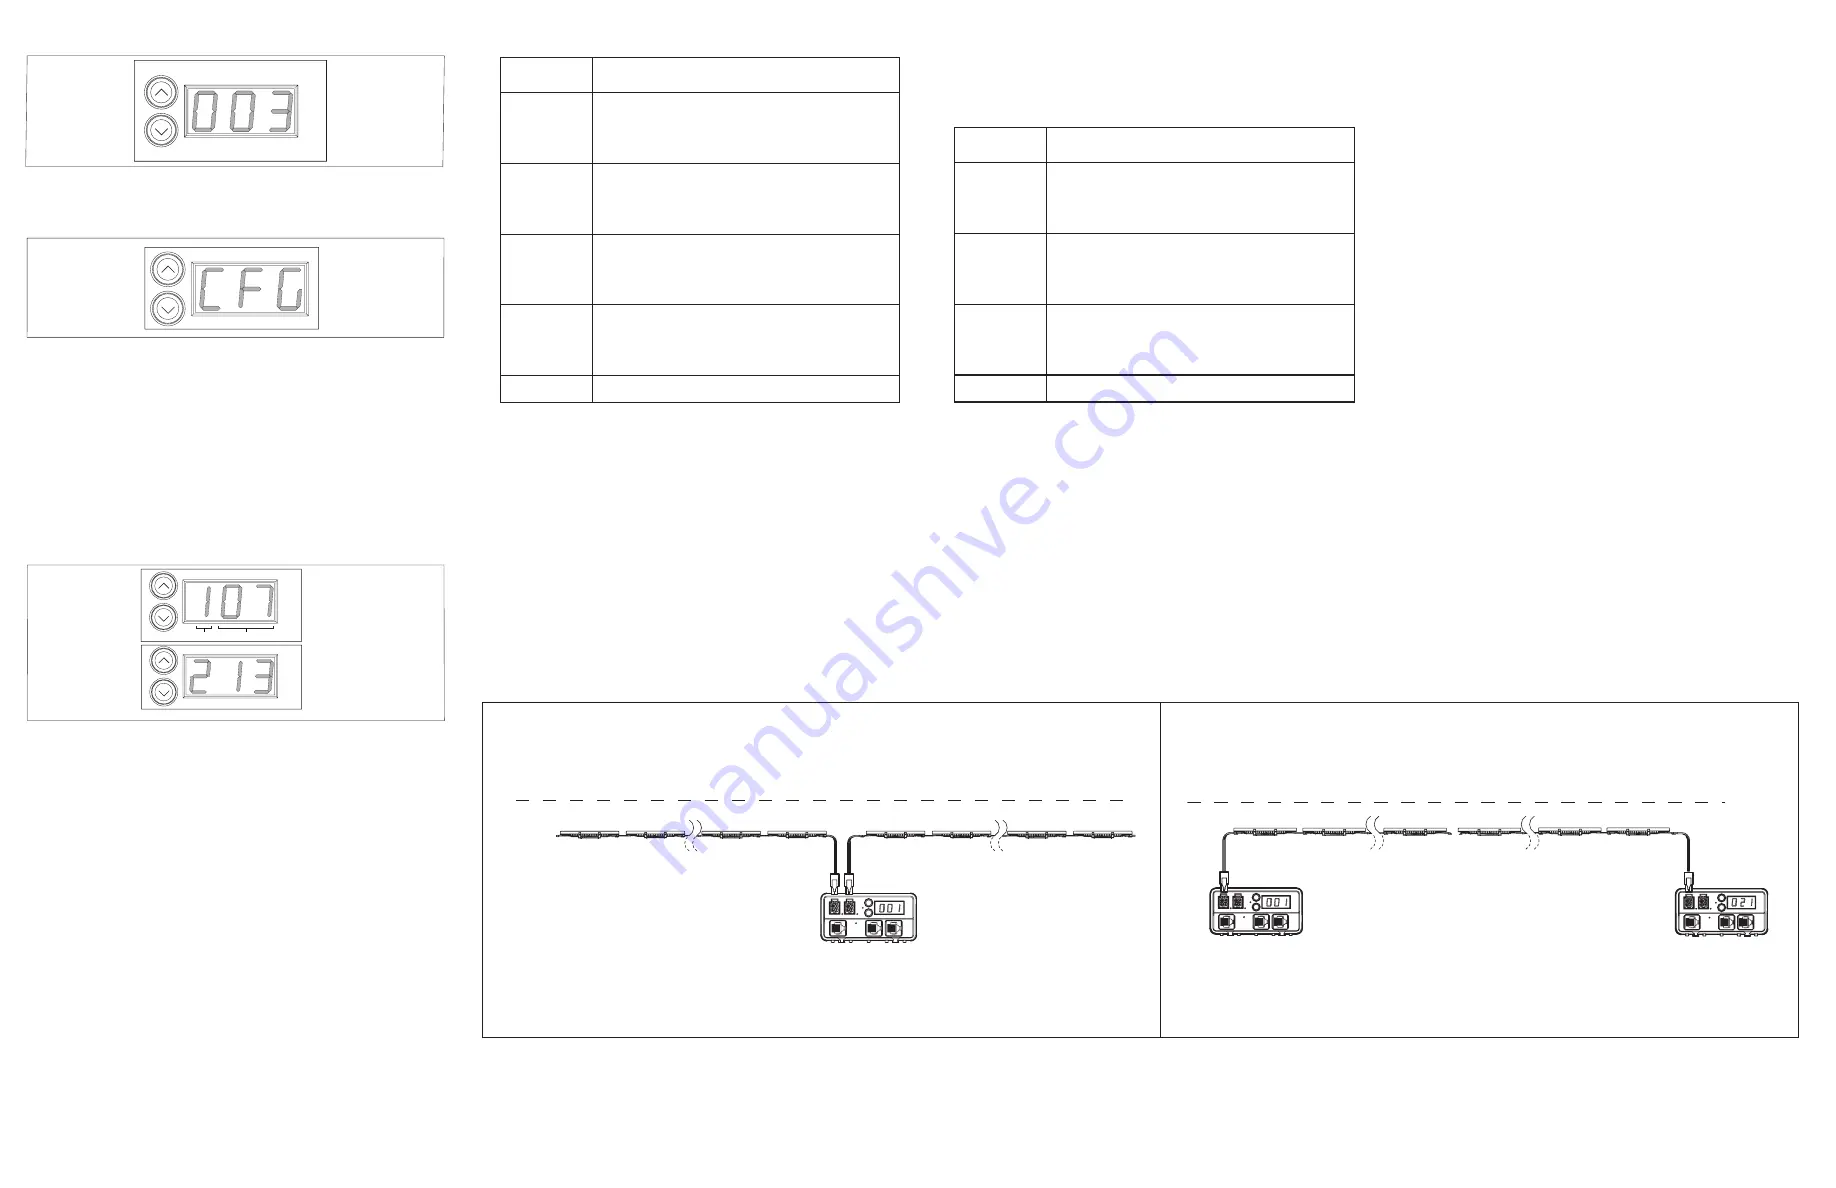
2. After selecting a base address, press and hold the UP and DOWN
buttons simultaneously to enter configuration mode. "CFG" appears
in the display. (See Fig. 7.)
When entering Configuration mode, sPDS-60ca 24V automatically
discovers all lights that are connected and addresses them sequen-
tially, beginning with the base address on the first light on
Output 1 through the last light on Output 2. This step ensures that
sPDS-60ca 24V correctly identifies all of the lights connected to its
outputs.
After the discovery is complete, two 3-digit numbers are briefly
displayed. The first digit indicates the output port and the last two
digits denote the number of lights connected to that output. For
example, the number 107 represents 7 lights on Output 1, while
the number 213 indicates 13 lights on Output 2. If there are no
lights attached to an output, the last two digits are 00, as in 200.
(See Fig. 8.)
3. To exit Configuration mode, press both buttons simultaneously. The
base address for sPDS-60ca 24V will appear on the display.
Grouping Light addresses
sPDS-60ca 24V allows you to conserve the total number of light
addresses in an installation by grouping light fixtures together. When
you group light addresses, you can assign multiple lights to the same
address. The number of lights per group is limited to the maximum
number of lights connected to Output 1. (For example, if you have 10
lights connected to Output 1 and 12 lights connected to Output 2, the
maximum group number is 10.)
To set grouping of light addresses:
1. Press and hold the UP and DOWN buttons simultaneously to enter
configuration mode. "CFG" appears in the display.
2. When entering Configuration mode, sPDS-60ca 24V automatically
discovers all lights that are connected.
3. Use the UP button to set a positive group number (the number of
lights per group), according to the following table.
Group
address
How Lights are addressed
ALL
ALL lights are assigned the selected Base Address.
If you have 20 lights with a Base Address of 1, they are
addressed as follows:
Light #: 1 2 3 4 5 6 7 8 ... 18 19 20
Address: 1 1 1 1 1 1 1 1 ... 1 1 1
1
All lights are addressed sequentially, starting with the Base
Address. If you have 20 lights with a Base Address of 1,
they are addressed as follows:
Light #: 1 2 3 4 5 6 7 8 ... 18 19 20
Address: 1 2 3 4 5 6 7 8 ... 18 19 20
2
Every two lights are assigned the same address. For
example, if you have 20 lights with a Base Address of 1,
they are addressed as follows:
Light #: 1 2 3 4 5 6 7 8 ... 18 19 20
Address: 1 1 2 2 3 3 4 4 ... 9 10 10
3
Every three lights are assigned the same address. For
example, if you have 20 lights with a Base Address of 1,
they are addressed as follows:
Light #: 1 2 3 4 5 6 7 8 ... 18 19 20
Address: 1 1 1 2 2 2 3 3 ... 6 7 7
4 to 20
...
note
:
It is recommended that you set your group number to a
number that evenly divides the number of lights connected to
Output 1 and you balance the number of lights on each output.
Otherwise, you may have a smaller amount of lights at the end of
each output port that would receive the next address.
4. Use the DOWN button to set reverse addressing.
note
:
sPDS-60ca 24V allows you to reverse the addressing
sequence on Output 1 ONLY.
Using reverse addressing, the last light on Output 1 receives the
Base Address, and then the addresses are assigned sequentially
from the last light to the first.
Reverse addressing is particularly useful if you mount your power
supply in the center of a linear feed or if you want to feed an
installation that uses multiple power supplies from each side. Use
reverse addressing to chase from one end of the light run to the
next. (See Fig. 9 for examples.)
Use the DOWN button to set a "negative" group number, accord-
ing to the following table. Set a negative group number to use
reverse addressing.
Group
address
How Lights are addressed
-1
All lights are addressed sequentially, starting with the Base
Address. If you have 20 lights with a Base Address of 1,
they are addressed as follows:
Light #: 1 2 3 4 5 6 7 8 ... 18 19 20
Address: 20 19 18 17 16 15 14 13 ... 3 2 1
-2
Every two lights are assigned the same address. For
example, if you have 20 lights with a Base Address of 1,
they are addressed as follows:
Light #: 1 2 3 4 5 6 7 8 ... 18 19 20
Address: 10 10 9 9 8 8 7 7 ... 2 1 1
-3
Every three lights are assigned the same address. For
example, if you have 20 lights with a Base Address of 1,
they are addressed as follows:
Light #: 1 2 3 4 5 6 7 8 ... 18 19 20
Address: 7 7 6 6 6 5 5 5 ... 1 1 1
-4 to -20
...
note
:
It is recommended that you set your group number to a
number that evenly divides the number of lights connected to
Output 1 and you balance the number of lights on each output.
Otherwise, you may have a smaller amount of lights at the end of
each output port that would receive the next address.
5. To exit Configuration mode, press both buttons simultaneously. The
base address for sPDS-60ca 24V will appear on the display.
sPdS-60ca 24V SPeCiFiCatiOnS
power
input
100-240VAC, 50Hz–60Hz, 1.1-0.4A
power
output
24VDC (62W Max.)
heat
dissipation
22% of total power input at maximum load
ambient
operating
temp
14ºF to 122°F (-10ºC to 50°C)
housing
8.8” (22.4 cm) X 4.0” (10.2 cm) X
2.0” (5.1 cm)
Weight: 2.0 lbs (907 g)
connectors
Data: RJ45 input and output connectors
Power: 4-pin output connectors, IEC power
connector (Supplied with C13 IEC plug,
grounded US outlet plug. UL/CSA rated 18
AWG 3/C ST 90ºC Rated.)
data
input
interface
Color Kinetics DMX Controllers or DMX512
compatible controllers or Color Kinetics Video
System Manager or Light System Manager
data
output
interface
Chromasic 24V
classification
Class 2
listings
UL/cUL, CE, PSE
max
. #
of
fixtures
iColor Cove QL 12": 20;
iColor Cove QL 6": 36;
iColor Cove EC: 30
Warranty
This product is sold pursuant to CK’s Standard Terms and Conditions
(the “T&Cs”) which may be found at http://colorkinetics.com/how-
tobuy/buy/terms and which contain important provisions, including,
among others, Limited Warranty, exclusions and limitations on CK’s
liability for damages, and restrictions on the remedies that are avail-
able to you.
3-Digit Display
UP
DOWN
CONFIGURATION MODE
Fig. 7
OUTPUT
NUMBER OF LIGHTS
EXAMPLE: 13 LIGHTS ON OUTPUT 2
Fig. 8
Fig. 6
sPDS-60ca 24V DMX/Ethernet
(Base Address = 21)
OUT
1
OUT
2
ENET IN
DMX IN
DMX OUT
AL
T
DA
TA
sPDS-60ca 24V DMX/Ethernet
(Base Address =1)
OUT
1
OUT
2
ENET IN
DMX IN
DMX OUT
AL
T
DA
TA
20
2
1
20
2
1
22
40
21
21
39
40
Group Address
Set to “
-1
”
iColor Cove QL fixtures
iColor Cove QL fixtures
Group Address
Set to “
1
”
Group Address
Set to “
1
”
Group Address
Set to “
-1
”
Example 2:
Reverse addressing allows you to have a continuous Rainbow Wash
when you have an installation fed by more than one power supply.
When using sequential addressing on both power supplies, the light
flows from the first light on Output 1 of the first power supply to the
last light on Output 1 (left to right), and then it flows from the first
light on Output 1 of the second power supply to the last light on
Output 1 (right to left).
Using reverse addressing on the second power supply allows you to
set up the flow from left to right across all fixtures. With this setup,
the light flows from the first light on Output 1 of the first power supply
to the last light on Output 1, and from the last light on Output 1 of the
second power supply to the first light on Output 1.
Fig. 9
sPDS-60ca 24V
(Center Feed Installation)
Base Address = 1
OUT
1
OUT
2
ENET IN
DMX IN
DMX OUT
AL
T
DA
TA
9
2
10
1
12
19
11
20
2
9
1
10
12
19
11
20
Group Address
Set to “
-1
”)
Group Address
Set to “
1
”)
Example 1:
When using a Rainbow Wash with sequential addressing
(group address set to 1), the light flows from the center
(the first light on Output 1) to the last light in Output 1, and
then back to the first light on Output 2.
When using a Rainbow Wash with reverse addressing
(group address set to -1), the light flows from left to
right across all fixtures. The light goes from the last fixture
on Ouput 1 to the first fixture on Output 1, and then to the
first fixture on Output 2 to the last fixture on Output 2.
iColor Cove QL fixtures
iColor Cove QL fixtures
EXAMPLES OF SEQUENTIAL AND REVERSE ADDRESSING
NOTE: Reverse addressing only reverses the addresses on Output 1 of the sPDS-60ca 24V.


