SmartLF Cx+40 Instruction Manual
Page 7 of 12
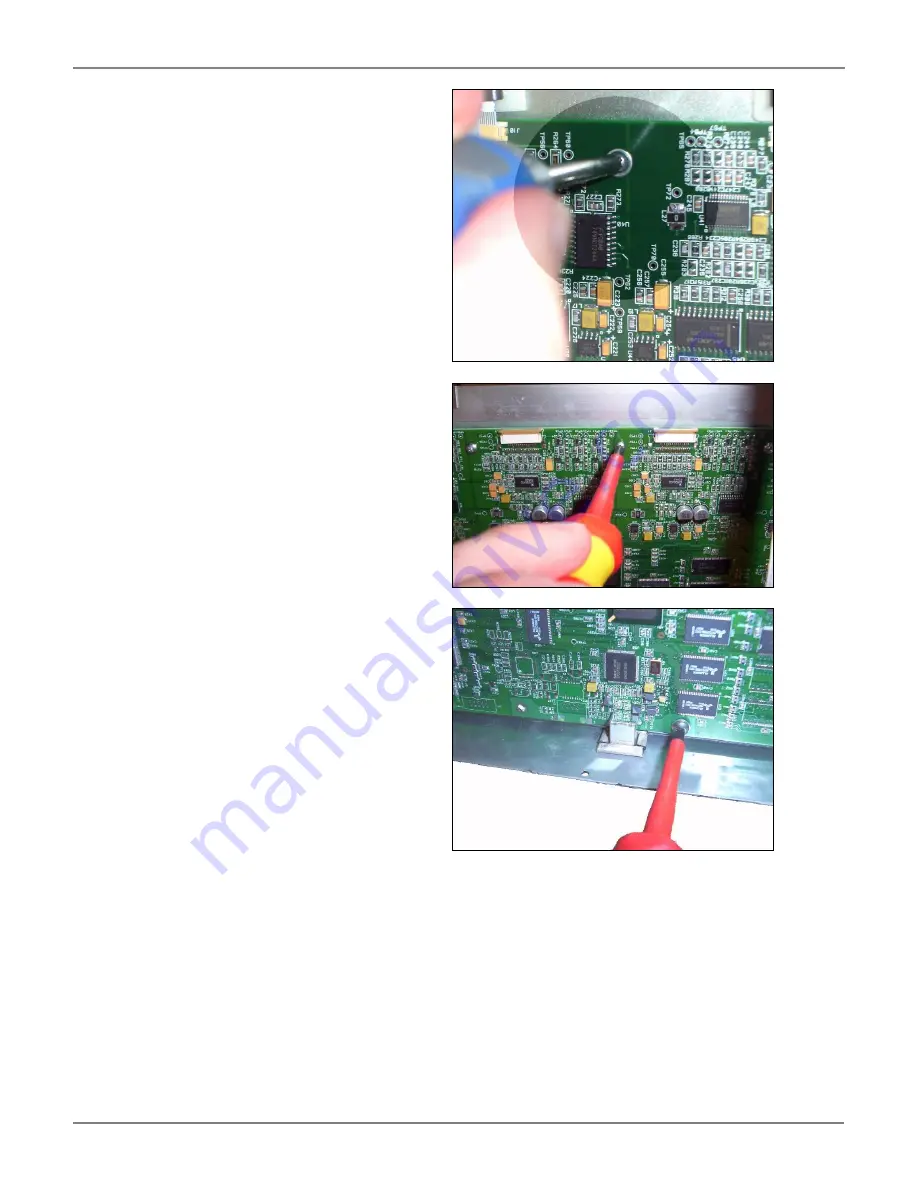
5. Remove the ten M3 x 10mm
screws and the two M4 x 6mm
screws that hold the Main
board on to the panel and
gently remove from scanner.
6. Hold the replacement board up
to the panel and insert the first
M3 x 10 screw in the central
hole at the top of the board to
hold it in place, do not tighten
at this point.
7. Insert the two M4 x 6mm
screws into the holes either
side of the USB2 connector.
Then insert the remaining nine
M3 x 5mm screws around the
board, when all are in place,
tighten all the screws up,
making sure not to apply too
much pressure.


