Chapter 2 - - - - - - - - - - - - - - - - - - - - - - - - - - - - - - - - - - - - - - - - How it works - - - - - - - - - - - - - - - - - - - - - - - - - - - - - - - - - - - - - - - - Chapter 2
- - - - - - - - - - - - - - - - - - - - - - - - - - - - - - - - - - - - - - - - - - - - - - - - - - - - 54 - - - - - - - - - - - - - - - - - - - - - - - - - - - - - - - - - - - - - - - - - - - - - - - - - - - -
Setting up a wireless link
1.
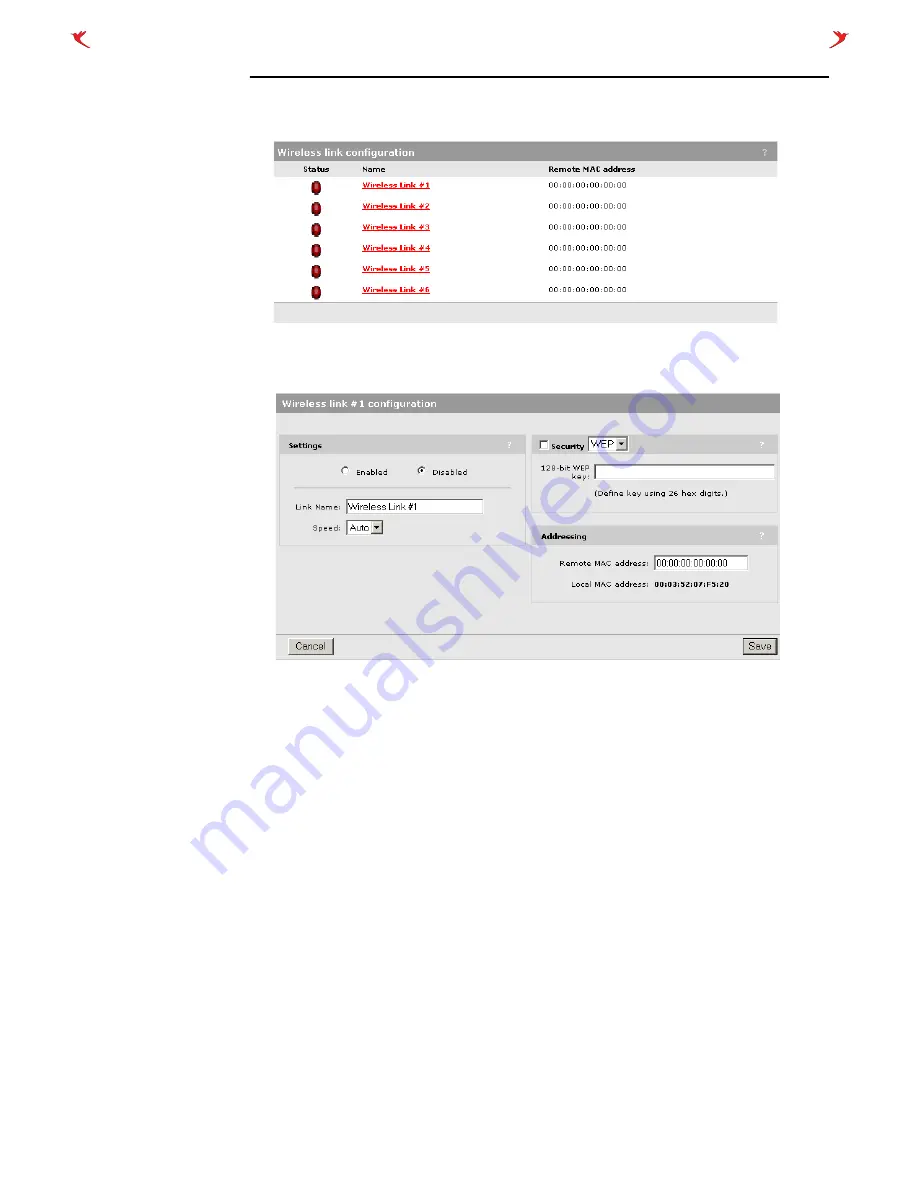
On the Wireless menu
,
click
Wireless links
.
The
Wireless links
page opens.
2.
Click the wireless link you want to configure. The configuration page for the link
opens.
3.
In the
Settings
box, select
Enabled
.
4.
In the
Addressing
box, specify the
Remote MAC address.
This is the MAC
address of the other access point.
5.
Click
Save
.
6.
Open the
Wireless > Wi-Fi
page. Make sure that
Operating Frequency
in the
Radio
box is set to the same channel as the other access point.
Note:
To support roaming, all access ponits must have the same WLAN name (SSID).
7.
Click
Save
.
Summary of Contents for CN3000
Page 1: ...CN3000 Administrator s Guide...
Page 8: ...Table of Contents 8...
Page 60: ...Chapter 2 How it works Chapter 2 60...
Page 94: ...Chapter 4 Scenarios Chapter 4 94...
Page 106: ...Chapter 5 Activating the public access interface Chapter 5 106...
Page 211: ...Chapter 10 SSL certificates Chapter 10 211...
Page 292: ...Chapter 13 The configuration file Chapter 13 292...
Page 370: ...Chapter 16 Sample setup Microsoft RADIUS Chapter 16 370...
Page 396: ...Chapter 16 Sample setup Microsoft RADIUS Chapter 16 396...
Page 414: ...Chapter 17 Experimenting with NOC authentication Chapter 17 414...


