Chapter 4 - - - - - - - - - - - - - - - - - - - - - - - - - - - - - - - - - - - - - - - - - Scenarios - - - - - - - - - - - - - - - - - - - - - - - - - - - - - - - - - - - - - - - - - Chapter 4
- - - - - - - - - - - - - - - - - - - - - - - - - - - - - - - - - - - - - - - - - - - - - - - - - - - - 86 - - - - - - - - - - - - - - - - - - - - - - - - - - - - - - - - - - - - - - - - - - - - - - - - - - - -
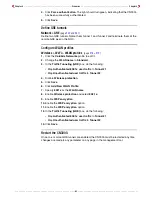
4.
Click
Force authentication
. The light should turn green, indicating that the CN3000
has been successfully authenticated.
5.
Click
Save
.
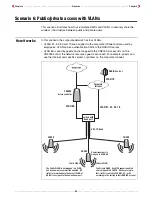
Define GRE tunnels
Network > GRE
(page
240
and
241
)
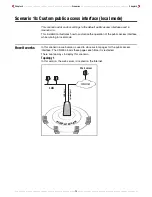
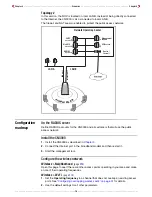
Define three GRE tunnels for each WISP. Name the tunnels for the type of traffic that
they will carry and configure them as follows:
• WISP1_HTML
• WISP1_WPA
• WISP1_8021x
• WISP2_HTML
• WISP2_WPA
• WISP2_8021x
Configure WLAN profiles
Wireless > Wi-Fi > WLAN profiles
(page
218
+
219
)
Define three WLAN profiles for each WISP. Name the profiles for the type of traffic that
they will carry and configure them as follows.
WISP1_HTML and WISP2_HTML
1.
Use the default settings for all parameters.
2.
In the
Traffic Tunneling (GRE)
box, do the following:
• Map
Authenticated 802.1x user traffic
to
WISP1_8021x
or
WISP2_802.1x
• Map
Unauthenticated user traffic
to
WISP1_HTML
. or
WISP2_HTML.
WISP1_WPA and WISP2_WPA
1.
Enable
Wireless protection
and select
WPA.
2.
Set
Key source
protection to
RADIUS.
3.
Set
RADIUS profile
to
RADIUS profile 1
.
4.
In the
Traffic Tunneling (GRE)
box, do the following:
• Map
Authenticated 802.1x user traffic
to
WISP1_WPA
or
WISP2_WPA
• Map
Unauthenticated user traffic
to
WISP1_HTML
. or
WISP2_HTML.
WISP1_8021x and WISP1_8021x
1.
Enable
Wireless protection
and select
802.1x.
2.
Select
RADIUS profile 1.
3.
Enable the
WEP encryption
option.
4.
In the
Traffic Tunneling (GRE)
box, do the following:
• Map
Authenticated 802.1x user traffic
to
WISP1_8021x
or
WISP2_8021x.
• Map
Unauthenticated user traffic
to
WISP1_HTML
. or
WISP2_HTML.
5.
Click
Save
.
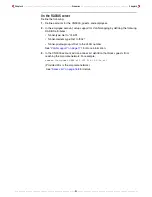
Restart the CN3000.
Once one or more GRE tunnels are enabled, the CN3000 must be restarted any time
changes are made to any parameter on any page in the management tool.
Summary of Contents for CN3000
Page 1: ...CN3000 Administrator s Guide...
Page 8: ...Table of Contents 8...
Page 60: ...Chapter 2 How it works Chapter 2 60...
Page 94: ...Chapter 4 Scenarios Chapter 4 94...
Page 106: ...Chapter 5 Activating the public access interface Chapter 5 106...
Page 211: ...Chapter 10 SSL certificates Chapter 10 211...
Page 292: ...Chapter 13 The configuration file Chapter 13 292...
Page 370: ...Chapter 16 Sample setup Microsoft RADIUS Chapter 16 370...
Page 396: ...Chapter 16 Sample setup Microsoft RADIUS Chapter 16 396...
Page 414: ...Chapter 17 Experimenting with NOC authentication Chapter 17 414...

