background image

19

4

Operating 

Your Lawn 

Tractor

WARNING

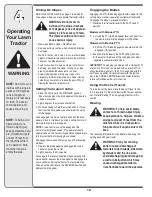
Plan your mowing 
pattern to avoid 
discharge of materi-
als toward roads, 
sidewalks, bystanders 
and the like. Also, 
avoid discharging 
material against a 
wall or obstruction 
which may cause 
discharged material to 
ricochet back toward 
the operator.

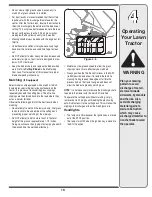
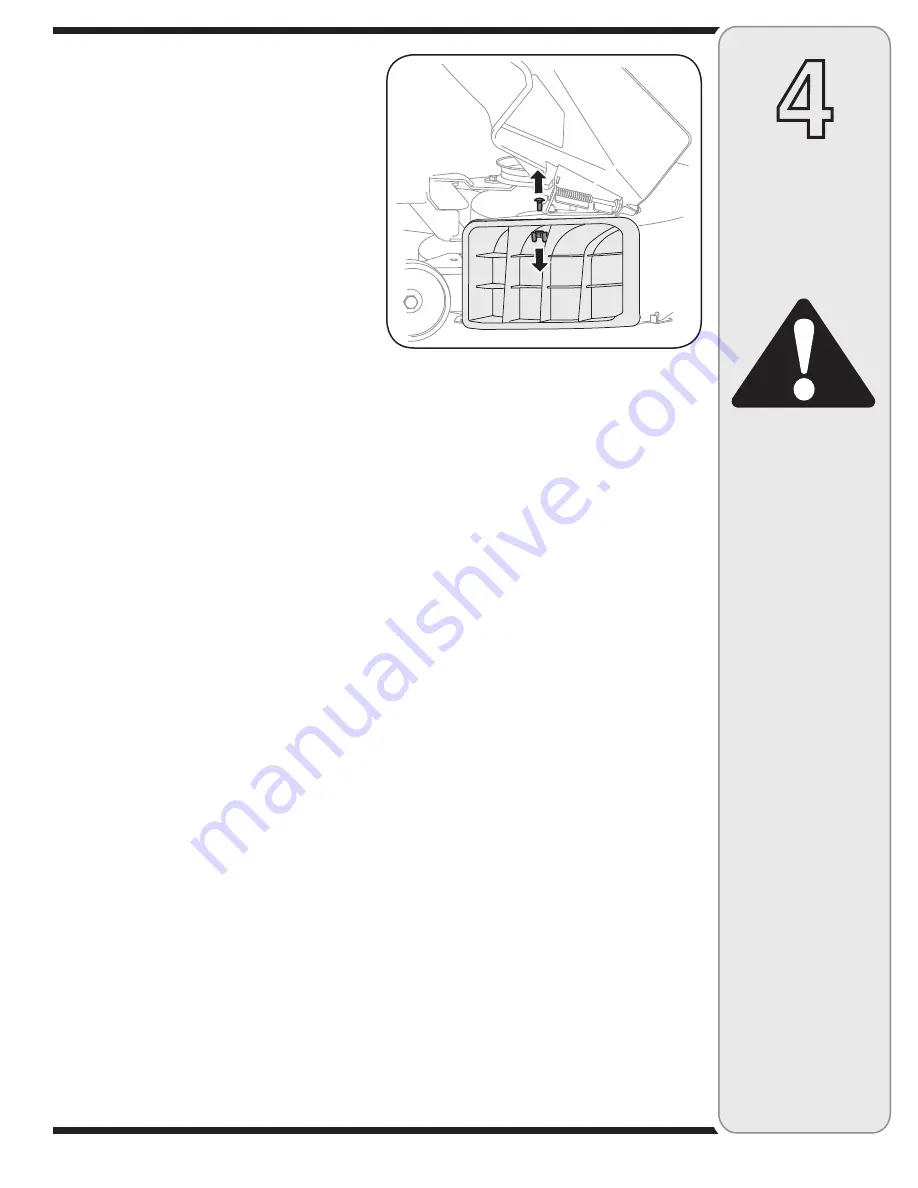
Figure 4-6

•  Do not mow at high ground speed, especially if a 

mulch kit or grass collector is installed.

•  For best results it is recommended that the first two 

laps be cut with the discharge thrown towards the 
center. After the first two laps, reverse the direction to 
throw the discharge to the outside for the balance of 
cutting. This will give a better appearance to the lawn.

•  Do not cut the grass too short. Short grass invites 

weed growth and yellows quickly in dry weather.

•  Mowing should always be done with the engine at full 

throttle. 

•  Under heavier conditions it may be necessary to go 

back over the cut area a second time to get a clean 
cut. 

•  Do NOT attempt to mow heavy brush and weeds and 

extremely tall grass. Your tractor is designed to mow 
lawns, NOT clear brush.

•  Keep the blades sharp and replace the blades when 

worn. Refer to 

Cutting Blades

 in the Maintaining 

Your Lawn Tractor section of this manual for proper 
blade sharpening instructions.

Mulching 

(If Equipped)

Select models come equipped with a mulch kit which 
incorporates special blades, already standard on the 
tractor, in a process of recirculating grass clippings 
repeatedly beneath the cutting deck. The ultra-fine 
clippings are then forced back into the lawn where they 
act as a natural fertilizer.
Observe the following points for the best results when 
mulching:
•  Never attempt to mulch if the lawn is damp. Wet grass 

tends to stick to the underside of the cutting deck 
preventing proper mulching of the clippings.

•  Do NOT attempt to mulch more than 1/3 the total 

height of the grass or approximately 1-1/2 inches. 
Doing so will cause the clippings to clump up beneath 
the deck and not be mulched effectively.

•  Maintain a slow ground speed to allow the grass 

clippings more time to effectively be mulched.

•  Always position the throttle control lever in the FAST 

(rabbit) position and allow it to remain there while 
mowing. Failing to keep the engine at full throttle 
places strain on the tractor’s engine and does not 
allow the blades to properly mulch grass.

NOTE

: It is not necessary to remove the discharge chute 

to operate the mower with the mulch kit installed.
To operate the cutting deck without mulching, simply 
remove the mulch plug by unthreading the plastic wing 
nut which fastens it to the cutting deck. This will allow the 
clippings to discharge out the side. See Figure 4-6.

Headlights

•  The lamps are ON whenever the ignition key is moved 

out of the STOP position.

•  The lamps turn OFF when the ignition key is moved to 

the STOP position.

Summary of Contents for 606

Page 1: ...hooting Warranty LES DISTRIBUTIONS RVI LIMITÉE 2955 JEAN BAPTISTE DESCHAMPS LACHINE QUEBEC H8T 1C5 PRINTED IN U S A IMPORTANT READ SAFETY RULES AND INSTRUCTIONS CAREFULLY BEFORE OPERATION OPERATOR S MANUAL 769 02794 01 06 07 Transmatic Lawn Tractor Model 606 ...

Page 2: ...mer Support 1 If you have difficulty assembling this product or have any questions regarding the controls operation or maintenance of this unit please call an authorized dealer Please have your unit s model number and serial number ready when you call See previous section to locate this information 2 The engine manufacturer is responsible for all engine related issues with regards to performance p...

Page 3: ... and you could slip resulting in serious injury Operate RIDING mowers up and down slopes never across the face of slopes Operate WALK BEHIND mowers across the face of slopes never up and down slopes Sight and hold this level with a vertical tree or a corner of a building or a fence post F o l d a l o n g d o t t e d l i n e r e p r e s e n t s a 1 5 s l o p e 15 Use this page as a guide to determi...

Page 4: ...iler with a portable container rather than from a gasoline dispenser nozzle d Keep the nozzle in contact with the rim of the fuel tank or container opening at all times until fueling is complete Do not use a nozzle lock open device e Extinguish all cigarettes cigars pipes and other sources of ignition f Never fuel machine indoors g Never remove gas cap or add fuel while the engine is hot or runnin...

Page 5: ... shifting into reverse Back up slowly Always look down and behind before and while backing to avoid a back over accident 19 Slow down before turning Operate the machine smoothly Avoid erratic operation and excessive speed 20 Disengage blade s set parking brake stop engine and wait until the blade s come to a complete stop before removing grass catcher emptying grass unclogging chute removing any g...

Page 6: ... and gradually downhill if possible 2 Do not mow near drop offs ditches or embankments The mower could suddenly turn over if a wheel is over the edge of a cliff ditch or if an edge caves in 3 Do not try to stabilize the machine by putting your foot on the ground 4 Do not use a grass catcher on steep slopes 5 Do not mow on wet grass Reduced traction could cause sliding 6 Do not shift to neutral and...

Page 7: ...r proper operation regularly 9 After striking a foreign object stop the engine disconnect the spark plug wire s and ground against the engine Thoroughly inspect the machine for any damage Repair the damage before starting and operating 10 Never attempt to make adjustments or repairs to the machine while the engine is running 11 Grass catcher components and the discharge cover are subject to wear a...

Page 8: ... the black plastic cover if present from the negative battery terminal and attach the negative cable heavy black wire to the negative battery terminal with the bolt and nut Make certain the retaining rod is in position over the battery securing it in place See Figure 3 1 NOTE If the battery is put into service after the date shown on the battery charge the battery as instructed in the Maintaining ...

Page 9: ... grasping it between your thumb and index finger and rotating it clockwise WARNING The shipping brace used for packaging purposes only must be removed and dis carded before operating your riding mower WARNING The mowing deck is capable of throwing objects Fail ure to operate the riding mower without the discharge cover in the proper operating position could result in serious personal injury and or...

Page 10: ...nstructions below Standard Adjustment Seat 1 Position the shoulder screws found on the base of the seat inside the slot openings in the seat pivot bracket Figure 3 4 2 Slide the seat slightly rearward in the seat pivot bracket lining up the rear slots in the pivot bracket with the remaining two holes in the seat s base 3 Select desired position for the seat and secure with the two hex screws remov...

Page 11: ... to the cutting deck This will allow the clippings to discharge out of the discharge opening during operation See Figure 3 7 Tire Pressure WARNING Maximum tire pres sure under any circumstances is 30 psi Equal tire pressure should be maintained at all times The tires on your unit may be over inflated for shipping purposes Reduce the tire pressure before operating the tractor Recommended operating ...

Page 12: ... the RIGHT or LEFT side of the tractor is observed from operator s position If so equipped NOTE Any reference in this manual to the RIGHT or LEFT side of the tractor is observed from operator s position NOTE This Opera tors Manual covers a range of product specifications for various models Characteristics and features discussed and or illustrated in this manual may not be applicable to all models ...

Page 13: ...witch Module WARNING Never leave a running machine unattended Always disengage PTO move shift lever into neutral position set parking brake stop engine and remove key to prevent unintended start ing To start the engine insert the key into the ignition switch and turn clockwise to the START position Release the key into the NORMAL MOWING MODE position once the engine has fired To stop the engine tu...

Page 14: ... seat in place Refer to the Adjusting Your Lawn Tractor section of this manual for more detailed instructions on all seat adjustments Deck Lift Lever Systems Indicator Monitor If Equipped LCD Located in the center of the tractor s console the systems indicator monitor records and displays on its LCD hours of tractor operation whenever the ignition key is rotated out of the STOP position The Indica...

Page 15: ...ersonal items while operating the tractor Safety Interlock Switches This tractor is equipped with a safety interlock system for the protection of the operator If the interlock system should ever malfunction do not operate the tractor Contact an authorized service dealer The safety interlock system prevents the engine from cranking or starting unless the parking brake is engaged and the PTO Blade E...

Page 16: ...UTTON 2EVERSE AUTION ODE 0OSITION NDICATOR IGHT Figure 4 5 WARNING AVOID SERIOUS INJURY OR DEATH GO UP AND DOWN SLOPES NOT ACROSS AVOID SUDDEN TURNS DO NOT OPERATE THE UNIT WHERE IT COULD SLIP OR TIP IF MACHINE STOPS GOING UPHILL STOP BLADE S AND BACK DOWNHILL SLOWLY DO NOT MOW WHEN CHILDREN OR OTHERS ARE AROUND NEVER CARRY CHILDREN EVEN WITH BLADES OFF LOOK DOWN AND BEHIND BEFORE AND WHILE BACKIN...

Page 17: ...orly Stopping the Engine WARNING If you strike a foreign object stop the engine discon nect the spark plug wire s and ground against the engine Thoroughly inspect the machine for any damage Repair the damage before restarting and operating 1 If the blades are engaged place the PTO Blade Engage knob or lever in the disengaged OFF position 2 Turn the ignition key counterclockwise to the STOP positio...

Page 18: ...hift lever in the REVERSE position and depress the drive pedal Engaging the Blades Engaging the PTO Blade Engage transfers power to the cutting deck or other separately available attachments To engage the blades proceed as follows 1 Move the throttle control lever to the FAST rabbit position Models with Manual PTO 2 a Grasp the PTO Blade Engage lever and pivot it all the way forward into the engag...

Page 19: ...ch kit which incorporates special blades already standard on the tractor in a process of recirculating grass clippings repeatedly beneath the cutting deck The ultra fine clippings are then forced back into the lawn where they act as a natural fertilizer Observe the following points for the best results when mulching Never attempt to mulch if the lawn is damp Wet grass tends to stick to the undersi...

Page 20: ...uld be equal If they re not proceed to the next step 3 Loosen but do NOT remove the hex cap bolt on the left deck hanger bracket See Fig 5 2 4 Balance the deck by using a wrench to turn the adjustment gear found immediately behind the hex cap bolt just loosened clockwise up or counterclock wise down The deck is properly balanced when both blade tip measurements taken earlier are equal 5 Retighten ...

Page 21: ...drag links may need to be adjusted Adjust the drag links so that equal lengths are threaded into the ball joint on the left and right side 1 Loosen the jam nut found on the drag link at the rear of the ball joint See Fig 5 3 2 Remove hex nut on the top of ball joint See Fig 5 3 3 Thread the ball joint toward the jam nut to shorten the drag link Thread the ball joint away from the jam nut to length...

Page 22: ...ed with your unit Perform the above steps in the opposite order after oil has finished draining 6 Refill the engine with new motor oil as instructed in the Engine Operator Owner Manual packed with your unit IMPORTANT Refer to the Engine Operator Owner Manual packed with your unit for information regarding the quantity and proper weight of motor oil Air Cleaner Service the pre cleaner if so equippe...

Page 23: ...ith the cutting deck engaged for a minimum of two minutes allowing the underside of the cutting deck to thoroughly rinse 10 Move the tractor s PTO Blade Engage into the OFF position 11 Turn the ignition key to the STOP position to turn the tractor s engine off and engage the parking brake 12 Turn the water off and detach the hose coupler from the water port on your decks surface 13 Repeat steps 4 ...

Page 24: ...the NEGATIVE Black wire from it s terminal first followed by the POSITIVE Red wire When reinstalling the battery always connect the POSITIVE Red wire to its terminal first followed by the NEGATIVE Black wire Be certain that the wires are connected to the correct terminals reversing them could change the polarity and result in damage to your engine s alternating system Charging If the tractor has n...

Page 25: ...that secures the blade to the spindle assembly See Figure 6 5 4 To properly sharpen the cutting blades remove equal amounts of metal from both ends of the blades along the cutting edges parallel to the trailing edge at a 25 to 30 angle IMPORTANT If the cutting edge of the blade has already been sharpened to within 1 5 8 from the edge or if any metal separation is present replace the blades with ne...

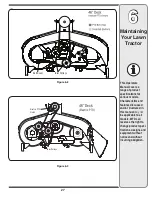
Page 26: ...on key discon nect the spark plug wire s and ground against the engine to prevent unintended starting before remov ing the belt s Avoid the possibility of a pinching injury Do not place your fingers on the idler spring or between the belt and a pulley while removing the belt Figure 6 7 5 Remove the deck belt from around all pulleys including the deck idler pulleys and the electric PTO clutch units...

Page 27: ...gure 6 9 This Operators Manual covers a range of product specifications for various models Characteristics and features discussed and or illustrated in this manual may not be applicable to all models MTD LLC reserves the right to change product speci fications designs and equipment without notice and without incurring obligation ...

Page 28: ...or fuel container indoors where there is an open flame spark or pilot light such as on water heater furnace clothes dryer or other gas appliance Attachments Accessories The following attachments and accessories are compatible with 600 series Lawn Tractors See the retailer from which you purchased your tractor an authorized Service Dealer for information regarding price and availability NOTE Model ...

Page 29: ...follow all instructions in this manual before at tempting to operate this machine Failure to comply with these instructions may result in personal injury When you see this symbol HEED ITS WARNING Your Responsibility Restrict the use of this power machine to persons who read understand and follow the warnings and instructions in this manual and on the machine R R MAX 20 S30 44 S303 3 6 ...

Page 30: ... cartridge element or clean pre cleaner if so equipped 1 Unit running with CHOKE applied 2 Spark plug wire s loose 3 Blocked fuel line or stale fuel 4 Vent in gas cap plugged 5 Water or dirt in fuel system 6 Dirty air cleaner Engine overheats 1 Fill crankcase with proper oil 2 Clean grass clippings and debris from around the engine s cooling fins and blower housing 1 Engine oil level low 2 Air flo...

Page 31: ...ines the battery will not hold a charge MTD PRODUCTS LIMITED will replace the battery at no charge to the original purchaser Additional Limited Thirty Day Warranty on Battery if equipped After ninety 90 days but within one hundred twenty 120 days from the date of purchase MTD PRODUCTS LIMITED will replace the defective battery for the original purchaser for a cost of one half of the current retail...

Page 32: ...Cylinder 746 1086 Discharge Chute Assembly 931 1032B NOTE Download a complete Parts Manual free of charge at www mtdcanada ca or phone 800 668 1238 to purchase a Parts Manual Be sure to have your model number and serial number ready These can be found on the model plate located under the seat Refer to page 2 for more information regarding locating your model and serial numbers Replacement Parts 11...

Reviews: