25
WEEKLY MAINTENANCE
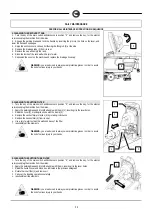
1. CLEANING THE SQUEEGEE TUBE
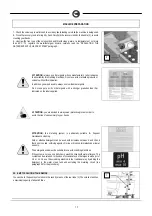
Every week, or whenever suction seems to be unsatisfactory, check the squeegee tube is not obstructed.
To clean it, proceed as follows:
1.
Turn the main switch key anticlockwise to position "0" and remove the key, for the electric versions
unplug the machine from the mains.
2.
Apply the parking brake and block the handle with the pin, inserting it in the lever holes.
3.
Lower the base with the pedal at the rear of the machine
4.
Lower the squeegee by means of the lever at the rear of the machine.
5.
remove the tube from the sleeve on the squeegee
6.
Check the recovery tank is empty (if necessary, empty it).
7.
Open the recovery tank by means of the handle on the side.
8.
Remove the other end of the tube (1) from the rubber-holder connector (2) of the recovery tank
9.
wash the inside of the tube with a jet of water (from the tank side)
10.
reassemble the tube
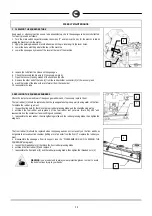
2. REPLACING THE SQUEEGEE RUBBERS
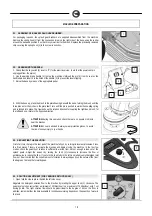
Check the state of wear and tear of the squeegee rubbers and, if necessary, replace them.
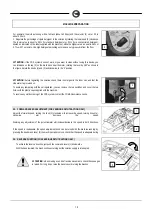
The rear rubber (1) should be replaced when the squeegee fails to pick up well, leaving water on the floor.
To replace the rubber, you must:
1.
loosen the wing nuts (2) that block the rear rubber-pressing blade and the strengthening profile
2.
unthread the rear rubber and replace it (if the rear rubber isn't yet worn, rotate it by 180° and
reassemble it so the contact surface is still in good condition)
3.
reassemble the rear rubber, the strengthening profile and the rubber-pressing blade, then tighten the
wing nuts
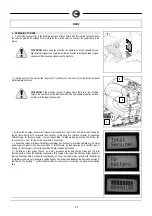
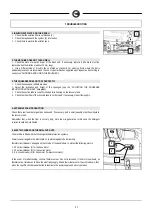
The front rubber (3) should be replaced when the squeegee does not rest evenly on the floor and does
not generate a closed suction chamber (letting a lot of air enter from the front). To replace the rubber, you
must:
4.
disassemble the squeegee from its support (see the “DISASSEMBLING AND CLEANING THE
SQUEEGEE” paragraph)
5.
loosen the threaded nuts (4) that block the front rubber-pressing blade
6.
unthread the front rubber (3) and replace it
7.
reassemble the front rubber (3) and the rubber-pressing blade, then tighten the threaded nuts (4)
WARNING: you are advised to always wear protective gloves in order to avoid
the risk of serious injury to your hands
1
2
1
2
3
4


