Section 11 - Installation of Car Seat in Vehicle (continued)
37
Adjust Base installation angle to center Bubble on the black line
for infant’s weight. To adjust see “Adjusting Base for Proper Car Seat
Recline” section.
Once Bubble is centered on the black line for infant’s weight,
proceed with installation.
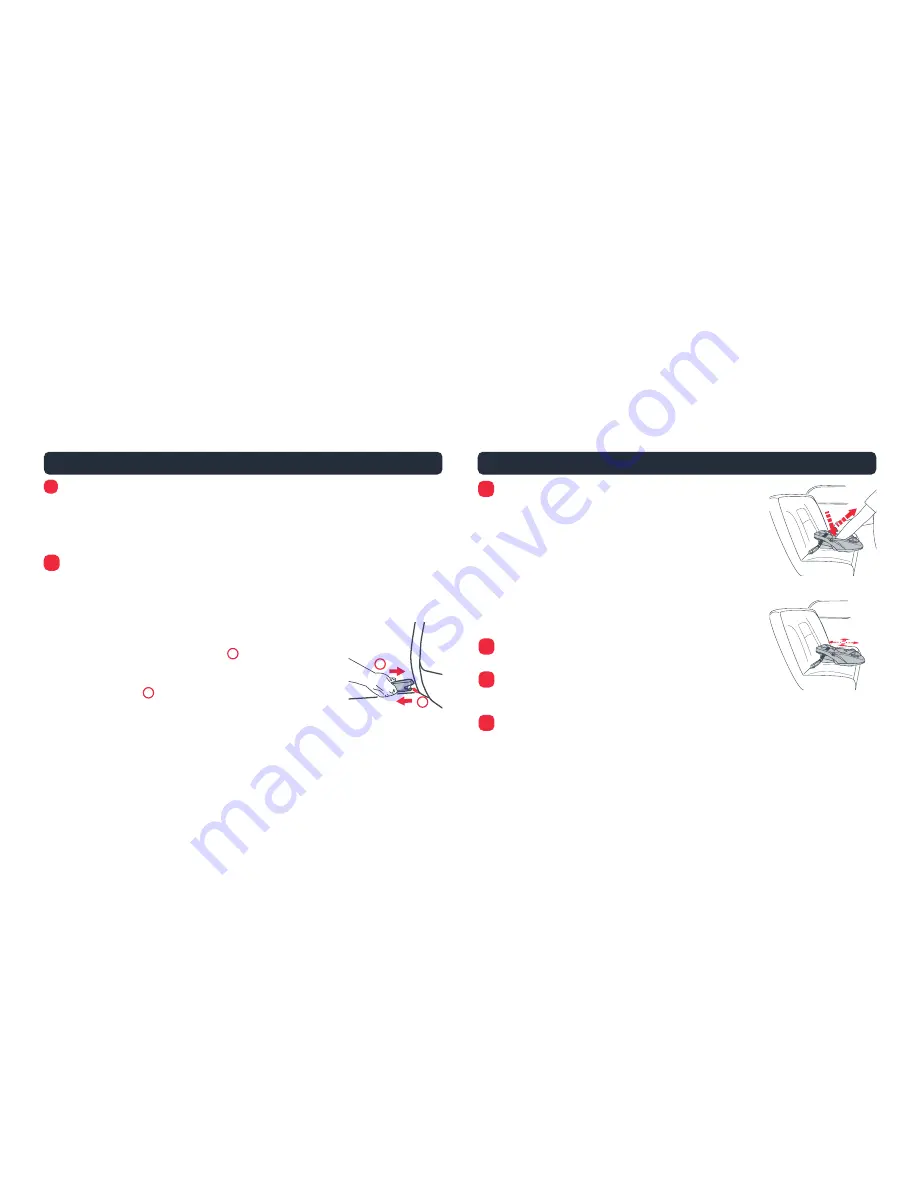
Connect Lower Anchor Connectors to vehicle lower anchors:
- Position red release button of Push-On Connector
facing away from Base and wording on back side
of connector facing Base. If connector is not in
this position, turn connector over.
- Position the slot of the Push-On Connector onto
the vehicle anchorage. Push connector in to lock
onto the vehicle anchorage
(fig. j)
. You should
hear a click.
- Pull on connector to be sure it is locked onto the
anchorage .
- Repeat for connector on opposite side.
9
10
(fig. j)
1
2
1
2
Section 11 - Installation of Car Seat in Vehicle (continued)
38
Tighten lower anchorage belt to secure the base.
Press down in center of Base to depress the
vehicle cushion and pull free end of Lower
Anchor Belt to tighten belt around Base
(fig. k)
.
Check for secure installation. Pull Base front
to back and left to right to check for secure
installation
(fig. m)
. LATCH belt MUST stay
tight.
If LATCH belt does not stay tight or Base
cannot be securely installed, try a different
LATCH location or use the vehicle’s seat
belt to secure the Base.
Attach car seat to Base. Keep handle up
in carry position.
Lift car seat to ensure it is properly attached
to Base (see “Attachment of Car Seat to Base”
section.
Recheck recline of car seat. Adjust if necessary
(see section 11a “Adjusting Base for Proper Car Seat Recline”).
(fig. m)
(fig. k)
11
12
13
14


