ISTRUZIONI ORIGINALI
ISTRUZIONI ORIGINALI
10
TR 420
5555555
5505555
400
5050050
400
Talvolta non sono necessari fori nel
distanziatore poiché
l
’
intero PCD si trova
all
’
interno del distanziatore.
Attenzione: Gli adattatori sono realizzati in
ghisa, non in alluminio o acciaio come le ruote.
Non sono compatibili con l
’
utilizzo di avvitatore
ad impulso.
Non usate un avvitatore per fissare
l
’
adattatore. Da 20 a 30 avvitamenti manuali
sono sufficienti per fissare l
’
adattatore al
veicolo. Una coppia eccessiva causata da
avvitatore danneggia l
’
adattatore. La garanzia
non copre un uso scorretto.
SECONDO PASSO: FISSAGGIO DEL
TORNIO
(1 minuto)
a)
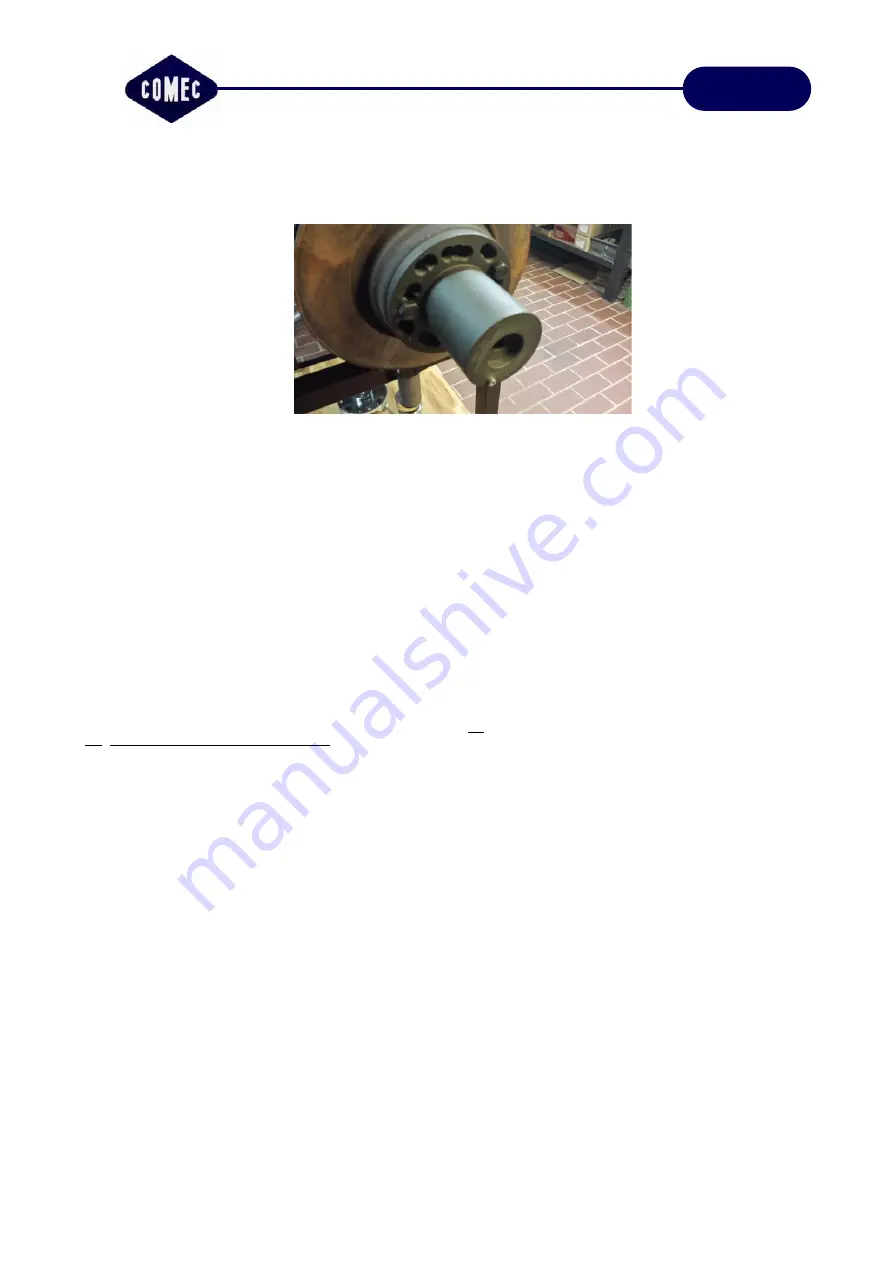
Montate il tornio all
’
adattatore
Svitate la testa di taglio in modo che gli utensili
non tocchino il disco del freno durante il
montaggio.
Ruotate poi la macchina sul posto e regolatela
all
’
adattatore. Il carrello può
essere spostato
verso l
’
alto o verso il basso, rendendo così
possibili diverse altezze.
Il piccolo perno di centraggio sul davanti
dell
’
adattatore va inserito in uno dei sei fori
della flangia di regolazione girevole. Ruotate la
manopola di montaggio e avvitate saldamente
l
’
asse centrale della macchina all
’
adattatore,
fissate saldamente il tornio al veicolo.
Warning: Adapters are made of cast iron, not
aluminium or steel as wheels.
They are not suitable for the use of impact
wrench. Do not use any impact wrenches to
tighten the adapter. 20 to 30 Nm hand-tighten
are enough to secure the adapter to the vehicle.
Do not use any impact wrench to tighten the
nuts. An excessive torque caused by impact
wrench damage the adapter. The warranty does
not cover improper use.
STEP 2: Securing the lathe (1 minute)
a)
Fit the lathe to the adapter
Unscrew the cutter head, so that the cutting tips
do not come in contact with the brake disc
during installation.
Than, roll the machine and adjust it to the
adapter. The trolly can be moved up and down
allowing different heights. The little dowel pin on
the front side of the adapter fits into one of the
6 holes of the runout adjustment flange.
Turn the fastening button and screw the central
axis of the machine on the adapter tightly, than,
secure the lathe to the vehicle.
Summary of Contents for TR 420
Page 21: ...ISTRUZIONI ORIGINALI ISTRUZIONI ORIGINALI 21 TR 420 505400 ...
Page 22: ......


