background image


8


IE-COM-D0221-05


Operation of the device 


Switching ON and OFF the device 


Connect  the  two  external  probes  to  the  connectors  T1,  T2  before 
switching  ON  the  instrument.  Switch  ON  the  instrument  by  pressing 
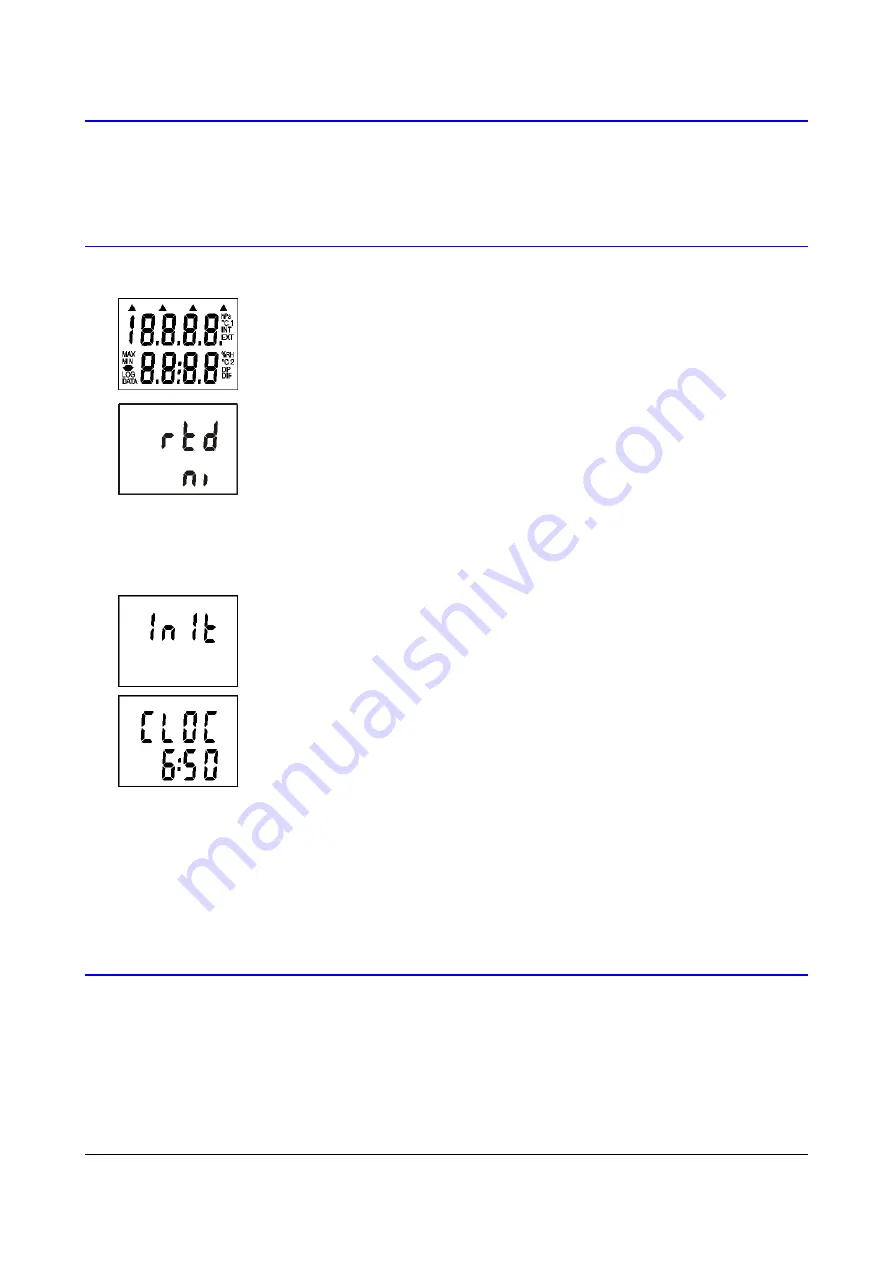
ON/OFF key. After switching ON the instrument all symbols on the LCD 
are displayed. If the ON/OFF key is being held pressed, all LCD symbols 
are displayed till the key is released.  


Then  actual  selected  sensor  type  is  displayed  -  symbols 

ni

  for  sensor 

Ni1000/6180ppm  or 

Pt

  for  sensor  Pt1000/3850ppm.  If  setting  of  the 

instrument  does  not  match  the  connected  RTD  probe  type,  displayed 
temperature readings are not correct and it is necessary to set instrument 
for connected probe type from the PC program. 


In  usual  operation  instrument  then  starts  the  measurement  mode  and 
actual  measured  values  are  displayed.  If  instrument  is  ON,  do  not 
disconnect or connect the probe to prevent storing of incorrect value to 
minimum and maximum memory. 


If  a  voltage  drop  below  critical  limit  occurred  since  last  adjustment  of 
internal real time clock or battery disconnection longer than approximately 
1  min,  new  instrument  initialization  is  performed  (reading  INIT  could  be 
displayed up to 12 s !). 


After  initialization is finished instrument starts to display  internal time to 
warn to incorrect internal time. New time adjustment is performed by the 
computer. Press MENU key to switch instrument to actual measurement 
mode. 


It is possible to switch OFF the instrument anytime, all instrument setting 
is  kept  saved.  If  automatic  logging  was  active  before  instrument  is 
switched OFF, logging will continue with the same parameters after new 
switching ON.  


Displaying of actual measured values 


In  this  mode  is  instrument  anytime  after  switching  ON.  It  is  possible  to 
enter this mode from other modes by pressing or by repeating pressing of 
MENU key. If the external probe is not connected properly or probe is out 
of measuring range, reading -- is displayed on the upper LCD line.  


Summary of Contents for Commeter D0221

Page 1: ...www cometsystem com Instruction manual Commeter D0221 Dual channel thermometer and datalogger for RTD Pt1000 and Ni1000 6180ppm probes...

Page 2: ...alues and minimum a maximum memory 9 Functions and settings available from menu 9 Alarm indication and setting 11 LOGGING MODE 13 Logging start from device keyboard 13 Logging start with clearing memo...

Page 3: ...nd it is possible to store values into the non volatile memory Then it is possible to transfer data to a personal computer Instrument compares measured values of temperature with two adjustable levels...

Page 4: ...Pt1000 3850 The device with Ni1000 6180 probes Measuring range 50 to 250 C with the limitation according to the used probe Resolution 0 1 C Accuracy 0 4 C from 50 to 100 C 0 5 from reading from 100 t...

Page 5: ...ation without ac dc adapter plugged Accumulator works only as a standby source in case of power mains failure Average current consumption 0 08 to 0 3 mA depending on operation mode ___________________...

Page 6: ...Backlighting turns off automatically 10 seconds after the last keystroke Protection IP20 Dimensions 146 x 71 x 27 mm Weight Approximately 150 g including battery without probe Operation conditions Am...

Page 7: ...IE COM D0221 05 7 Dimensions...

Page 8: ...ent storing of incorrect value to minimum and maximum memory If a voltage drop below critical limit occurred since last adjustment of internal real time clock or battery disconnection longer than appr...

Page 9: ...value from MENU see below Each pressing of the HOLD key in the default mode causes value stored in HOLD memory is replaced with actual temperature Switched ON instrument permanently updates minimum an...

Page 10: ...witched on On or switched off OFF Press ENTER key to change actual setting Notice if the battery voltage is low audio indication is out of operation to reduce current consumption independently on this...

Page 11: ...ch pressing of ENTER key causes displaying information on storing interval actual logging mode MODE memory occupation MEMO in automatic logging mode memory occupation in is displayed in manual mode th...

Page 12: ...pressing DISPLAY key Press ENTER key to confirm new upper limit Then you are offered to set alarm of other input value here temperature of channel 2 The procedure is the same as the above temperature...

Page 13: ...dicated by a short beep and position of the record in memory is displayed reading MEMO with the record serial number In this mode it is possible to store max 1000 records It is possible to select one...

Page 14: ...indicated with reading LOG on display If memory is filled over 90 symbol LOG is blinking only in automatic logging Logging start with clearing memory and logging mode selection It is possible to clear...

Page 15: ...de is selected after confirmation by ENTER key logging is active In automatic logging mode i e cyclic or non cyclic last applied storing interval is offered to confirm or modify See above procedure Lo...

Page 16: ...protocol of measurement including instrument serial number and a table of logged values with date and time After disconnection of the communication cable reading PC disappears and instrument is in the...

Page 17: ...t for automatic Installator run If Installator is not run automatically depends on setting of operating system find in file browser file CDSetup exe in main directory of the installation CD and click...

Page 18: ...le of measured values occurs Detailed information on file is available from context menu menu occurs after clicking right mouse button on the position of table In context menu function export to text...

Page 19: ...cessary to replace battery with instrument switched OFF otherwise internal time and setting of d REF and AUDI from menu selections and data in memory HOLD MIN and MAX will be lost For the same reason...

Page 20: ...20 IE COM D0221 05 Technical support and service Technical support and service is provided by distributor Contact is included in warranty certificate...

Reviews: