background image

Do NOT install damaged, incomplete, or
substitute components.

Inspect stove and components for damage.
Damaged parts may impair safe operation.

Report damaged parts to dealer or manufacturer.

Safety Equipment  (Recommended for all installation and maintenance steps)

Pellet Vent Pipe
Must be an approved 3" or 4" diameter Type "L" or "PL" vent.  Use 4" diameter vent if flue height is over 12 ft.
or if installation is over 5,000ft above sea level.

7

comfortbilt.net

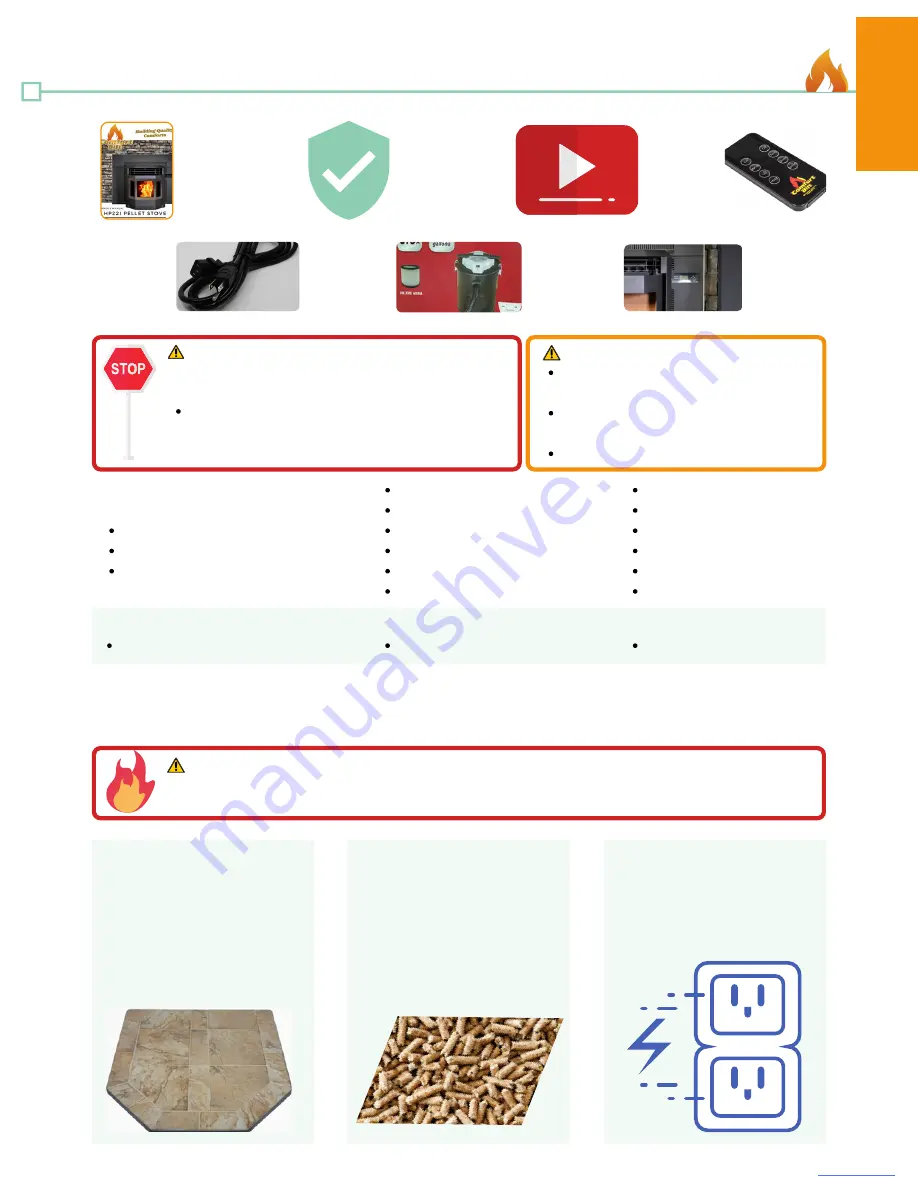
What's Included

Owner's Manual

Power Cord

Shroud with Control Panel

WARNING!  

CAUTION!

Risk of cuts, abrasions, or flying
debris. 
Wear protective gloves and safety
glasses during installation.
Metal edges may be sharp.

What You May Need

High temperature silicone (500°F+)
Screwdriver
Allen wrench set

Tools & Supplies

Tape measure
Framing square
Reciprocating saw
Electric drill & bits
Caulking gun
Level

Plumb Line
Stud Finder
Utility knife 
Pliers
Flashlight
Hammer

WARNING!  

NO OTHER vent component may be used.  Substitute or damaged vent components may
impair safe operation.

Floor Protection
Non-combustible material
(such as a masonry hearth or
hearth pad) is required
underneath your stove.

Surge Protector
Protect the electrical
components of your stove by
using a surge protector.

Pellet Fuel
Use only wood pellets in your
stove.  For best performance,
use premium, low-ash pellets
(<1%), a length of 1" or less,
and avoid excess dust and
broken pieces in the bottom of
the bag.

Remote Control

1 Year Warranty

Ash Vacuum

Online Guides and

Videos

Getting Started

Fire Risk:  

Safety glasses

Close-toed shoes

Gloves

Getting Started

Summary of Contents for HP22i

Page 1: ...ter and save for future reference Failure to follow these instructions could result in property damage bodily injury or even death Contact local building or fire officials about restrictions and installation inspection requirements in your area WARNING Building Quality Building Quality Building Quality Comforts Comforts Comforts ...

Page 2: ......

Page 3: ...or approved Disable safety switches Do not touch glass until it is cooled NEVER allow children to touch glass or door Keep children away if you expect that children may come into contact with the stove we recommend a barrier such as a decorative screen CAREFULLY SUPERVISE children in the same room as the stove Alert children and adults to hazards of high temperatures NOTICE FIRE RISK SMG Hearth an...

Page 4: ...nd convection fans will continue to run until the stove cools Over Fire Protection If the stove is being over fired or burning too hot the high limit switches will automatically shut down the stove to avoid damage to other components If the temperature on the hopper reaches 197 F 92 C the auger will automatically stop and the stove will shut down The exhaust fan will continue to run until the proo...

Page 5: ...nation Clearances Venting Troubleshooting Video Total Power Loss Low Temperature Alert High Temperature Alert Failure to Ignite Lazy Burn Pellet Buildup Safety Key Additional Warnings Getting Familiar with Your Stove What s Included Maintenance Cleaning Side Panel Access BTU Efficiency Specifications Electrical Rating Glass Specifications Warranty Coverage and Limitations TableofContents GettingSt...

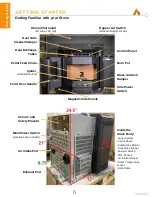
Page 6: ...ed Getting Familiar with your Stove Control Panel Pellet Feed Chute Burn Pot Heat Exchange Tubes Heat Tube Cleaner Scraper Inside the Stove Body Auger System Circuit Board Combustion Blower Convection Blower Vacuum Switch POF Sensors Air Intake Damper Room Temperature sensor Data Cable Exhaust Port Air Intake Port Glass Airwash Damper Shroud Surround 43 wide x 32 tall Side Power Switch GettingStar...

Page 7: ...eed High temperature silicone 500 F Screwdriver Allen wrench set Tools Supplies Tape measure Framing square Reciprocating saw Electric drill bits Caulking gun Level Plumb Line Stud Finder Utility knife Pliers Flashlight Hammer WARNING NO OTHER vent component may be used Substitute or damaged vent components may impair safe operation Floor Protection Non combustible material such as a masonry heart...

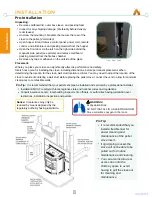
Page 8: ...let vent pipe be installed and serviced by a professional installer Placement Where you place your stove can significantly affect its performance and safety Sketch out a plan for installing the stove including dimensions before permanent placement When determining the location for the stove wall stud location is critical You may need to adjust the location of the stove to avoid encountering a wall...

Page 9: ...are free of cracks loose mortar creosote deposits blockage or other signs of deterioration If necessary have any repair work done by a qualified professional before installing the heater Bend down the flanges If you have never done this before it might be a good idea to make a cardboard pattern and test it first Fasten this flue cover in position as high as possible with two masonry screws per sid...

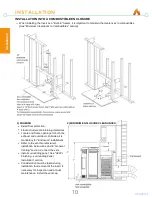
Page 10: ...and frame openings for both the exhaust and outside air Outside air is mandatory for Enclosure installations Refer to the vent manufacturer s installation instructions and to General Venting section Connect the vent Install surrounding panel See HP22I Finishing surrounding Panel Installation section Consideration must be taken during installation that removal of the insert is necessary for inspect...

Page 11: ...URE CONTINUED 3 MINIMUM CLEARANCES TO COMBUSTIBLES Side wall to heater 8 Mantel to top of heater 8 Top facing to heater 6 3 8 Side facing to heater 6 Floor protection 6 Floor Protection Minimum 6 in front of door and to either side 4 MINIMUM MANTEL CLEARANCES Installation ...

Page 12: ...tove from the top as shown Secure the panel using the six M6x20 screws Slide the surrounding panel assembly down over the insert body Connect the cable to the control panel Fish the room temperature sensor probe out into the room through the shroud via the provided conduit Conduit for temperature sensor probe Installation ...

Page 13: ...r window that opens C Minimum 24 clearance from any adjacent building D Minimum 7 clearance above any grade when adjacent to public walkways E Minimum 24 clearance above any grass plants or other combustible materials F Minimum 36 clearance from any forced air intake of another appliance G Minimum 24 clearance below eaves or overhangs H Minimum 24 clearance horizontally from combustible wall X Mus...

Page 14: ...ic cleaning and maintenance Secure exhaust venting system to the Stove per the pipe manufacturer s instructions Install termination cap Confirm all required Stove clearances to combustibles The vent must have a support bracket every 5 of pellet vent when on the exterior of the structure 14 comfortbilt net Installation Venting CAUTION Do NOT connect to any air distribution duct or system Do NOT ins...

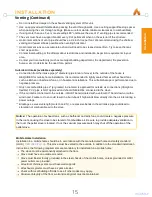
Page 15: ...cordance with the manufactured home and safety standard HUD CFR 3280 Part 24 This stove must be vented to the outside In addition to the standard installation instructions the following requirements are mandatory for installation in a mobile home Do not install flue damper in the exhaust venting system of this unit Use an approved wall thimble when passing the vent through walls Use a ceiling supp...

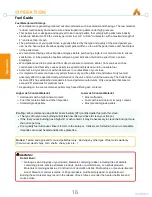
Page 16: ...s established standards for wood pellet manufacturers Only use pellets that meet or exceed PFI standards for premium fuels Depending on the source material pellets may have differing ash contents Fuel Material and Storage The type of fuel you are burning will dictate how often you have to clean your fire pot If the fuel you are burning has a high dirt or ash content it may be necessary to clean th...

Page 17: ...ushes pellets up a chute located in the hopper The pellets will then turn and fall through another chute into the burn pot Your stove is equipped with an automatic ignition system that should ignite the fuel within 5 minutes of displaying Igniting As pellets fill the burn pot and ignite outside air is drawn through the fuel and heated during the combustion process which is then pulled across the h...

Page 18: ...ion list below Button 6 Timer use scroll up and down to change value Button 11 Feeding On Used to prime the auger Button 9 Stop Feeding Used when auger priming is finished Button 4 Child Lock Hold button 4 for three seconds to activate child lock Hold button 9 for three seconds to disengage child lock 8 Scroll up Button Allows you to scroll up to choose items in the menu 9 Exit Button Takes you ou...

Page 19: ...Temperature Displays the temperature that is being read by the room temperature sensor wire Current Time Period In weekly mode this displays the current time setting Day and Time Displays the day of the week and current time ECO Mode Indicator Indicates when ECO is currently active Safe Mode Indicator If the vacuum or limit switches are being bypassed the stove will operate in Safe Mode On Off Ind...

Page 20: ... that no damage or seizing occurred during transport There should be little resistance and the fan blades will spin like a skate wheel Plug Unit In Plug the power cable into the main power switch assembly block at the back of the stove and switch the power switches to the On position is on 0 is off There are 2 switches one at the back of the stove and another on the lower right hand side of the fr...

Page 21: ...lls below the call to temperature the stove s heat power level indicator will automatically rise to five When the temperature has been reached and maintained for about a minute the heat power level will return to one and it will stay there until more heat is needed The desired or Call to temperature has a range of 61 82 F 16 28 C NOTE In temperature mode the stove will not shut off or go into stan...

Page 22: ...n will engage During operation the stove may display Cleaning periodically This is an automatic cleaning that the stove will perform The stove will continue operation until something interrupts that operation Low Temperature alerts due to low pellets in hopper for example After you have chosen the desired operation mode for your stove press the ON OFF button to start the stove s ignite cycle 22 co...

Page 23: ...up to four on off cycles per day 3 Set Combustion This menu allows you to alter the stove s Exhaust voltages and Blower voltages for each Heating or Ignition level Feed rates are factory set and should not be altered 4 Set Ash Cleaning Cycle This menu allows you to alter the stove s automatic ash cleaning schedule for each Heating level 5 Set ECO This menu lets you to toggle on or off the ECO func...

Page 24: ...p or Down buttons to select the Day you wish to edit and then press Enter again to confirm your selection Press the Down button to move the cursor arrow down to your first program block Press the Enter button to highlight the Ignite On time Hour block press the Up or Down buttons to change the value then press Enter again to confirm and highlight the Ignite On time minute block Use the Up and Down...

Page 25: ...he Voltage block use the Up and Down arrows to adjust the values and then press the Enter button again to confirm The fan will engage while editing the values 1 2 3 Most times this menu is password protected to prevent creating a potentially dangerous situation Do not change any of these settings without first knowing the risks and speaking to your Dealer or a Comfortbilt technical support represe...

Page 26: ...sired temperature set in the Temp mode When ECO is set to ON and the stove is operating in the Temp mode the stove will go into Fire off mode and shut down when the actual temperature in the house meets or exceeds the desired or call to temperature left side of screen Once the exhaust housing is cool and the actual temperature falls below the desired temperature then the stove will automatically r...

Page 27: ...ws you to view some specific information about the stove See information screen on pg 21 1 2 3 9 Set Blower This menu allows the room blower fan to be toggled On or Off This menu is not used for our pellet stoves but for devices that do not use blower fans such as boilers Password protected there is no reason to alter this Setting the Blower to OFF would prevent the stove from being able to transf...

Page 28: ...e hot even when stove surfaces are cool to the touch A protective glove is recommended Maintenance Cleaning Maintenance 28 comfortbilt net WARNING visit https comfortbilt net pages our videos or scan the code Maintenance Cleaning Video Clinkers may remain hot for several minutes after they are pulled from the burn pot Never perform service with power supplied to the unit In order to access many of...

Page 29: ...ve when the stove is off and cool Do NOT touch the knob or vents near it while the stove is running They can get extremely hot to the touch and can cause burns WARNING Remove the burn pot from the cradle and vacuum beneath Be sure to remove any ash buildup in and around the igniter tube Be sure to vacuum out and clean the side ash holding areas to the left and right of the cradle as these will fil...

Page 30: ...placement gasket to ensure a proper fit Run a healthy bead of high temperature caulking around the track and lay the new gasket down inside starting and ending on the hinge side of the door Keeping the slider to the right will open up the damper and allow some room air to be drawn in and gently washed up the inside of the glass to help prevent excess soot buildup on the glass You can close this da...

Page 31: ...s Burned or as Needed In addition to daily and weekly maintenance tasks the exhaust chamber covers should be removed and the entire chamber vacuumed thoroughly once every ton 50 bags of pellets burned or more often depending on pellet quality Once you have located the chamber covers you will then remove them by unscrewing the wing nuts Allen screws and pulling the plate back There is a gasket behi...

Page 32: ...tray The active fuse is in the saddle while the backup fuse is in the plastic sleeve Solutions Problem Alarm Low Temperature Check Hopper Burn Pot Message When the low temp alarm occurs it means that the computer has lost communication to the proof of fire switch POF This usually happens because the fire got too small or went out to embers A handful of reasons can account for this happening but th...

Page 33: ...ts are feeding and being delivered to the burn pot see feeder troubleshooting video Ensure combustion fan is engaging and the there is sufficient airflow being drawn through the stove at the air intake pipe Ensure that the front door and ash pan drawer are properly sealed Solutions Problem Lazy or Dirty Flame Buildup of Pellets in the Pot Dark Black Smoke or Ash If you see a buildup of pellets and...

Page 34: ...crors Electrical Rating On High HP22 115VAC 60Hz Start 4 3 Amps Run 1 8 Amps Room Blower 115VAC 60Hz 0 70 Amps Combustion Blower 115VAC 60Hz 0 55 Amps Auger Motor 115VAC 60Hz 0 55 Amps Igniter 115VAC 60Hz 3 2 Amps Any generator UPS or battery backup system must have a Pure Sine Wave power signature Partial or modified sine waves can damage electronics This manual describes the installation and ope...

Page 35: ...t parts are covered for remainder of original or extended warranty period or 90 days whichever is longer 90 Days 5 Years 1 Year Warranty does not cover damage or breakage due to misuse improper handling or modifications There is no warranty on the paint glass fire brick or any gaskets or against damage caused from corrosion There is no expressed or implied performance warranty on Comfortbilt stove...

Reviews: