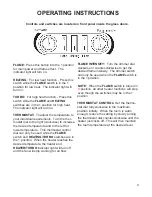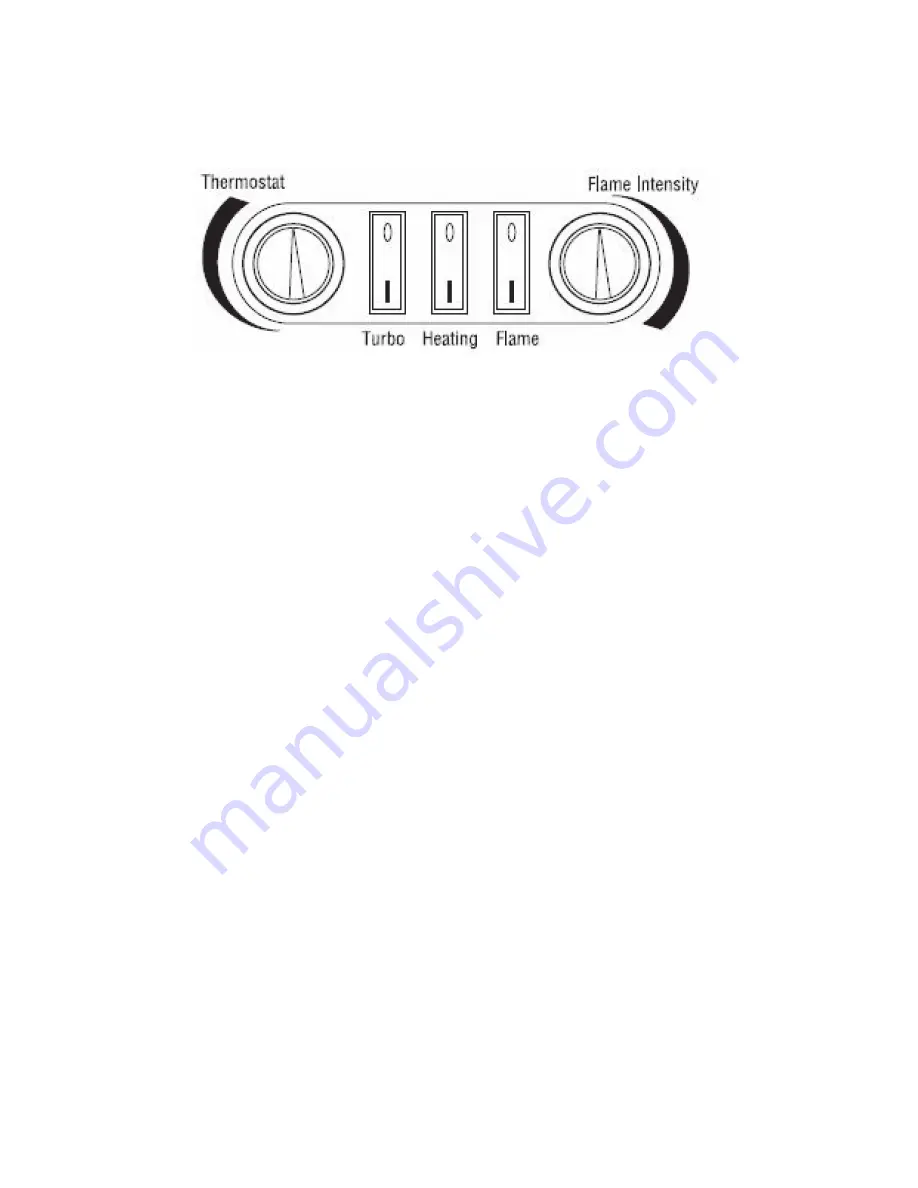
FLAME:
Press this button into the 1 position
for main power and flame effect. The
indicator light will turn on.
HEATING
: For low heat function - Press this
switch while the
FLAME
switch is in the 1
position for low heat. The indicator light will
turn on.
TURBO:
For high heat function - Press this
switch while the
FLAME
and
HEATING
switches are in the 1 position for high heat.
The indicator light will turn on.
THERMOSTAT:
To adjust the temperature to
your individual requirements. Turn the ther-
mostat dial to the right (clockwise) to increase
the desired temperature and to the left for
lower temperature. This thermostat control
dial can only be used while the
FLAME
switch and
HEATING/TURBO
switches are in
the 1 position. When the heater reaches the
desired temperature, the heater and
HEATER/TURBO
indicator light will turn off
and the fan will stop working for air flow.
FLAME INTENSITY:
Turn the dimmer dial
clockwise or counter-clockwise to get the
desired flame intensity. The dimmer switch
can only be used when the
FLAME
switch is
in the 1 position.
NOTE:
When the
FLAME
switch is turned in
O
position, all other heater functions will stop
even though the switches may be in the 1
position.
THERMOSTAT CONTROL:
Set the thermo-
stat dial fully clockwise to the maximum
position initially. When the room is warm
enough, reduce the setting by slowly turning
the thermostat dial counter-clockwise until the
heater just clicks off. This will then maintain
the room temperature at the desired level.
4
OPERATING INSTRUCTIONS
Controls and switches are located on front panel inside the glass doors.


