background image

6. HEATING CABLE INsTALLATION

• 

Fix the mounting tape to the floor.

• 

Lay the heating cable and fix it on the tape keeping the distance between the 

loops (C-C).

• 

Distance C-C = heated area (m

2

)/ heating cable length (m).

• 

Put the sensor pipe into channel and seal its end. The end of pipe has to be 

between the cable loops, not nearer than 30 cm from the edge of heated area.

ATTENTION! Heating cable (RED) cannot be shortened, crossed or touch itself.

7

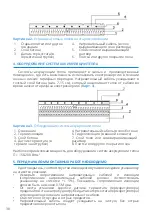
Picture 4

Installation tape is mounted onto clean 

surface (concrete) within 0.5 meter intervals.

Cable  is  installed  when  fixing  it  on  the 

installation tape in distance C-C between 

cable loops. 

Picture 5

Minimum bending radius has to be 8 

diameters of the cable.

Heating  cable  has  to  be  fixed  to  the 

installation tape using hooks.

Picture 6

Picture 7

Summary of Contents for CTAV-10

Page 1: ...Comfort Heat UAB Laisves av 123 LT 06118 Vilnius Lithuania info comfortheat eu www comfortheat eu...

Page 2: ...ELECTRIC HEATING CABLE CTAV 10 18 INSTALLATION INSTRUCTION...

Page 3: ...Contents EN 3 LT 11 LV 19 NO 27 RU 35 FI 43 EE 51 2...

Page 4: ...ELECTRIC HEATING CABLE CTAV 10 CTAV 18 EN 3...

Page 5: ...CTAV 18 250 300W m Heating of external stairs and staircases 1 TECHNICAL DATA Voltage 230V AC 50 60Hz Max power 10W m 18W m Conductor insulation thickness Fluorpolymere FEP 0 3mm Protection screen 14...

Page 6: ...s 25 mm The mounting tape is laid in 50 100 cm distance The consumption of tape is 1 2 m m2 Tape is fixed by nails or glued 3 Floor heating base arrangement If you want to have the floor giving comfor...

Page 7: ...3 Accumulated floor heating installation 1 Base 2 Thermo insulation 3 Concrete 4 Thermostat sensor in sealed pipe 4 Heating cable in concrete 6 Damp protection in bathroom 7 Glue or sel levelling com...

Page 8: ...the cable loops not nearer than 30 cm from the edge of heated area Attention Heating cable RED cannot be shortened crossed or touch itself 7 Picture 4 Installation tape is mounted onto clean surface...

Page 9: ...ors in protective pipes to enable easy change of them 7 INSTALLATION OF FROST PROTECTION SYSTEM IN STAIRCASES Ice and snow melting system can be used as effective help against icy and slippery stairs...

Page 10: ...rs Warranty is valid if following documents are presented 1 Warranty coupon filled correctly 2 Document of purchase invoice or receipt 3 The obligation of Comfort Heat will be to repair or supply a ne...

Page 11: ...h of heating cable m Power W Selling date year month day Salesman name surname signature FILLED BY BUYER FILLED DURING INSTALLATION Resistance of heating cables before installation Resistance of insul...

Page 12: ...35 V 10 CTAV 18 RU...

Page 13: ...36 V 10 18 CTAV 18 100 150 CTAV 18 100 120 CTAV 10 100 C CTAV 18 250 300 1 230 AC 50 60 10 18 FEP 0 3 14 1 2 0 3 AIPEL 0 8 CT V 4 6 IP 67 8 70 o C IEC 60800 1 2 3...

Page 14: ...2 35 V 18 18 c c 5 15 V 18 V 10 V 18 V 10 25 50 100 1 2 2 3 1 2 1 2 1 1 2 3 4 5 6 7 8 37...

Page 15: ...2 1 2 3 4 5 6 4 7 15 3 3 1 2 3 4 4 6 7 8 e 150 200 2 5 5 0 5 M 38...

Page 16: ...6 C C 30 39 4 0 5 C C 5 8 6 7...

Page 17: ...40 30 50 7 250 300 2 5 c c 7 4 a 1 2 8...

Page 18: ...41 8 III 9 20 1 2 3 Comfort Heat Comfort Heat Comfort Heat Comfort Heat...

Page 19: ...42 CTAV 10 CTAV 18 M M Comfort Heat UAB Laisv s pr 123 LT 06118 Vilnius Lietuva info comfortheat eu www comfortheat eu...

Page 20: ...59...
Reviews: