background image

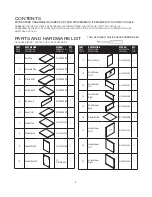
B x 4

A x 4

9

8

A

B

A

A

A

10

21

31

D x 2

4

D

21

6

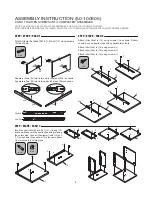
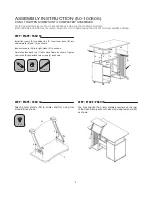
ASSEMBLY INSTRUCTION (50-100505)

DO NOT TIGHTEN SCREWS UNTIL COMPLETELY ASSEMBLED

NOTICE DE MONTAGE (50-100505) NE PAS SERRER LES VIS AVANT LE MONTAGE COMPLET
INSTRUCCIONES DE MONTAJE (50-100505) NO AJUSTE LOS TORNILLOS HASTA QUE ESTÉ COMPLETAMENTE ARMADO

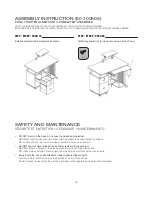
STEP / ÉTAPE / PASO 8

Attach leg caps (31) to right stand (21) as shown.

STEP / ÉTAPE / PASO 7

Insert cam locks (B) into (9) and (10) as shown.

Attach (9) and (10) to cabinet base (8) using cams (A) as 
shown. Turn cam locks to lock into place.

STEP / ÉTAPE / PASO 9

Attach bottom shelf (4) to right stand (21) using screws (D) 
as shown.

Summary of Contents for 50-100505

Page 1: ... MODEL 50 100505 For fastest service please visit our website at www comfortproducts net support e mail customerservice comfortproducts net Keep your sales receipt as documentation of your ownership CUSTOMER SERVICE SUPPLIER CODE CH 50 100505 ...

Page 2: ...ck 51 100505CBK 1 12 Small Drawer Front 51 100505SDF 1 13 Small Drawer Left 51 100505SDL 1 14 Small Drawer Right 51 100505SDR 1 15 Small Drawer Back 51 100505SDB 1 16 Drawer Bottom 51 100505DB 2 17 Large Drawer Front 51 100505LDF 1 18 Large Drawer Left 51 100505LDL 1 19 Large Drawer Right 51 100505LDR 1 CONTENTS EXTRA SPARE HARDWARE INCLUDED FOR YOUR CONVENIENCE ITEMS ARE NOT SHOWN TO SCALE CONTEN...

Page 3: ...ON DESCRIPCIÓN STOCK RÉFÉRENCE CÓDIGO QTY QTÉ CANT 32 Disk 51 1005DK 4 33 Printer Stands 51 1005PST 1 34a 34b Drawer Rollers 51 1005LR34A 51 1005LR34B 2 2 35a 35b Drawer Rollers 51 1005RR35A 51 1005RR35B 2 2 A Cam CAM 16 B Cam Lock CAMLOCK 16 C M5 x 60 M5X60MM 12 D M5 x 70 M5X70MM 2 2 E M6 x 30 M6X30MM 3 F M6 x 40 M6X40MM G M4 x 18 M4x18MM 4 H M4 x 35 M4x35MM 8 I M4 x 12 M4x12MM 36 J M6 x 80 M6X80...

Page 4: ...is facing the outer holes Connect the drawer fronts 12 and 17 using cams A as shown Turn the cams about 1 2 clockwise to lock into place STEP ÉTAPE PASO 1 Attach drawer handles 28 to 12 and 17 using screws G as shown STEP ÉTAPE PASO 2 Attach roller 34b to 13 using screws I as shown Rollers should be on opposite sides of long horizontal cutouts Attach roller 35b to 14 using screws I Attach roller 3...

Page 5: ...OS TORNILLOS HASTA QUE ESTÉ COMPLETAMENTE ARMADO STEP ÉTAPE PASO 5 Attach casters 29 to cabinet base 8 using screws I as shown STEP ÉTAPE PASO 6 Attach rollers 34a to cabinet wall 9 using screws I as shown Attach rollers 35a to cabinet wall 10 using screws I as shown STEP ÉTAPE PASO 4 Insert drawer bottom 16 into small drawer as shown Attach drawer back 15 using screws H as shown Insert drawer bot...

Page 6: ...COMPLET INSTRUCCIONES DE MONTAJE 50 100505 NO AJUSTE LOS TORNILLOS HASTA QUE ESTÉ COMPLETAMENTE ARMADO STEP ÉTAPE PASO 8 Attach leg caps 31 to right stand 21 as shown STEP ÉTAPE PASO 7 Insert cam locks B into 9 and 10 as shown Attach 9 and 10 to cabinet base 8 using cams A as shown Turn cam locks to lock into place STEP ÉTAPE PASO 9 Attach bottom shelf 4 to right stand 21 using screws D as shown ...

Page 7: ... SERRER LES VIS AVANT LE MONTAGE COMPLET INSTRUCCIONES DE MONTAJE 50 100505 NO AJUSTE LOS TORNILLOS HASTA QUE ESTÉ COMPLETAMENTE ARMADO STEP ÉTAPE PASO 10 Attach brace 23 to 4 using screws E as shown STEP ÉTAPE PASO 12 Connect back board 5 and book shelf 6 to frame using eight screws C and one screw E as shown STEP ÉTAPE PASO 11 Attach rear bar 22 using two screws F as shown ...

Page 8: ...D NOTICE DE MONTAGE 50 100505 NE PAS SERRER LES VIS AVANT LE MONTAGE COMPLET INSTRUCCIONES DE MONTAJE 50 100505 NO AJUSTE LOS TORNILLOS HASTA QUE ESTÉ COMPLETAMENTE ARMADO STEP ÉTAPE PASO 13 Attach cabinet back 11 using four screws C as shown STEP ÉTAPE PASO 14 Turn desk top 1 upside down Attach 24 and 25 using eight screws K as shown NOTE make sure the position of the rollers on part 24 matches t...

Page 9: ...OMPLET INSTRUCCIONES DE MONTAJE 50 100505 NO AJUSTE LOS TORNILLOS HASTA QUE ESTÉ COMPLETAMENTE ARMADO STEP ÉTAPE PASO 16 Install four cams A to cabinet top 7 Insert cam locks B into cabinet walls 9 and 10 as shown Insert extenders 26 into right stand 21 as shown Carefully place desk top 1 onto desk frame as shown Tighten cam locks B and attach two screws J as shown STEP ÉTAPE PASO 18 You may posit...

Page 10: ...S se mettre debout sur le bureau Ne pas utiliser le bureau comme escabeau NO se pare sobre el escritorio No use el escritorio como una escalera DO NOT use this desk unless all bolts and screws are firmly secured NE PAS utiliser ce bureau si tous les boulons et vis ne sont pas bien serrés NO utilice este escritorio a menos que todos los pernos y tornillos estén bien sujetos Every 6 months check all...

Page 11: ...s causés par un mauvais montage ou démontage défauts se produisant après l achat dus à une modification du produit des dommages intentionnels un incendie une mauvaise utilisation une négligence ou l exposition aux éléments coût de main d oeuvre ou de montage Cette garantie ne couvre pas le coût de transport ou de main d oeuvre Comfort Products ne sera en aucun cas tenu responsable à titre délictue...

Reviews: