⸋
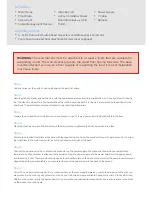
Main Frame
⸋
Front Plate
⸋
Screw Pack
⸋
Cable Management Ties (x4)
⸋
Allen Key (x2)
⸋
4-Way CommBox Power
Board (Includes 4 x USB
Ports)
⸋
Power Supply
⸋
Y Cable
⸋
Remote
Step 1:
Unbox and lay out the parts, checking off against the parts list above.
Step 2
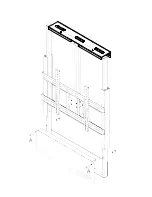
Hold the stand vertically against the wall, with the upper bracket mounting slots against the wall. Use a spirit level to ensure
that the stand is vertical. Mark the hole positions that will be used to attach it to the wall, and also the hole positions for the
floor bolts. The wall bracket must be attached to two load supporting joists.
Step 3
Prepare the wall and floor for the bolts you have chosen to use. This may involve inserting DynaBolts into the floor.
Step 4
Place the stand back in position and screw to the wall and floor, tightening the bolts when all are in place.
Step 5
Position the branded front plate at the base with the logo facing out. Using the provided screws (A), washers and nuts, screw
the front plate to the main frame with the nuts positioned out of sight at the back.
Step 6
Connect the single end of the Y cable to the connector on the power supply. The split ends should be connected to the
remote and to the cable that is attached to the actuator. Plug the power supply into the power board and the power board
into the mains to test. There are mounting pegs on the mounting plate on the back of the stand for the power board, however,
depending on the room available, you may prefer to mount the power board to the back of the screen.
Step 7
A mini PC can be mounted directly to the mounting slots on the rear mounting plates, or given the proximity to the wall, you
may prefer to mount on the key hole slots on the back of the screen, where available. Connect the mini PC to the HDMI and
USB B on the screen, and to the power board. You can use the supplied cable management ties to secure wires to the holes
on the back of the main frame.
Assembly Screws:
⸋
A - M8 x 60mm (x2) button head cap screw and M8 washer (x2) and nut
⸋
Your chosen wall and floor attachment screws (user supplied)
In The Box:
WARNING: The wall bracket must be attached to at least 2 joists that are suitable for
supporting a load. The wall bracket prevents the stand from tipping forwards. The base
must be attached securely to a floor capable of supporting the load. Incorrect installation
may cause injury.


