background image

Page 12

SET UP & USE

CARE AND MAINTENANCE

Store Pizza oven out of direct sunlight and indoors where possible and when storing 

for extended periods of time. The pizza oven should not be exposed to harsh weather 

conditions such as snow, heavy rain and strong winds. 

Wait for the pizza oven to cool completely before moving.

Pizza Baking Stone

1. 

DO NOT use the stone over an open flame. 

2.  Avoid extreme temperature change to the stone. DO NOT place frozen foods on 

a hot stone.

3.  The stone is fragile and can break if bumped or dropped.

4.  The stone is very hot during use and stays hot for a long time after use.

5.  DO NOT cool the stone with water when the stone is hot. 

6.  After cleaning the stone with water, please dry the stone before use. This can be 

done in a conventional oven at 60°C (140°F) for 2 hours.

MAINTENANCE:

1. 

Keep appliance area clear and free from combustible materials, gasoline, and 

other flammable vapors and liquids.

2.  Do not obstruct the flow of combustion and ventilation air.

3.  Keep the ventilation opening(s) of the cylinder enclosure free and clear from 

debris.

4.  Clean appliance, including special surfaces, with recommended cleaning agents, 

if necessary.

5.  Check and clean burner tubes for insects and insect nests. A clogged tube can 

lead to a fire beneath the appliance.

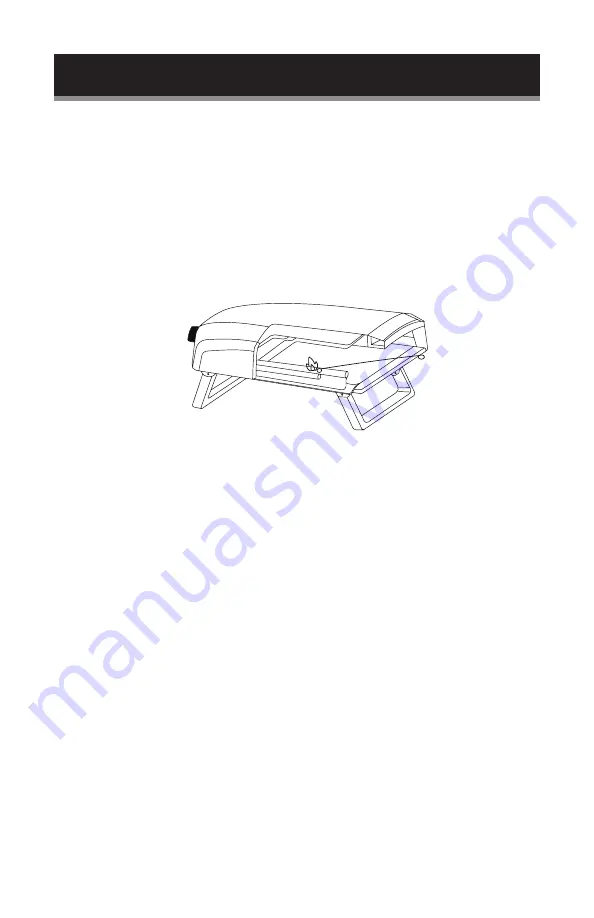
TO LIGHT WITH A MATCH 

1. 

If burner will not light after several attempts using the control knob, the burner 

may be lit with a match.

2.  If you have already attempted to light the burner using the control knob, wait 

few minutes for any gas to dissipate. 

3.  Insert a match into the matchstick holder, ignite the match and insert through 

the oven opening to the burner.

4.  Push and turn the control knob to HI slowly, the burner should ignite 

immediately.

5.  If the burner does not light within seconds, turn the control knob OFF and wait 

for 5 minutes and try again.

Summary of Contents for CHGSPZOV

Page 1: ...operating the appliance Keep them for further reference 2 Record in the space below the SERIAL MODEL NUMBER found on the back or bottom of your appliance and retain this information for future refere...

Page 2: ...from the appliance and immediately call your gas supplier or your fire department WARNING 1 Do not store or use gasoline or other flammable liquids or vapors in the vicinity of this or any other appl...

Page 3: ...liance until all connections have been checked and do not leak 14 Do not smoke while leak testing Never leak test with an open ame 15 When lighting keep your face and hands as far away from the applia...

Page 4: ...or combustible material 26 The appliance is not intended for commercial use 27 Installation must conform with local codes or in the absence of local codes with either the National Fuel Gas Code ANSI Z...

Page 5: ...disconnected and removed from the outdoor cooking gas appliance Cylinders must be stored outdoors out of the reach of children and must be stored in a building garage or any other enclosed area 32 The...

Page 6: ...h an oil or a grease fire with water If you smell gas Shut off gas to the appliance Extinguish any open flame If odor continues keep away from the appliance and immediately call your gas supplier or y...

Page 7: ...imited to following 1 Do not repair or replace any part of the oven unless speci cally recommended in this manual All other service should be referred to a quali ed technician 2 Children should not be...

Page 8: ...one Replacement baking stone can be purchased online ASSEMBLY Before assembly make sure all parts are present If any part is missing or damaged do not attempt to assemble the appliance Contact custome...

Page 9: ...ckwise until it stops Use of a wrench could damage the quick coupling nut and result in a hazardous situation 5 Open the cylinder valve fully by turning the valve counterclockwise 6 Before lighting th...

Page 10: ...are leak tested prior packing and shipment a complete test must be performed at the installation site Before each use check all the gas connections for leak testing using the procedure listed below I...

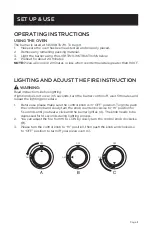
Page 11: ...s to be depressed for 10 seconds during lighting process 2 You can adjust the fire from HI to LOW by slowly turn the control knob clockwise B 3 Please turn the control knob to HI position then push th...

Page 12: ...appliance area clear and free from combustible materials gasoline and other flammable vapors and liquids 2 Do not obstruct the flow of combustion and ventilation air 3 Keep the ventilation opening s o...

Page 13: ...ith this appliance please contact the BH HOME GOODS LLC Customer Satisfaction Center at 201 210 8334 DATED PROOF OF PURCHASE MODEL AND DATE CODE REQUIRED FOR WARRANTY SERVICE SPECIFICATIONS Unit Dimen...

Page 14: ...ropane tank 2 Turn off gas control knob wait 1 minute and light oven If the flame is still low turn off gas control knob and propane tank valve Disconnect and Reconnect regulator and perform a leak te...

Page 15: ...ay in service repair or replacement 14 Service calls to instruct you how to use your slow cooker 15 Service calls to repair or replace the house fuse reset the circuit breaker or correct the wiring in...

Page 16: ...Page 16 January 2022 Under License by Commercial Chef 2022 BH HOME GOODS LLC MODEL CHGSPZOV MODEL VMP 12A...

Reviews: