Measuring AC and DC current
7
WARNING: To avoid damage to the meter or
injury if the fuse blows, never attempt an
in-circuit current measurement where the
open-circuit potential to earth (ground) is
greater than 250V.
The DC current range is 400uA, 4.000mA,
40.00mA, and 400.0mA .The AC current
range is 400uA, 4.000mA, 40.00mA,
and 400.0mA.
NOTE: Connect the measuring current of
the meter in series, not connected in
parallel. This prevents damage to the
meter or endangering personal safety.
□
Cut off the power of the measured circuit.
Discharge all high voltage capacitance on
the measured circuit.
□
Turn the rotary switch to the mA or uA
position (1). When the measured current
is less than 400uA, select the uA position.
When the measured current is
4mA~400mA, select the mA position.
□
Disconnect the circuit under test. Connect
the black test lead to the end of dis
connected circuit under test (with lower
voltage). Connect the red test lead to the
other end of the disconnected circuit
under test (with higher voltage).
□
Switch on the power of the circuit, and then
read the reading displayed on the LCD. If the
display only displays “OL”, it indicates that
the input exceeds the selected range. Move
the rotary dial to a higher range.
□
Cut off the power to the measured circuit.
Discharge all capacitances, take off the
test leads and recover the circuit.
When measuring DC current, if the test
leads are reversely connected to the
circuit , the display will change into
negative, but not affect measuring
accuracy.
17
16
Operation (continued)
Measuring capacitance
Operation (continued)
5
CAUTION: To avoid the meter or measured
equipment from being damaged, cut off all
power supply of measured circuits and
discharge all high voltage capacitors before
on/off measurement.
The capacitance ranges of the meter are
4.000nF, 40.00nF, 400.0nF, 4.000uF,
40.00uF, 100.0uF.
□
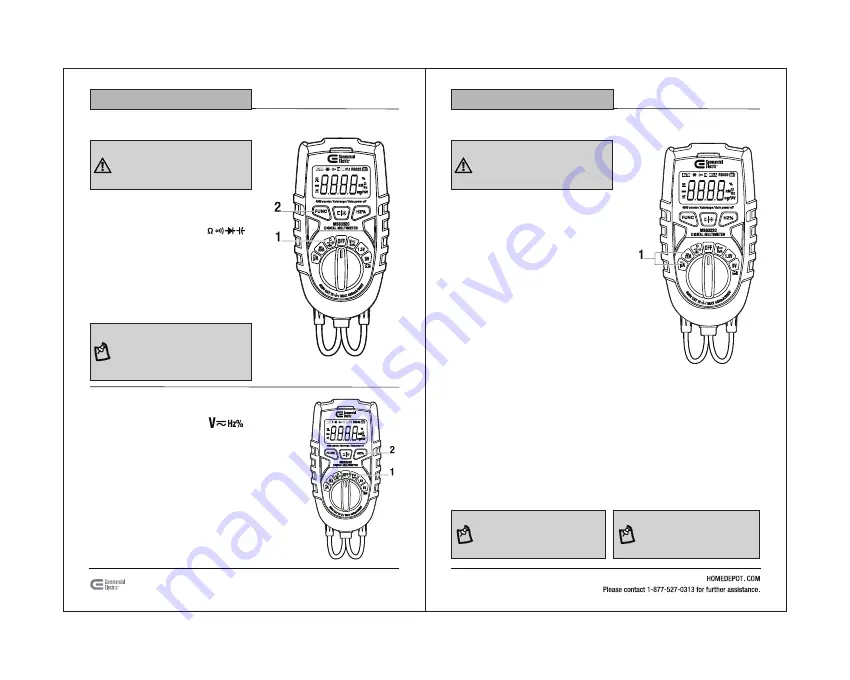
Turn the rotary switch to the
position (1).
□
Press the FUNC key (2) and select the
CAP measuring range.
□
Apply the two ends of the test leads to
measure the two pins of the capacitance
under test and read the measured value
on the LCD.
NOTE: The meter will take some time to
stabilize the reading when the capacitance
is high. A small capacitance with less than
10nF subtracts from the distribution
capacitance of the meter and lead
(namely
displayed base number) when measuring.
Measuring frequency and duty cycle
6
□
Turn the rotary switch to the
position (1).
□
Press the Hz% key (2). For frequency,
select the Hz range. For duty cycle,
select the % range.
□
Apply the two ends of the test leads to
measure the frequency or duty cycle
value of the circuit under test.
□
Read the value that displays on the LCD.


