Appendix B: Transmitter Installation
CommPact Installation Manual
92
The receiver allocates a transmitter number to each registered unit. Write this number and
the number of the zone on the sticker provided. Affix the sticker inside the front cover for
future reference.
3.
After a warm-up period of 130 sec. indicated by both LEDs' blinking, the detector
automatically enters Radio Mode for 4 minutes approximately and sends transmissions
every 8 seconds, then it enters Regular mode – see Operation and Adjustment, Selectable
Operation Modes below.
4.
Knock out the mounting holes and test the transmitter from the exact mounting position
before permanently mounting the unit. The EL-2650XL can be wall or ceiling mounted.
The "Alarm" arrow on the PCB (see Figure B- 4 and Figure B- 5) must point inward (i.e.
towards the protected area). The recommended height is 2.2 m. If you choose mounting
height other than recommended (which is not advised), please perform a walk test to check
the lens coverage. The recommended mounting height is the best in terms of detection area.
5.
Attach the base to the wall with two screws. If using the Back Tamper switch, insert a
screw into the Back Tamper hole (see Figure B- 6) instead of the lower mounting hole.
When the detector is removed from the wall, the screw causes the tamper release to break
away from the back cover and the Back Tamper switch is released.
Figure B- 6: Back Tamper Release
6.
Mount the PCB at the required setting using the horizontal adjustment scale and tighten
the PCB screw – see Operation and Adjustment, PCB Adjustment below. Attach the front
cover and replace the cover screw.
Operation and Adjustment
PCB Adjustment
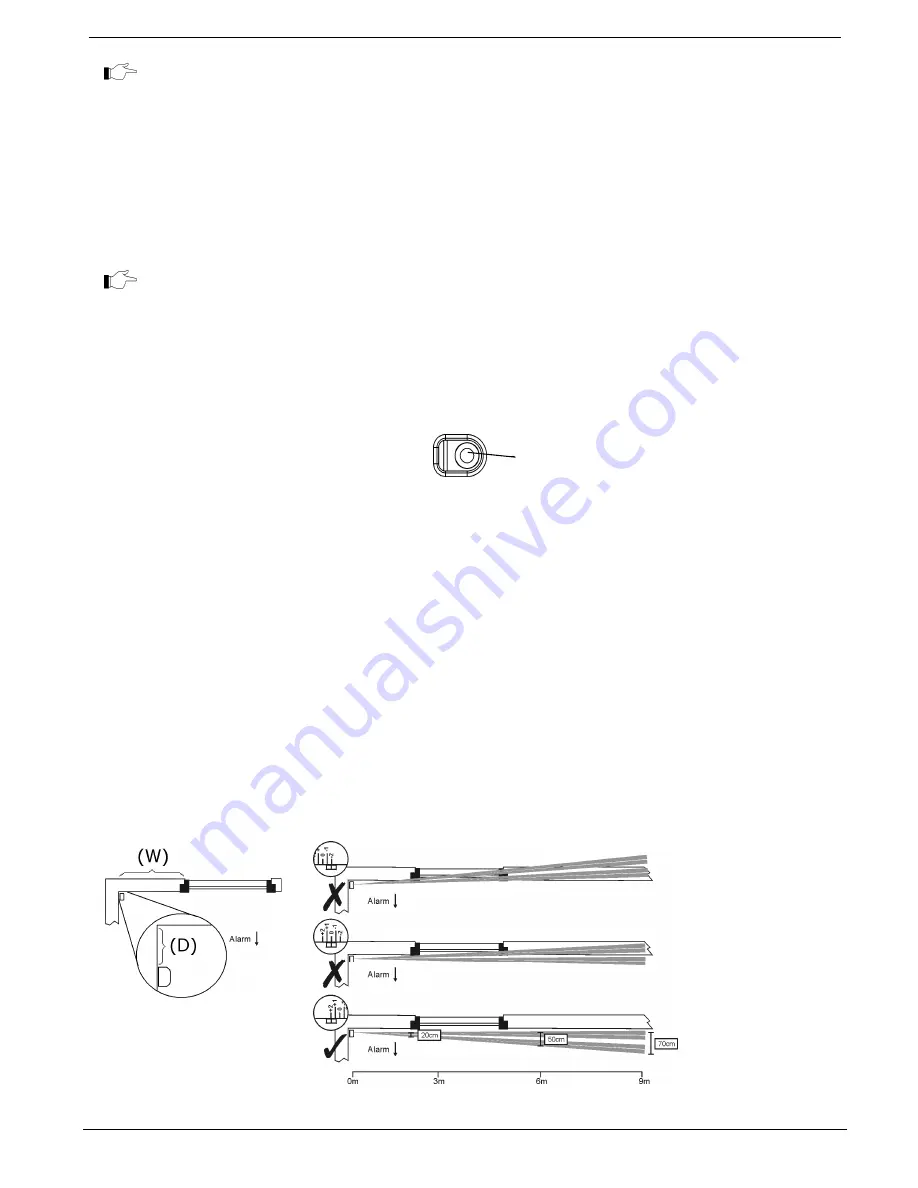
PCB adjustment enables you to angle the infrared beams by changing the position of the pyro
element in relation to the lens. To adjust the PCB, loosen the PCB screw and slide the PCB to the
required position using the PCB adjustment scale as a guide. After adjusting the board, tighten the
PCB screw. Slide the board towards -2 to position the beams closer to the wall. Slide the board
t2 to position the beams further away from the wall. For the correct PCB adjustment, you
must take into account the distance of the detector from the wall and the distance of the protected
door/window from the detector – see Table B- 2 as illustrated in Figure B- 7 are relevant both to
wall and ceiling mounting.
Figure B- 7: EL-2650XL Correct Installation
Back tamper
mounting hole
Summary of Contents for Control system
Page 84: ...Appendix A Menu Structure CommPact Installation Manual 80 Appendix A Menu Structure ...
Page 85: ...Appendix A Menu Structure CommPact Installation Manual 81 ...
Page 86: ...Appendix A Menu Structure CommPact Installation Manual 82 ...
Page 87: ...Appendix A Menu Structure CommPact Installation Manual 83 ...
Page 88: ...Appendix A Menu Structure CommPact Installation Manual 84 ...
Page 89: ...Appendix A Menu Structure CommPact Installation Manual 85 ...
Page 90: ...Appendix A Menu Structure CommPact Installation Manual 86 ...


