860106368
Instruction Sheet
www.commscope.com
Page 10 of 12
Step 4 – Checking the Panel Bus Jumper
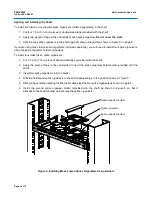
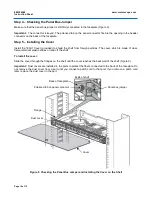
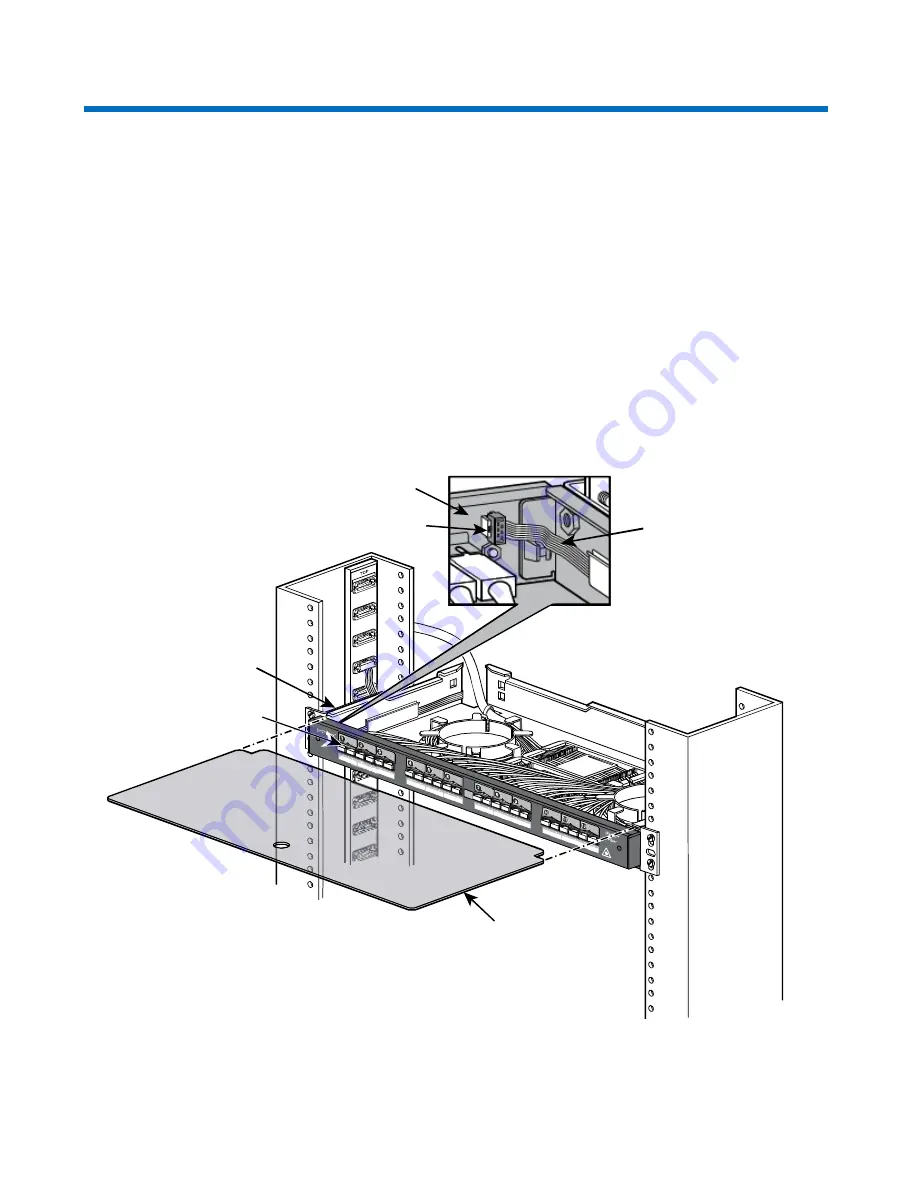
Make sure that the panel bus jumper is still firmly connected to the faceplate (Figure 9).
Important:
The connector is keyed. The polarized tab on the panel connector fits into the opening in the header
connector on the back of the faceplate.
Step 5 – Installing the Cover
Install the 183U1 Cover (provided) to shield the shelf from foreign particles. The cover, which is made of clear,
flame-retardant plastic, slides on and off the shelf.
To install the cover:
Slide the cover through the flanges on the shelf until the cover reaches the back wall of the shelf (Figure 9).
Important:
Dust covers are installed in the ports to protect the fibers connected to the back of the faceplate. Do
not remove the dust cover from a port until you connect a patch cord to that port. If you remove a patch cord
later, replace the dust cover in the port.
Figure 9 Checking the Panel Bus Jumper and Installing the Cover on the Shelf
Flange
Dust cover
Panel bus jumper
Back of faceplate
Polarized tab on panel connector
Inside of shelf
Cover

