8.1.3
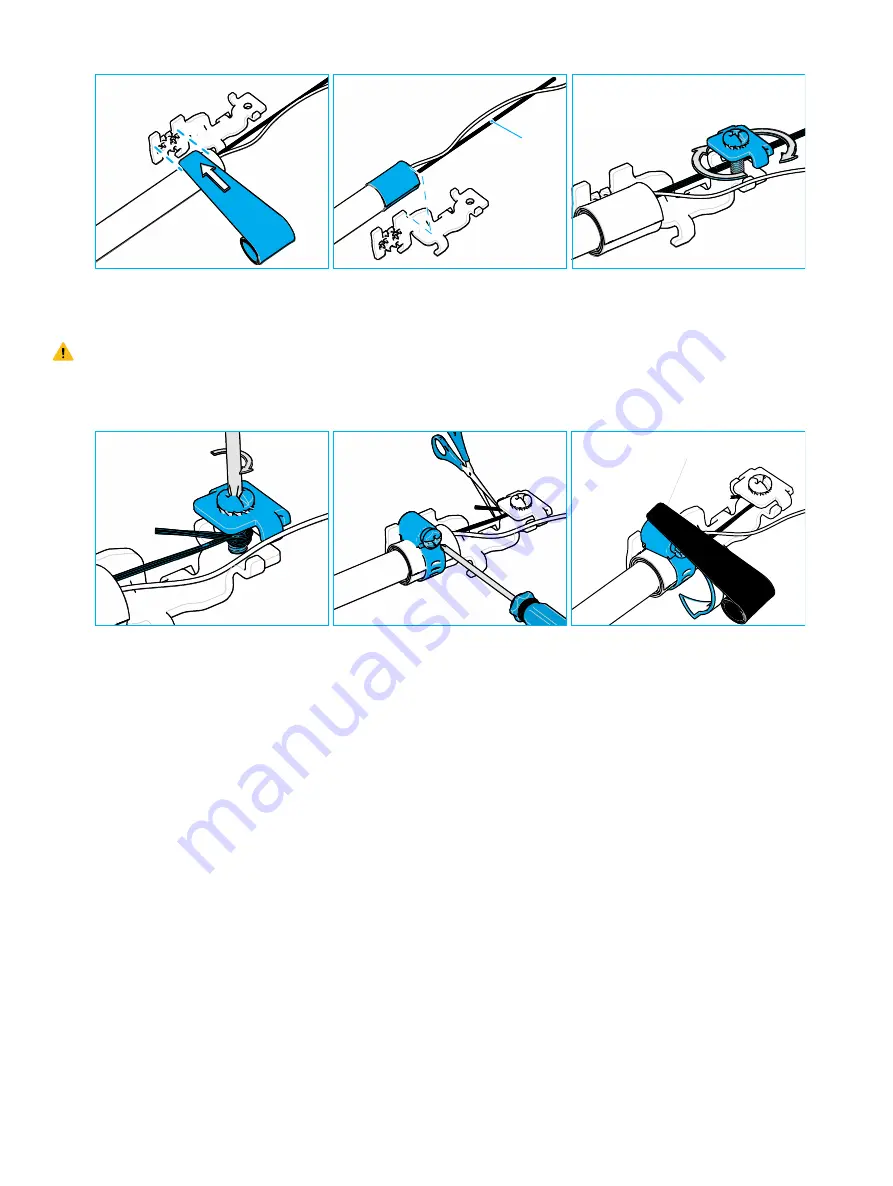
Feeder cable aramid yarn strain relief
1
12 cm
2
3
1 If the diameter is smaller than 9 mm (0.35 Inches) or if the jacket is a thin jacket, add 5 wraps of self amalgamating
silicon tape. Stretch the tape between 50% and 300% while wrapping the tape around the cable. Make sure the
tape is wrapped where the hose clamp will be positioned.
Attention:
Make sure your hands are clean and degreased before preparing and installing the cables.
2 Cut the aramid yarn to a length of 12 +/- 1 cm (4.7 +/-0.4 Inches).
3 Place the cable on the bracket with the jacket end aligned with the bracket edge. Route the subunits aside, install
the metal plate and bolt with washer. Wrap the aramid yarn around the bolt.
4
5
PVC
6
4 Secure the bolt.
5 Install the hose clamp around the cable bracket assembly and secure with an appropriate tool. Make sure the head
of the hose clamp is positioned against the bracket.
6 Finalize with wrapping 2 layers PVC tape around the hose clamp to keep the excess length of the hose clamp band
close to the cable.
8.2
Feeder cable installation
8.2.1
Port reducers
Port reducers are installed above and below the Octopus
™
gel seal. Depending on the cable diameter, the port reducer
should remain or be removed.
If the cable diameter is
less than 10 mm (0.39 Inches)
: keep the two port reducers in place.
If the cable diameter is
more than 10 mm (0.39 Inches)
: remove the two port reducers.
page 11 / 24
© 2021 CommScope, Inc. All Rights Reserved


