ADCP-92-309 • Issue 4 • July 2016
Page 5
© 2016
CommScope
. All Rights Reserved.
• Locate mounting hardware required.
2. Determine what rack size is being used. When installing in a 19-inch rack use the hardware
provided to attach the chassis to the rack.
3. Locate the equipment rack mounting space that is specified for the chassis.
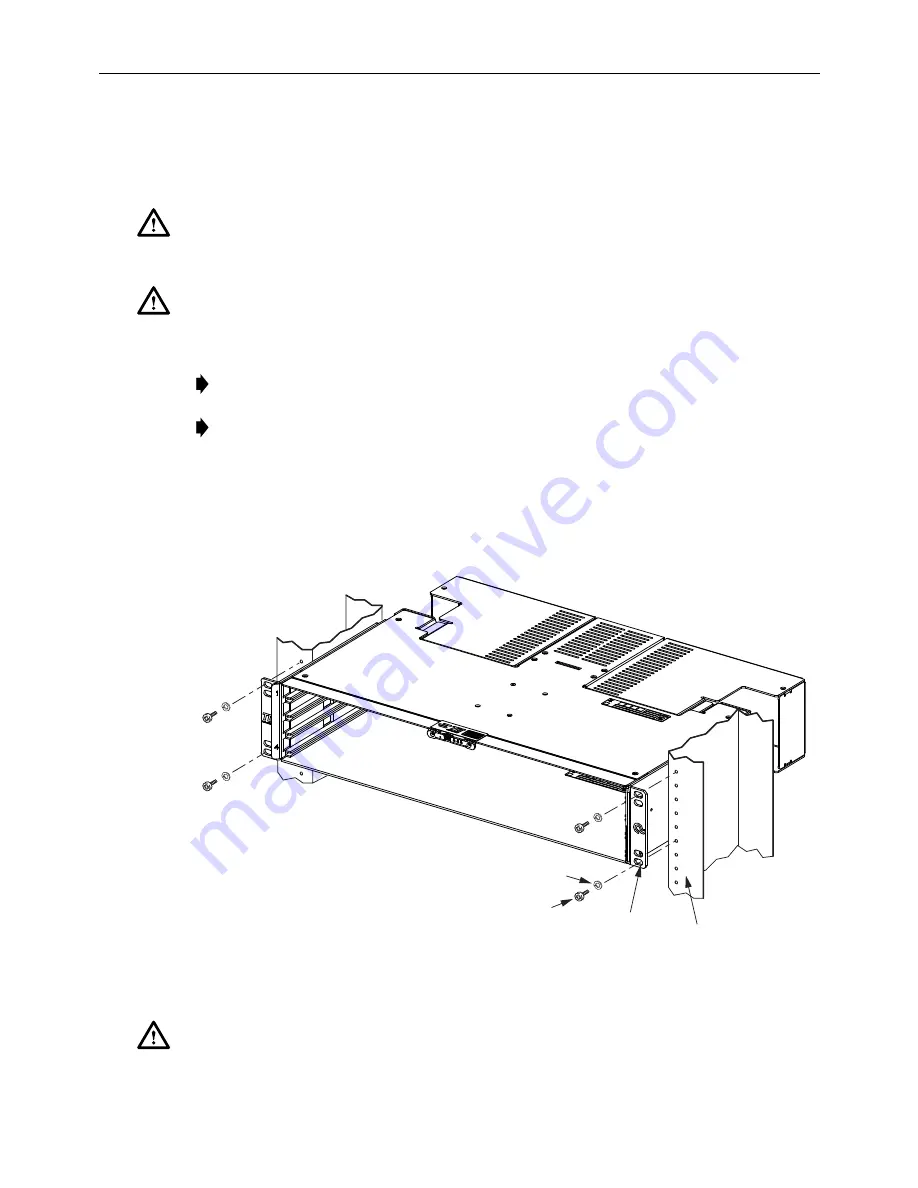
4. Place chassis in the assigned mounting space and align the holes in the mounting brackets
with the holes in the equipment rack. See
Figure 1
.
5. Secure chassis to equipment rack using the appropriate hardware. Torque these screws to
approximately 27 pound-inches (3.1 Newton meters).
Figure 1. Installing 2RU Chassis
Caution: If chassis is installed in a closed or multi-rack assembly, the operating temperature of the
rack environment may be greater than the ambient temperature. Be sure to install the chassis in an
environment that is compatible with the maximum rated ambient temperature. See Specifications.
Caution: Installation of the equipment in a rack should be such that air flow to the equipment is
not compromised.
Note: Ethernet cabling distance to and from the chassis should not exceed 328ft. (100m).
Note: If installing chassis in a Q-Frame (Cross-Connect Solution), make ground
connection to chassis before securing chassis in the rack.
Caution: When mounting equipment in the rack make sure mechanical loading is even to avoid
a hazardous condition, such as loading heavy equipment in the rack unevenly. The rack should
safely support the combined weight of all equipment it supports.
MOUNTING
BRACKET
12-24 x 1/2 IN.
SCREW (4)
24751-A
RACK
FRONT
FLANGE
LOCKWASHER
(4)


