www.commscope.com
860543388
Instruction Sheet
Page 17 of 19
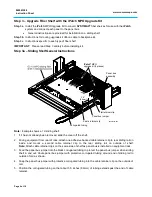
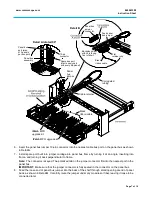
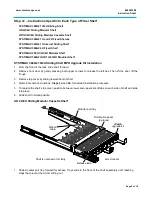
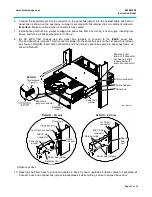
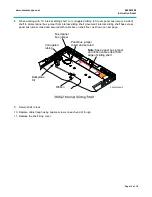
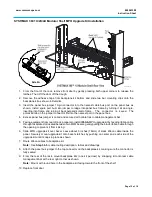
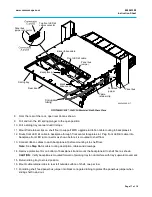
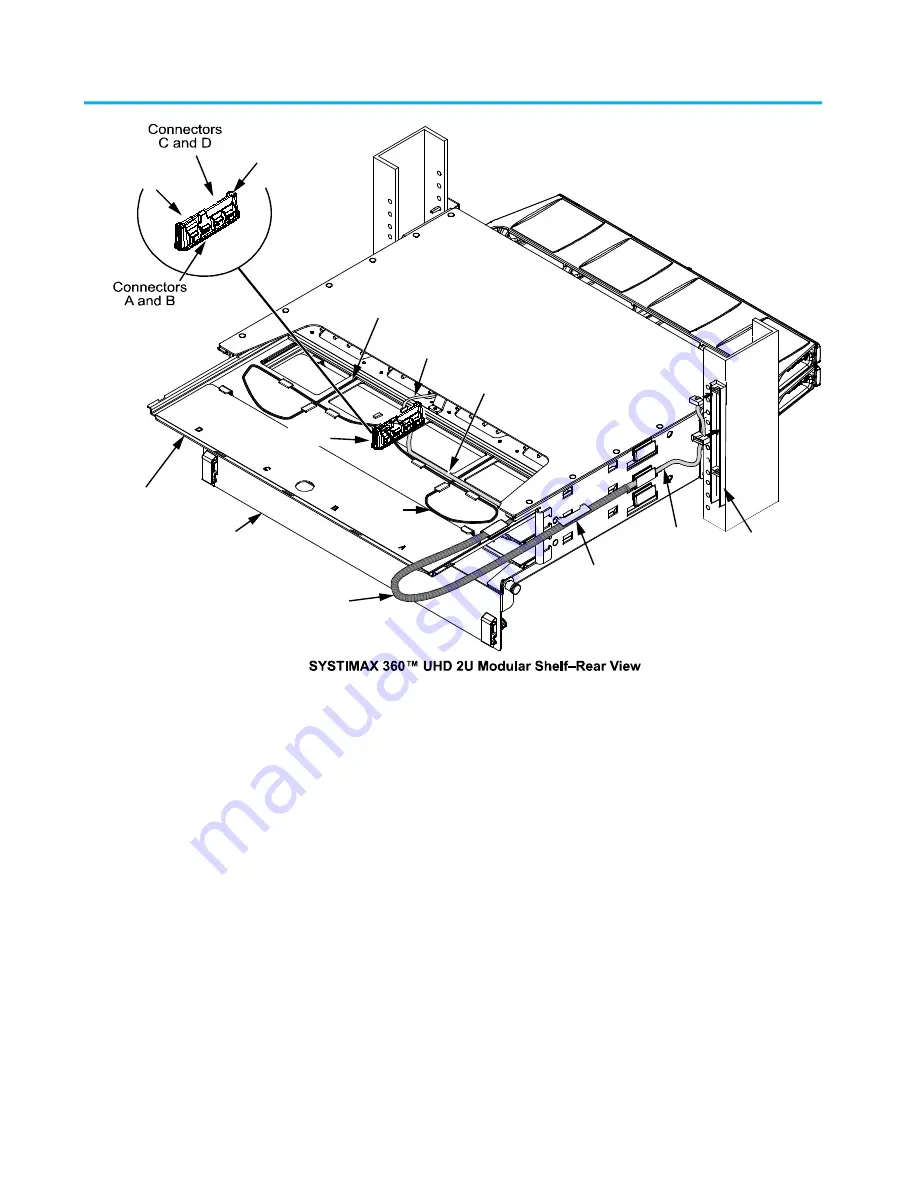
8. From the rear of the rack, open rear door as shown.
9. Pull and turn the left spring plunger to the open position.
10. Pull a sliding tray rearward until it stops.
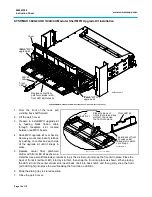
11. Mount flat retainer clips on shelf floor to support MPO upgrade kit ribbon cable routing to backplane kit.
12. Route front LED kit cable to backplane through front center faceplate slot. Plug front LED kit cable into
backplane front LED kit connector as shown before it is mounted to shelf floor.
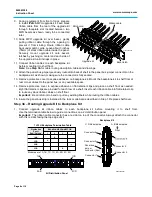
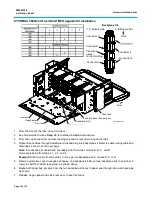
13. Connect ribbon cables to each backplane kit before mounting it to shelf floor.
Note:
See
Step 3b
for cable routing description, tables and drawings.
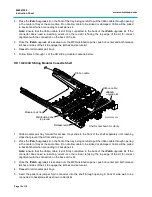
14. Remove protective film on bottom of backplane kit and mount the backplane kit to shelf floor as shown.
CAUTION:
Verify backplane is mounted forward of pivoting tray to not interfere with tray’s upward movement.
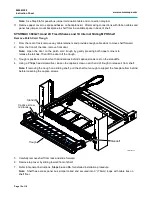
15. Return sliding tray to stored position.
16. Mount cable retainer clips to rear left outside surface of shelf, one per row.
17. For sliding shelf, feed panel bus jumper into black corrugated tubing to protect the panel bus jumper when
sliding shelf in and out.
Panel bus
jumper
Rear door
Backplane kit
Panel bus
Panel bus
jumper
Cable
retainer clip
Corrugated
tubing
Front LED kit cable
Black ribbon cable
Black
ribbon cable
Sliding tray
Panel bus
jumper connector
Top front LED kit
cable connector
860543388-017

