5
communityplaythings.co.uk
8
9
10
11
12
13
7
14
15
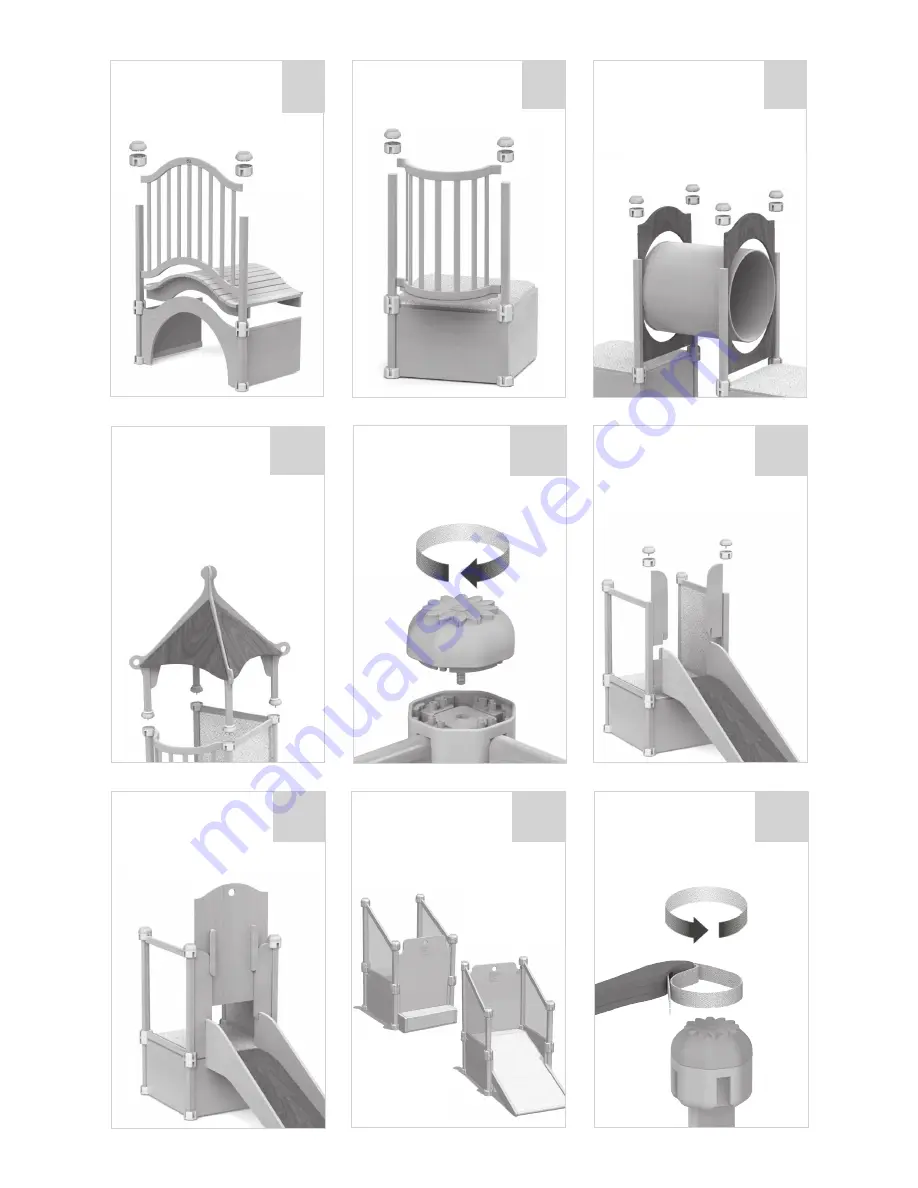
Once connector rings are in
place, two people can lift
the roof into place. Align the
bolts with the threaded holes
in the top of the post. Tighten down all
four roof caps half way, and then tighten
them down hard so your children can’t
get them off. You will have four extra
caps.
When all the upper panels
are in place, screw a cap
to each post. Tighten them
down hard so your children
can’t get them off.
Install both the lower tunnel
cradles. Place the wooden
barrel in the cradles and add
the upper cradles. Ensure top
and bottom cradles are interlocked and
positioned in the barrel grooves.
Once the bridge braces are in
place, lay the bridge surface on
top. Install the bridge railings
with the brand facing out.
Insert the balcony the same way
as any other upper panel.
To add the slide, make sure
both sides are captured by
the connector rings. Then add
the two slide handles on top
locking them in place with the top
connectors.
Insert the gate over the slide
handles to close the slide.
The gate can face either in or
out. When used under a roof,
face gate guides towards platform.
Extra gates are available if
you wish to close off activity
areas. Use at the bottom of
the stairs (G895) or the top of
the ramp (G888).
Use a simple strap wrench,
jar gripper, or similar tool to
remove the connector.


