background image

5. Extended functions 

10 

Exten de d f un cti on s 

5.1   [ CONTROL MENU ]  sub-menu 

The most important parameters of the  

[


CONTROL


MENU


]


menu have already been explained 

in section 2 Default settings. This section simply 
contains an overview and explanation of additional 
(extended) functions.  


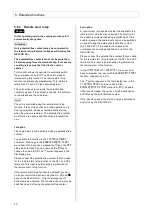
5.1.1  Operating modes 

Go to the  

[


CONTROL


MENU


]

 sub-menu and use the


key to go to the  

AUTOMATIC


OPERATION

 menu item. If 

you press the 


key, the 

AUTOMATIC


OPERATION


value starts to flash. You can use the 


key to now 

switch to  

CONTINUOUS


OPERATION

. Confirm a set 

value by pressing the 


key. 

You can choose from two operating modes: 

AUTOMATIC OPERATION 

AUTOMATIC


OPERATION 

is the most economical of 

your compressor's operating modes. If there is no need 
for compressed air in your system, the compressor is 
shut down after the 

RUN-ON


TIME

. The control system 

automatically recognises when compressed air is 
needed again. The unit then starts up straight away. 

CONTINUOUS OPERATION 

CONTINUOUS


OPERATION

 is only needed for some 

special applications. When in this operating mode, the 
motor is not shut down if there is no longer any need for 
pressure. The compressor stage now runs continually 
in off-mode when there is no need for pressure.  


5.1.2  Second pressure range (

p

2

The range between the maximum and minimum 
network pressure is called the pressure range. The 
second pressure range function allows you to use 
another pressure range in addition to the pressure 
range already set (see section 2.2). This could be used 
to for example implement night-time lowering.  

You will find the settings for the second pressure range 
function in the  

[


CONTROL


MENU


]

 sub-menu. The 

relevant menu items there are: 

p

2

CUT-OUT


POINT 

10.5bar


p

2

CUT-IN


POINT 

10.0bar


p

2

TIMER


CONTROL 

OFF 


You can use 

p

2

CUT-OUT


POINT 

and 

p

2

CUT-

IN


POINT

 to set the network pressure switching points. 

Use the 

p

2

TIMER


CONTROL On

 menu item to activate 

the timer for the second pressure range. 

You can activate / deactivate the second pressure 
range using an external potential-free contact (see 
section 5.5). 

Section 5.3.2 contains a description of how to set the 
timer for the second pressure range. 


Note  

The values shown are examples only. The values used 
in your unit may be different. 


5.1.3  Dryer pre-run 

If you are using an external dryer, you can provide the 
compressor with a specified pre-run time. The 
compressor is then only started after this pre-run time. 

To set the pre-run time, please go to the 

[


CONTROL


MENU


]

 sub-menu. From there use the 


key to go to the 

DRYER


PRE-RUN 0min

 menu item. 

Once you have pressed the 


key, the 

0min

 value 

starts to flash. You can now use the  


or


 keys to 

set the pre-run time you want. Then confirm your entry 
using the 


key. 


5.1.4  RS 485 communication 

You can perform the settings for RS 485 
communication in the  

[


CONTROL


MENU


]

 sub-menu. 

The  

RS485-ProTOCOL 

ModBus 

RS485-BAUDRATE 

19200 

RS485-ADDRESS 

menu items are of relevance. 

The DELCOS 

Pro

 has a serial RS485 interface. This 

interface can be used with the ModBus RTU protocol.  

ModBus interfaces and drivers are available from many 
of the well-known manufacturers of programmable logic 
controllers (PLC). 

You can set the baud rate you want in the

 RS485-

BAUDRATE

 menu item. 

You can set the participant number you want in the 


RS485-ADDRESS

 menu item. 


Note  

The values shown are examples only. The values used 
in your unit may be different. 


Summary of Contents for DELCOS Pro

Page 1: ...GB Id no 100013596 03 January 2010 1 Original User Manual DELCOS Pro electronics for stationary rotary screw compressor...

Page 2: ......

Page 3: ...1 German basis BA 100013595 03 Valid as of software version DPro L 1 xx We reserve the right to modifications relating to technical advances...

Page 4: ...rogramming maintenance intervals 9 4 3 Total load hours counter 9 5 Extended functions 10 5 1 CONTROL MENU sub menu 10 5 1 1 Operating modes 10 5 1 2 Second pressure range p2 10 5 1 3 Dryer pre run 10...

Page 5: ...al compression pressure is the pressure measured downstream of the compressor stage Network pressure is the pressure within the system connected downstream of the compressor The following symbols may...

Page 6: ...START IN xxs alternating with AFTER POWER LOSS A power loss has caused the unit to shut down The automatic restart function has been selected in the control menu The unit now starts automatically aft...

Page 7: ...0 00 00 p27 __________ 00 00 00 00 01 EM STOP 12345h 01 EM STOP 12300h CUT OUT POINT 13 0bar CUT IN POINT 12 5bar p2 CUT OUT POINT 10 5bar p2 CUT IN POINT 10 0bar AUTOMATIC OPERATION ENABLE REMOTE STA...

Page 8: ...CONTROL MENU FAULT MEMORY TIMER CONTROL LIMIT VALUES OPTIONAL IN OUTPUTS Enter a sub menu by pressing the key Again here you can use the or keys to go to a menu item To exit the sub menu you must pre...

Page 9: ...e set by pressing the key Note The control system checks whether the value set can be used The maximum network pressure CUT OUT POINT must be at least 0 2 more than the minimum network pressure CUT IN...

Page 10: ...requirement from the compressed air system and the unit is in CONTINUOUS OPERATION it switches to OFF LOAD This means that the motor and compressor stage run but no air is pumped into the compressed...

Page 11: ...maintenance interval should be reprogrammed The maintenance message can be acknowledged using the key 4 2 Programming maintenance intervals To program a maintenance interval please go to the MAINTENAN...

Page 12: ...second pressure range function in the CONTROL MENU sub menu The relevant menu items there are p2CUT OUT POINT 10 5bar p2CUT IN POINT 10 0bar p2TIMER CONTROL OFF You can use p2CUT OUT POINT and p2CUT I...

Page 13: ...it features several compressors This in turn ensures that the power supply is not loaded unnecessarily 5 1 6 Unlimited autom re start after power loss The control system can perform an automatic re st...

Page 14: ...sion pressure and network pressure When accessed these values flash to clearly show that they are not the current display values To access this information please use or to go to the warning message o...

Page 15: ...entry The timer is now switched on To improve your understanding of this function the timer unit setting is explained below using various examples Example 1 Switching unit 1 not active 1 _______ 00 0...

Page 16: ...for the 2nd pressure range 5 4 Limit values sub menu The LIMIT VALUES sub menu is for information only Here you can access the parameters set in the factory The following are shown a DESIGN PRESS 13 0...

Page 17: ...not assigned programmed EXT FAULT If the contact is opened the EXT FAULT fault message appears on the display and the unit is shut down shutting down is delayed by 1sec EXT WARNING If the contact is...

Page 18: ...e no faults on the compressor WARNING The output relay is activated when there are no warnings on the compressor MAINT ELAPSED The output relay is activated when there are no maintenance messages on t...

Page 19: ...ed twice for codes 2 and 3 If you have entered a code incorrectly the indication immediately jumps back to code 1 You then have to re enter all three codes If you have correctly entered the codes the...

Page 20: ...AD Fig 5 Circuit diagram for pressure changeover Sections 5 1 2 and 5 3 2 contain explanations of how to set the second pressure range and the possibility of timer operations with the second pressure...

Page 21: ...now be switched to on load or off load using these two inputs You will find a circuit diagram in Fig 6 In our explanation we have assigned the inputs as follows INPUT 1 ENAB REM LOAD INPUT 2 REMOTE L...

Page 22: ...e key to change the value to ON The symbol appears in the first display row Please connect the potential free contact that you need for the remote start stop function to the X2 1 and X2 3 terminals Th...

Page 23: ...must not exceed 55 C 4 All remote controls fitted at a later date remote On Off must be managed without a connection relay at max 20 metres from the control cabinet 5 When commissioning and carrying...

Page 24: ...tive cooling Improve Unit being operated with enclosure open Close enclosure Oil injection volume temperature too low high Check find cause Incorrect oil grade viscosity Check replace oil if necessary...

Page 25: ...PUT EXT WARNING 3 Check find cause FAULT BEKOMAT FAULT Connected condensate drain valve Bekomat defective 3 Check find cause WARNING BEKOMAT WARN Connected condensate drain valve Bekomat defective 3 C...

Page 26: ...ef pressure requirements during the run on time No compressed air requirements within the switching points set 4 Pressure changeover by timer or external contact active 5 1 Unit specific setting see 5...

Page 27: ......

Page 28: ...Gardner Denver Deutschland GmbH Argenthaler Str 11 55469 Simmern Germany Tel 49 0 6761 832 0 www compair com e mail sales compair com...

Reviews: