background image

molinos de café

coffee grinders 

moulins à café

kaffeemühlen

macinadosatori 

moinhos de café

к о ф е м о л к и

μαδοι αδσησ καε

Manual de Instrucciones · Instructions Manual 

· 

Manuel d’Instructions 

Bedienungshandbuch  ·  Manuale  d’Uso  ·  Manual  de  instruçoes 

ИНСТРУКЦИЯ ПО ЭКСПЛУАТАЦИИ 

 ·  

ΕΓΧΕΙΡΙΔΙΟ ΟΔΗΓΙΩΝ ΧΡΗΣΗΣ

K-6
K-6 

Silenzio

K-6 

Professional Barista

K-8
K-8 

Silenzio

K-10 

Conic

K-10 

Conic WBC

Summary of Contents for K-10 Conic

Page 1: ... к о ф е м о л к и μαδοι αδσησ καε Manual de Instrucciones Instructions Manual Manuel d Instructions Bedienungshandbuch Manuale d Uso Manual de instruçoes ИНСТРУКЦИЯ ПО ЭКСПЛУАТАЦИИ ΕΓΧΕΙΡΙΔΙΟ ΟΔΗΓΙΩΝ ΧΡΗΣΗΣ K 6 K 6 Silenzio K 6 Professional Barista K 8 K 8 Silenzio K 10 Conic K 10 Conic WBC ...

Page 2: ...molino 2 Manual de instrucciones 3 Identificación 4 Características técnicas 5 Componentes externos 6 Instalación 7 Regulación 8 Funcionamiento 9 Limpieza 10 Mantenimiento 11 Medidas de seguridad 12 Declaración de Conformidad CE ...

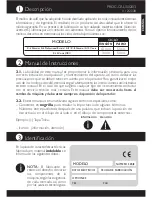
Page 3: ...onveniente contactar con el servicio técnico más cercano Este manual debe ser conservado hasta el cambio de máquina y debe estar siempre a disposición del operador 2 2 En este manual se han utilizado algunos términos especiales como Caracteres en negrilla para resaltar la importancia de algunos términos Números entre paréntesis después de una palabra que indican la posición de ese artículo en el d...

Page 4: ...este medio y punto de molienda espresso Fresas in mm 2 5 64 3 3 83 2 7 68 Producción lb h Kg h 24 2 11 33 15 37 4 17 Capacidad tolva lb gr 3 74 1 700 Peso neto lb kg 31 9 14 5 33 4 15 2 37 5 17 Altura x Anchura x Profundidad 25 x 8 2 x 14 4 in in mm 635 x 210 x 365 mm 110 v 60 hz 200w 100w 1100 rpm 470w 245w 1540 rpm 440w 245w 1300 rpm 260w 120w 1400 rpm 400w 245w 1390 rpm 220 v 60 hz 230 v 50 hz ...

Page 5: ...Protector manos Obturador tolva Dosificador de café molido Maneta dosificador Indicador posición bloqueo de seguridad 14 Interruptor luminoso on off 6 Instalación 6 1 Advertencias generales El instalador deberá leer atentamente este manual de instrucciones antes de efectuar la instalación de la máquina La instalación del aparato debe ser efectuada por personal cualificado y autorizado y respetando...

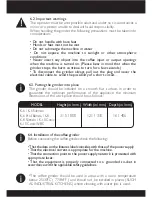
Page 6: ...trabajo para garantizar las mejores prestaciones del aparato deben ser como mínimo las siguientes 6 4 Instalación del molino de café Antes de conectar el molino de café se deberá controlar lo siguiente Que los datos de la etiqueta de características coincidan con las de la red eléctrica Que la clavija de conexión eléctrica coincide con el enchufe donde va conectada Controlar que el caudal eléctric...

Page 7: ... y girar el regulador de molido 6 hasta ajustarlo al punto de molido del café deseado Girando en el sentido de las agujas del reloj obtendremos un café molido más grueso y girando en sentido anti horario obtendremos un café molido más fino Note que sólo debe cambiar los puntos de molienda cuando la máquina está en marcha Si no sigue esta instrucción las fresas acumularán café y necesitará limpieza...

Page 8: ...OFF 14 el aparato empieza a moler café Si incorpora la opción de paro automático el molino dejará de moler café cuando el dosificador llegue al nivel máximo y se volverá a activar después de servir 8 dosis de café para volver a su nivel máximo Si no incorpora la opción de paro automático recomendamos llenar el dosificador un 75 de su capacidad para garantizar un servicio consistente Para servir la...

Page 9: ...no el tornillo de seguridad tolva y a mano terminar roscando la rulina seguridad tolva 5 9 3 Limpieza del deposito de café molido Para proceder a la limpieza del depósito de café molido primero hemos de vaciar todo el café que se encuentre en su interior Sacar la tapa dosificador de café molido 8 y con un pincel limpiar todo su interior 9 4 Limpieza exterior Para la limpieza exterior utilizar prim...

Page 10: ...molienda se deben seguir las siguien tes indicaciones Apagar el aparato mediante el interruptor ON OFF 14 Desconectar el aparato de la red eléctrica Aflojar la rulina seguridad tolva 5 según Fig 2 y sacar la tolva 2 del regulador de molido 6 Soltar los tornillos del regulador de molienda 6 con la ayuda de una llave Allen según Fig 10 Girar el regulador de molido 6 en el sentido horario hasta sacar...

Page 11: ...ción recomendamos contactar con los servicios técnicos los cuales efectuarán la reparación o sustitución ga rantizando el mantenimiento de los estándares de seguridad Sólo un proveedor autorizado puede reemplazar el cable principal de cualquier molino Siguiendo la normativa arriba mencionada de la CE las marcas han sido aplicadas Todos los materiales técnicos han sido adecuados y están preparados ...

Page 12: ...Machine description 2 Instructions manual 3 Identification 4 Technical characteristics 5 External components 6 Installation 7 Regulation 8 Operation 9 Cleaning 10 Maintenance 11 Safety measures 12 EC Conformity ...

Page 13: ...of a problem please contact your local technical service The manual should be kept until the machine is changed and should always be available to the operator 2 2 Different terms are used in the manual such as Characters in bold type to emphasize importance Numbers in brackets following a word to indicate the position of the item shown in the adjoining drawing or external compo nents diagram Examp...

Page 14: ...resso grind Technical characteristics 4 Burrs in mm 2 5 64 3 3 83 2 7 68 Production lb h Kg h 24 2 11 33 15 37 4 17 Hopper capacity lb gr 3 74 1 700 Net weight lb kg 31 9 14 5 33 4 15 2 37 5 17 Height x width x depth 25 x 8 2 x 14 4 in in mm 635 x 210 x 365 mm 110 v 60 hz 200w 100w 1100 rpm 470w 245w 1540 rpm 440w 245w 1300 rpm 260w 120w 1400 rpm 400w 245w 1390 rpm 220 v 60 hz 230 v 50 hz 240 v 50...

Page 15: ...n tray 11 10 7 4 Hand protector Hopper shutter Ground coffee dispenser Dispenser handle Position indicator safety block 14 On Off Switch 6 Installation 6 1 General warnings The installer should read this instruction manual carefully before installing the machine The machine must be installed by qualified authorized staff respecting the applicable safety and hygiene guidelines i ...

Page 16: ...grinder should be installed on a smooth flat surface In order to guarantee the optimum performance of the appliance the minimum dimensions of the work place should be as follows K 6 K 6 Silenzio K 6 Prof Barista K 8 31 5 800 12 1 310 16 406 K 8 Silenzio K 10 Conic K 10 Conic WBC MODEL Height in mm Width in mm Depth in mm 6 4 Installation of the coffee grinder Before connecting the coffee grinder c...

Page 17: ...Remove the dispenser lid 8 and turn the grind regulator 6 to the required grind setting By turning it clockwise the coffee grind will be coarser and turning it counter clockwise the grind will be finer Note that you should only change grind settings when the machine is on and burrs are in motion If you do not do this the burrs will gunk up and cleaning will be required Changing grind settings when...

Page 18: ...f switch 14 The machine will start to grind the coffee If the automatic stop option is incorporated the grinder will stop grinding when the dispenser reaches the maximum level and will restart after 8 portions of coffee have been served grinding again to the maximum level If the machine does not incorporate the automatic stop option we recommend that you fill the doser 75 of its capacity in order ...

Page 19: ...ack on the grind regulator and thread the hopper safety screw with the help of a flat head screwdriver and adjust the setting roller 5 by hand 9 3 Cleaning the ground coffee deposit To clean the ground coffee holder first empty all the coffee inside it Remove the ground coffee dispenser lid 8 and clean the inside using a small brush 9 4 Exterior cleaning To clean the exterior use a brush or a clot...

Page 20: ...instructions Turn off the machine using the On Off switch 14 Disconnect the machine from the power supply Loosen the setting roller 5 as shown in Fig 2 and remove the hopper 2 from the grind regulator 6 Release the 3 screws on the grind regula tor 6 using an Allen key as shown in Fig 10 Turn the grind regulator 6 clockwise until it lifts off Using a small brush or va cuum clean the inside of the g...

Page 21: ...e In the event of any broken components or intervention we recommend that you contact your local technical service who will repair or replace the part guaranteeing the maintenance of the safety standards Replacement of the main power cable of any grinder model should only be done by an authorized supplier In accordance with European commu nity directives quality certificates have been applied All ...

Page 22: ...chine 2 Manuel d instructions 3 Identificatión 4 Caracteristiques téchniques 5 Composants externes 6 Installation 7 Menu afficheur et réglage 8 Fonctionnement 9 Nettoyage 10 Maintenance 11 Securité 12 Declaration de conformité CE ...

Page 23: ...se produire prendre contact avec le service technique le plus proche Ce manuel doit être conservé jusqu au changement de machine et il doit toujours être à la disposition de l opérateur 2 2 Dans ce manuel certains sigles spécifiques ont été utilisés comme par exemple des caractères en gras pour faire ressortir l importance de certains termes des numéros entre parenthèses après un mot qui indiquent...

Page 24: ...nt torréfié et avec un point de mouture espresso Caractéristiques techniques 4 Meiles en mm 2 5 64 3 3 83 2 7 68 Production lb h Kg h 24 2 11 33 15 37 4 17 CapacitéTrémie lb gr 3 74 1 700 Poids net lb kg 31 9 14 5 33 4 15 2 37 5 17 Hauteur largeur profondeur 25 x 8 2 x 14 4 en en mm 635 x 210 x 365 mm 110 v 60 hz 200w 100w 1100 rpm 470w 245w 1540 rpm 440w 245w 1300 rpm 260w 120w 1400 rpm 400w 245w...

Page 25: ...10 7 4 Protecteur pour les mains Obturateur de trémie Doseur du café moulu Manette du doseur Indicateur de position 14 Interrupteur lumineux ON OFF 6 1 Avertissements généraux L installateur devra lire attentivement ce Manuel d instructions avant d effectuer l installation de la machine L installation de l appareil doit être effectuée par personnel qualifié et agréé en respectant les normes de séc...

Page 26: ...onsistante et proche de la machine à café Les dimensions minimales de l emplacement de fonctionnement qui garantissent les prestations optimales de l appareil doivent être au minimum les suivantes K 6 K 6 Silenzio K 6 Prof Barista K 8 31 5 800 12 1 310 16 406 K 8 Silenzio K 10 Conic K 10 Conic WBC MODEL Hauteur en mm Largeur en mm Profond en mm 6 4 Installation du moulin à café Avant de brancher l...

Page 27: ... le régulateur de mouture 6 pour l ajuster sur le degré de mouture souhaité En le tournant dans le sens des aiguilles d une montre nous obtiendrons un café moulu plus épais et dans le sens antihoraire nous ob tiendrons un café moulu plus fin Veuillez noter que vous devez changer le point de mouture autant que le moulin est en fonctionnement Si cette instruction n est pas suivi les meules accumuler...

Page 28: ... mencera alors à moudre le café S il est équipé de l option d arrêt automatique le moulin arrêtera de moudre le café lorsque le doseur sera au niveau maximum et il sera à nouveau activé après avoir servi 8 doses de café pour revenir au niveau maxi mum S il n est pas équipé de l option d arrêt automatique nous recommandons de remplir le doseur un 75 de son capacité afin de garantir un service consi...

Page 29: ...in la molette de la trémie 5 9 3 Nettoyage du doseur de café moulu Au moyen d un pinceau nettoyer le café qui pourrait avoir resté collé à l intérieur des chambres du doseur 9 4 Nettoyage extérieur Pour le nettoyage extérieur utiliser un pinceau ou un chiffon légèrement humecté d eau savonneuse REMARQUE Ne jamais utiliser de chiffons humectés pour le nettoyage du réservoir de café moulu Garder le ...

Page 30: ...ctrique Desserrez la molette de sécurité trémie 5 et retirez la trémie 2 du régulateur de mouture 6 comme indiqué sur Fig 2 Dévisser les vises du régulateur de mouture 6 à l aide d une clé Allen selon Fig 10 Tournez le régulateur de mouture 6 dans le sens horaire jusqu à le retirer de son lo gement Nettoyez avec l aide d un pinceau ou un aspirateur l intérieur de la cavité de mouture Réviser l éta...

Page 31: ...toute autre intervention nous recommandons de se mettre en contact avec les services techniques qui effectueront la réparation ou le remplacement en garantissant le respect des normes de sécurité Uniquement ou un fournisseur autorisé peut remplacer le câble principal du moulin 12 Déclaration de conformité CE Lasmarquesontétéadaptéesconformément aux directives de l UE indiquées ci dessous Tous les ...

Page 32: ...er maschine 2 Bedienungshandbuch 3 Identifikation 4 Technische beschreibung 5 Externe bauteile 6 Aufstellung 7 Menü und einstellung 8 Betriebsweise 9 Reinigung 10 Wartung 11 Sicherheitsvorschriften 12 EG konformitätserklärung ...

Page 33: ...lemenbitteaneinenKundendienstinIhrerNähe DiesesHandbuchistbiszumEinsatzeinerneuen Maschine aufzubewahren und muss dem Bedienungspersonal jederzeit zurVerfügung stehen 2 2 In diesem Handbuch werden einige spezielle Kennzeichnungen verwendet wie z B FettgedruckteAusdrücke sind besonders wichtig Zahlen in Klammern gefolgt von einemWort geben die Position des betreffendenArtikels in der nebenstehenden...

Page 34: ...mittlerer Röstung und einen Espressoma hlgrad Mahlmesser in mm 2 5 64 3 3 83 2 7 68 Durchsatz lb h Kg h 24 2 11 33 15 37 4 17 Kapazität Fülltrichter lb gr 3 74 1 700 Nettogewicht lb kg 31 9 14 5 33 4 15 2 37 5 17 Höhe x Breite xTiefe 25 x 8 2 x 14 4 in in mm 635 x 210 x 365 mm 110 v 60 hz 200w 100w 1100 rpm 470w 245w 1540 rpm 440w 245w 1300 rpm 260w 120w 1400 rpm 400w 245w 1390 rpm 220 v 60 hz 230...

Page 35: ... Fingerschutz Abdichtung Füllbehälter Dosierer Kaffeepulver Dosierhebel Positionsanzeige 14 Leuchtschalter Ein Aus 6 Aufstellung 6 1 Allgemeine Hinweise Vor der Aufstellung des Geräts muss der Installateur dieses Bedienungshandbuch sorgfältig durchlesen Die Aufstellung des Geräts ist von autorisiertem und qualifiziertem Fachpersonal unter Einhaltung der geltenden Sicherheits und Hygienevorschrifte...

Page 36: ...stellungsort Das Gerät ist auf einer ebenen und festen Oberfläche aufzustellen Es müssen mindestens folgende Mindestmaße am Arbeitsplatz zurVerfügung stehen um einen bestmöglichen Betrieb zu garantieren 6 4 Aufstellung der Kaffeemühle Bitte stellen Sie Folgendes sicher bevor Sie das Gerät einschalten Die Angaben auf dem Typenschild müssen mit denen des Stromnetzes übereinstimmen Die Stromstärke de...

Page 37: ... und die Verschlussklappe 4 für den gemahlenen Kaffee öffnen Dosierdeckel 8 abnehmen und durch Drehen des Mahlreglers 6 die gewünschte Mahlstärke des Kaffees einstel len Durch Drehen im Uhrzeigersinn wird die Mahlstärke gröber und durch Drehen in Gegenrichtung feiner Die Mahlstärke darf nur bei laufender Maschine umgestellt werden da sich ansonsten Kaffee an den Mahlmessern festsetzen und eine Rei...

Page 38: ... zu beginnen Bei vorhandenerautomatischerStoppfunktionwirdderMahlvorgangautomatischbeendet wenn der Mahldosierer die maximale Höhe erreicht und nach derAusgabe von 8 Kaffeeportionen wieder aktiviert um erneut die maximale Höhe zu erreichen Verfügt das Gerät nicht über eine automatische Stoppfunktion so empfehlen wir Ihnen den Mahldosierer zu 75 seines Fassungsvermögens zu befüllen um einen gleichm...

Page 39: ... Sicherheitsrad desTrichters 5 festdrehen 9 3 Reinigung des Kaffeedosierers Mit Hilfe eines Pinsels Kaffeereste entfernen die eventuell noch an den Innenseiten der Dosierkammern haften 9 4 Außenreinigung Verwenden Sie für die Außenreinigung einen Pinsel oder ein leicht mit Wasser und Seife befeuchtetesTuch HINWEIS Verwenden Sie nie feuchte Tücher zur Reinigung des Behälters für den gemahlenen Kaff...

Page 40: ...lters 14 ausschaltenundvomNetztrennen DasSicher heitsrad desTrichters 5 gemäßAbb 2 lösen und den Fülltrichter 2 aus dem Mahlregler 6 nehmen Die Schrauben des Mahlreglers 6 mit einem Inbusschlüssel gemäßAbb 10 lösen Den Mahlregler 6 im Uhrzeigersinn drehen bis er aus seiner Lagerung genommen werden kann Das Innere des Mahlbehälters mit einem Pinsel reinigen oder aussaugen Zustand der Mahlmesser prü...

Page 41: ...igt oder ein sonstiger Eingriff erforderlich sein wenden Sie sich bitte an den Kundendienst der die Reparatur oder den Austausch unter der garantierten Einhaltung der Sicherheitsvorschriften vornehmen wird Nur selbst oder ein von autorisierter Lieferant darf das Hauptkabel der Mühlen aus tauschen Hiermit bestätigen wir das gemäß der oben genannten EG Vorschrift die Warenzeichen angegeben wurden Al...

Page 42: ...ella macchina 2 Manuale d uso 3 Identificazione 4 Caratteristiche tecniche 5 Componenti esterni 6 Installazione 7 Regolazione 8 Funzionamento 9 Pulizia 10 Manutenzione 11 Misure di sicurezza 12 Dichiarazione di Conformità CE ...

Page 43: ... al servizio di assistenza più vicino Conservare il presente manuale fino alla sostituzione della macchina e fare in modo che sia sempre a disposizione dell operatore 2 2 Nel presente manuale sono utilizzati i seguenti termini speciali quali Caratteri in grassetto per sottolineare l importanza di alcuni termini Numeri tra parentesi dopo una parola che indicano la posizione di un componente nel dis...

Page 44: ...rendendo come base un caffè a media tostatura e punto di macinatura espresso Frese in mm 2 5 64 3 3 83 2 7 68 Produzione lb h Kg h 24 2 11 33 15 37 4 17 Capacità tramoggia lb gr 3 74 1 700 Peso netto lb kg 31 9 14 5 33 4 15 2 37 5 17 Altezza xAmpiezza x Profondità 25 x 8 2 x 14 4 in in mm 635 x 210 x 365 mm 110 v 60 hz 200w 100w 1100 rpm 470w 245w 1540 rpm 440w 245w 1300 rpm 260w 120w 1400 rpm 400...

Page 45: ...coglicaffè 11 10 7 4 Protezione salvamani Otturatore tramoggia Dosatore di caffè macinato Levetta di dosaggio Indicatore di posizione 14 Tasto luminoso di accensione spegnimento 6 Installazione 6 1 Avvertenze generali L installatore deve leggere attentamente il presente manuale d uso prima di installare l apparecchio L apparecchio deve essere installato da personale qualificato e autorizzato nel r...

Page 46: ...ssima alla macchina del caffè Perché l apparecchio funzioni in modo ottimale il luogo di utilizzo deve avere almeno le seguenti dimensioni 6 4 Installazione del macinacaffè Prima di collegare il macinacaffè controllare quanto segue I dati riportati sulla targhetta delle caratteristiche devono coincidere con quelli della rete elettrica La tensione elettrica nel luogo di utilizzo deve essere adeguat...

Page 47: ...ella macinatura desiderata Girando la ghiera in senso orario la macinatura sarà più grossa mentre in senso anti orario otterremo una macinaturà più fine Nota che dovresti spostare la ghiera per aggiustare la macinatura solamente quando il macinadosatore è nella posizione ON e le macine stanno lavorando Se non si esegue questa procedura le macine tenderanno a sporcarsi e di conseguenza sarà richies...

Page 48: ...sare l interrutore ON OFF 14 Lamacchinaincominceràamacinare Seèdotatadell opzioneautomatico ilmacinadosatore terminerà la macinazione quando raggiungerà il massimo livello nel dosatore e riprenderà la macinatura dopo aver servito 8 porzioni di caffè raggiungendo sempre il massimo livello Se non dispone dell opzione automatico noi raccomandiamo di riempire il dosatore per il 75 del suo volume per p...

Page 49: ... cacciavite a taglio e terminando l operazione avvitando a mano la testa che ricopre la vite di fissaggio 5 9 3 Pulizia del deposito di caffè macinato Per pulire il deposito di caffè macinato rimuovere dapprima tutto il caffè che si trova all interno Rimuovere il coperchio dosatore di caffè macinato 8 e pulirne l interno con un pennello 9 4 Pulizia esterna Per la pulizia esterna dell apparecchio u...

Page 50: ...o della tramoggia 5 come da Fig 2 e togliere la tramoggia dalla ghiera di regolazione della macinatura 6 Svitare le viti del regolatore di macinatura 6 utilizzando una chiave esagonale come Fig 10 Ruotare il regolatore del macinadosatore 6 in senso orario fino ad estrarlo dal suo alloggio Pulire l interno della camera di macinatura utilizzando un pennello oppure un aspiratore Verificare la condizi...

Page 51: ...ivolgersi al servizio di assistenza tecnica che provvederà alla riparazione o sostituzione garantendo il mantenimento degli standard di sicurezza Il cavo dell alimentazione dei macinacaffè può essere sostituito solo da un fornitore autorizzato 12 Dichiarazione di conformità CE Le marcature sono state applicate in base alla normativa della CE nominata qua sopra Tutti i ma teriali tecnici sono stati...

Page 52: ...áquina 2 Manual de instruções 3 Identificação 4 Características técnicas 5 Componentes externos 6 Instalação 7 Menu e regulação 8 Funcionamento 9 Limpeza 10 Manutenção 11 Medidas de segurança 12 Declaração de Conformidade CE ...

Page 53: ...veniente contactar o serviço técnico mais próximo Este manual deve ser conservado até à substituição da máquina e deve estar sempre à disposição do operador 2 2 Neste manual utilizam se alguns termos especiais como Caracteres a negrito para realçar a importância de alguns termos Números entre parênteses depois de uma palavra que indicam a posição desse artigo no desenho ao lado ou no desenho de co...

Page 54: ...torragem média e ponto de moagem expresso Fresas pol mm 2 5 64 3 3 83 2 7 68 Produção lb h Kg h 24 2 11 33 15 37 4 17 Capacidade tremonha lb gr 3 74 1 700 Peso líquido lb kg 31 9 14 5 33 4 15 2 37 5 17 Altura largura profundidade 25 x 8 2 x 14 4 pol pol mm 635 x 210 x 365 mm 110 v 60 hz 200w 100w 1100 rpm 470w 245w 1540 rpm 440w 245w 1300 rpm 260w 120w 1400 rpm 400w 245w 1390 rpm 220 v 60 hz 230 v...

Page 55: ...café 11 10 7 4 Protector das maõs Obturador da tremonha Doseador de café moído Alavanca doseadora Indicador de posição 14 Interruptor luminoso ON OFF 6 Instalação 6 1 Advertências gerais O instalador deve ler atentamente este manual de instruções antes de efectuar a instalação da máquina A instalação do aparelho deve ser efectuada por pessoal qualificado e autorizado e respeitando as normas de seg...

Page 56: ...a uniforme As dimensões mínimas do local de trabalho para garantir as melhores prestações de trabalho devem ser no mínimo as seguintes K 6 K 6 Silenzio K 6 Prof Barista K 8 31 5 800 12 1 310 16 406 K 8 Silenzio K 10 Conic K 10 Conic WBC MODELO Altura pol mm Largura pol mm Profund pol mm 6 4 Instalação do moinho de café Antes de ligar o moinho de café deve controlar se o seguinte Que os dados da et...

Page 57: ...r o café Retirar a tampa do doseador 8 e girar o regulador de moinho 6 até ajustar ao ponto desejado de moagem do café Ao girar no sentido dos ponteiros do relógio obtém um café moído mais grosso e girando no sentido contrário obtém um café moído mais fino Note que deve alterar os pontos de moagem apenas e sempre que a máquina estiver em funcionamento Se não seguir esta indicação o café acumula se...

Page 58: ...em funcionamento através do interruptor ON OFF 14 e o aparelho começa a moer café Integramos a opção de paragem automática o moinho deixará de moer café sempre que o doseador chegar ao nível máximo e voltará a ser activado de pois de servir 8 doses de café para voltar ao seu nível máximo Caso não tenha a opção de paragem automática recomendamos que encha o doseador a cerca de 75 da sua capacidade ...

Page 59: ...gurança do depósito e terminar apertando à mão o encaixe de segurança do depósito 5 9 3 Limpeza do doseador de café Com ajuda de um pincel limpar os restos de café que possam ter ficado agarrados no interior das câmaras do doseador 9 4 Limpeza exterior Para a limpeza exterior utilizar um pincel ou um pano ligeiramente humedecido em água e sabão NOTA Nunca utilizar panos humedecidos para a limpeza ...

Page 60: ... depósito 5 como na Fig 2 e retirar o depósito 2 do regulador do moinho 6 Desapertar os parafusos do regulador de moagem 6 com a ajuda de uma chave Allen como na Fig 10 Rodar o regulador do moinho 6 no sentido dos ponteiros do relógio até o des encaixar Limpar o interior da cavidade de moagem com ajuda de um pincel ou as pirador Verificar o estado das lâminas e trocar se for o caso Caso não seja n...

Page 61: ...tituição garantindo a manutenção das normas de segurança Apenas a um fornecedor autorizado pode substituir o cabo principal de qualquer moinho 12 Declaração de conformidade CE Seguindo a norma acima mencionada da CE as normas foram aplicadas Todos os materiais técnicos foram adequados e estão preparados e disponíveis nas nossas oficinas 04 108 CE sobre la aproximación de las legis laciones de los ...

Page 62: ...ТРУКЦИИ ПО ЭКСПЛУАТАЦИИ 3 МАРКИРОВКА 4 ТЕХНИЧЕСКИЕ ХАРАКТЕРИСТИКИ 5 НАРУЖНЫЕ КОМПОНЕНТЫ 6 УСТАНОВКА 7 МЕНЮ И РЕГУЛИРОВКА 8 ФУНКЦИОНИРОВАНИЕ 9 ЧИСТКА 10 ОБСЛУЖИВАНИЕ 11 МЕРЫ БЕЗОПАСНОСТИ 12 ДЕКЛАРАЦИЯ О СООТВЕТСТВИИ ИЗДЕЛИЯ СТАНДАРТАМ ЕС ...

Page 63: ...ии Вслучаевозникновения какой либопроблемыследуетобращатьсявближайшийкВамцентртехническогообслуживания Данное руководство по эксплуатации необходимо сохранять на протяжении всего времени пользованиякофеваркой ионодолжновсегдабытьподрукойупользователя 2 2 Внастоящемруководствепоэксплуатациибылииспользованы некоторыеспециальныетермины такиекак Слова выделенныежирнымшрифтом чтобыподчеркнутьважностьне...

Page 64: ...тельность берет за основу кофе средней степени обжарки и типа помола эспрессо Жерновов in mm 2 5 64 3 3 83 2 7 68 Производительность lb h Kg h 24 2 11 33 15 37 4 17 емкость хоппера lb gr 3 74 1 700 Вес нетто lb kg 31 9 14 5 33 4 15 2 37 5 17 Высота x Вес x глубина 25 x 8 2 x 14 4 in in mm 635 x 210 x 365 mm 110 v 60 hz 200w 100w 1100 rpm 470w 245w 1540 rpm 440w 245w 1300 rpm 260w 120w 1400 rpm 400...

Page 65: ...пера Распределитель земного кофе Ручка распределителя Индикатор положения и блок безопасности 14 ON OFF переключатель 6 Установка 6 1 Общие указания Человек осуществляющий установку данной машины должен внимательно прочесть данное руководство по эксплуатации перед началом работы Установку аппарата должен производить квалифицированный и уполномоченный персонал с соблюдением всех действующих норм бе...

Page 66: ...жание опасности короткого замыкания 6 3 Размещениекофеваркидляиспользования Аппарат должен быть установлен на ровной твердой поверхности Для обеспечения наилучшей службы аппарата размеры рабочего места должны быть как минимум следующими 6 4 Установкакофемолки Передподключениемкофемолкиксетинеобходимопроверитьследующее Убедитесь в том что данные указанные на ярлыке с характеристиками соответствует ...

Page 67: ...помола 6 до тех пор пока не добьетесь нужной степени помола кофе Вращая регулятор помола по часовой стрелке Вы получите кофе более грубого помола отвинчивание жепротивчасовойстрелкидасткофесболеемелкойстепеньюпомола Приэтомследуетпомнить чтоменятьстепеньпомолакофенужнотолькотогда когдамашинанаходитсяврабочемрежиме При несоблюдении этой инструкции жернова создадут скопления кофе и понадобится чистк...

Page 68: ...ь 8 1 Использованиекофемолки НажмитепереключательON OFF 14 чтобывключитьприбор Кофемолканачнетработу Если Ваша кофемолка оснащена режимом автоматической остановки то она перестанет перемалывать кофейные зёрна в тот момент когда дозатор достигнет уровня максимального заполнения молотым кофе Сделав 8 порций кофе кофемолка вновь начнет размол зёрен чтобы заполнить дозатор до максимального уровня Если...

Page 69: ...лечегозавинтитьвручнуюблокирующееустройствоконтейнера 5 9 3 Чисткадозаторамолотогокофе Чистка чтобыверхняяинижняякрышкибылиоткрыты Спомощьюкисточкивычиститьостатки кофе которыемоглиприлипнутьвнутриотделенийдозатора 9 4 Наружнаячистка Длянаружнойчисткикофеваркинеобходимоиспользоватькисточкуилитряпку слегкасмоченную врастворемыльнойводы ПРИМЕЧАНИЕ Ни в коем случае не пользоваться влажными тряпками д...

Page 70: ... на Рис 2 после чего снятьконтейнердлязёрен 2 срегуляторапомола 6 Отвинтить болты удерживающие регулятор помола 6 при помощи шестигранного ключа Аллена какпоказанонаРис 10 Вращать регулятор помола 6 по часовой стрелке до тех пор пока он не освободится и его можнобудет снять С помощью кисточки или пылесоса вычистить остатки кофе из внутренней полости кофемолки Проверить состояние жерновов и в случа...

Page 71: ...омпонента машины или для осуществления любого вмешательства в её механизм настоятельно советуем обращаться в центры технического обслуживания которые и произведут необходимый ремонт или замену гарантируяобеспечениестандартовбезопасности Только компания или поставщик уполномоченный со стороны может производить заменуосновногокабелялюбойизмоделейкофемолок 12 Декларация о Соответствии Изделия Стандар...

Page 72: ...Σ ΣΥΣΚΕΥΗΣ 2 ΕΓΧΕΙΡΙΔΙΟ ΟΔΗΓΙΩΝ ΧΡΗΣΗΣ 3 ΑΝΑΓΝΩΡΙΣΗ ΤΗΣ ΣΥΣΚΕΥΣΗΣ 4 ΤΕΧΝΙΚΑ ΧΑΡΑΚΤΗΡΙΣΤΙΚΑ 5 ΕΞΩΤΕΡΙΚΑ ΕΞΑΡΤΗΜΑΤΑ 6 ΕΓΚΑΤΑΣΤΑΣΗ 7 ΜΕΝΟΥ ΚΑΙ ΡΥΘΜΙΣΗ 8 ΛΕΙΤΟΥΡΓΙΑ 9 ΚΑΘΑΡΙΣΜΟΣ 10 ΣΥΝΤΗΡΗΣΗ 11 ΠΡΟΔΙΑΓΡΑΦΕΣ ΑΣΦΑΛΕΙΑΣ 12 ΔΉΛΩΣΗ ΠΙΣΤΌΤΗΤΑΣ ΕΚ ...

Page 73: ...παρουσιαστεί οποιοδήποτε πρόβλημα επικοινωνήστε με το πιο κοντινό κέντρο τεχνικής υποστήριξης Φυλάξτε το εγχειρίδιο αυτό μέχρις ότου αλλάξετε συσκευή και κρατήστε το πάντα στη διάθεση του χειριστή 2 2 Στο εγχειρίδιο αυτό χρησιμοποιούνται μερικοί ειδικοί όροι όπως Έντονοι bold χαρακτήρες για να τονιστεί η σπουδαιότητα ορισμένων όρων Αριθμοί σε παρένθεση ύστερα από μια λέξη που δείχνουν τη θέση του ...

Page 74: ...με βάση καφέ μέτριου βαθμού καβουρδίσματος και τύπου άλεσης espresso i Δίσκοι in mm 2 5 64 3 3 83 2 7 68 Παραγωγή lb h Kg h 24 2 11 33 15 37 4 17 Χωρητικότητα χοάνης lb gr 3 74 1 700 Καθαρό βάρος lb kg 31 9 14 5 33 4 15 2 37 5 17 Ύψος πλάτος βάθος 25 x 8 2 x 14 4 in in mm 635 x 210 x 365 mm 110 v 60 hz 200w 100w 1100 rpm 470w 245w 1540 rpm 440w 245w 1300 rpm 260w 120w 1400 rpm 400w 245w 1390 rpm 2...

Page 75: ...ης χεριών Παραθυρόφυλλο χοανών Διανομέας επίγειου καφέ Λαβή διανομέων Δείκτης θέσης και ομάδα δεδομένων ασφάλειας 14 On off διακόπτης 6 ΕΓΚΑΤΆΣΤΑΣΗ 6 1 Γενικές προειδοποιήσεις Πριν την εγκατάσταση της συσκευής πρέπει να διαβάσετε με προσοχή αυτό το εγχειρίδιο οδηγιών χρήσης Η εγκατάσταση της συσκευής πρέπει να γίνει από ειδικευμένο και εξουσιοδοτημένο προσωπικό και σύμφωνα με τις ισχύουσες προδιαγ...

Page 76: ...σε επίπεδη και στέρεη επιφάνεια Για την εξασφάλιση της βέλτιστης απόδοσης της συσκευής οι ελάχιστες διαστάσεις του χώρου εργασίας πρέπει να είναι τουλάχιστον 6 4 Εγκατάσταση του μύλου άλεσης καφέ Πριν να συνδέσετε το μύλο άλεσης καφέ στο ρεύμα πρέπει να ελέγξετε τα ακόλουθα Ότι τα στοιχεία στην ετικέτα χαρακτηριστικών συμπίπτουν με αυτά του ηλεκτρικού δικτύου Ελέγξτε ότι η ένταση της ηλεκτρικής εγ...

Page 77: ...υθείαν Αφαιρέστε το καπάκι διανομέων 8 και γυρίστε το ρυθμιστή αλέσματος 6 στην απαραίτητη ρύθμιση αλέσματος Με να γυρίσει το δεξιόστροφα το άλεσμα καφέ θα είναι πιό χονδροειδές και γυρίζοντας το αντίθετα προς τη φορά τωνδεικτωντουρολογιού τοάλεσμαθαείναιλεπτότερο Σημειώστεότιπρέπειμόνονααλλάξετε τιςτοποθετήσειςαλέσματοςότανείναιανοικτήημηχανήκαιτασαλιάσματαείναιστηνκίνηση Εάν δεν κάνετε αυτό τα σ...

Page 78: ...άν η αυτόματη επιλογή στάσεων ενσωματώνεται ο μύλος θα σταματήσει όταν φθάνει ο διανομέας στο ανώτατο όριο και θα ξαναξεκινήσει αφότου έχουν εξυπηρετηθεί 8 μερίδες του καφέ αλέθοντας πάλι στο ανώτατο όριο Εάν η μηχανή δεν ενσωματώνει την αυτόματη επιλογή στάσεων συστήνουμε ότι γεμίζετε doser 75 της ικανότητάς της προκειμένου να εγγυηθεί η συνεπής χορήγηση της δόσης Για να εξυπηρετήσετε servings κα...

Page 79: ...τη βοήθεια ενός πινέλου καθαρίστε τα υπολείμματα καφέ που είναι πιθανόν προσκολλημένα στο εσωτερικό των θαλάμων του δοσομετρητή 9 4 Εξωτερικός καθαρισμός Για τον εξωτερικό καθαρισμό της συσκευής χρησιμοποιείστε ένα πινέλο ή ένα πανί ελαφρώς βρεγμένο με νερό και σαπούνι ΣΗΜΕΙΩΣΗ Μη χρησιμοποιείτε ποτέ βρεγμένα πανιά για τον καθαρισμό του δοχείου αλεσμένου καφέ Φυλάξτε το πινέλο σε προστατευμένο χώρ...

Page 80: ... όπως φαίνεται στο σύκο 2 και απομακρύνετε τηχοάνη 2 απότορυθμιστήαλέσματος 6 Απελευθερώστετις3βίδεςστορυθμιστήαλέσματος 6 χρησιμοποιώντας ένα κλειδίΆλλεν όπως φαίνεται στο σύκο 10 Γυρίστε το ρυθμιστή αλέσματος 6 δεξιόστροφα έως ότου ανασηκώνει Χρησιμοποιώντας μια μικρό βούρτσα ή ένα κενό καθαρίστε το εσωτερικό της αλέθοντας αίθουσας Ελέγξτε τον όρο των σαλιασμάτων και τους αλλάξτε εάν είναι απαρα...

Page 81: ... κέντρα τεχνικής υποστήριξης τα οποία θα διενεργήσουν την επιδιόρθωση ή την αντικατάσταση σύμφωνα με τα πρότυπα ασφάλειας Μόνο η ή οι προμηθευτές που είναι εξουσιοδοτημένοι από την μπορούν να αντικαταστήσουν το κεντρικό καλώδιο οποιουδήποτε μύλου 12 ΔΉΛΩΣΗ ΠΙΣΤΌΤΗΤΑΣ ΕΚ Σύμφωνα με τον κανονισμό της ΕΕ που αναφέρεται ανωτέρω εφαρμόστηκαν τα κοινοτικά σήματα Όλα τα υλικά ήταν ενδεδειγμένα και ετοιμά...

Page 82: ......

Page 83: ......

Page 84: ......

Reviews: