install optional devices, the computer may detect a configuration
change and prompt you to run Computer Setup. (Section 6.7).
o Verify that all required device drivers are installed.
o Verify that all required changes have been made to the CONFIG.SYS file.
o Verify that all required changes have been made to the AUTOEXEC.BAT file.
o Verify that printer drivers have been installed for each application.
o Determine whether an external device or its cable is responsible for the
problem by running POST with and without the external device connected.
NOTE: To deactivate most of the sensors for the purposes of troubleshooting
a problem, turn configuration switch number 6 off (Section C.2).
Turning switch number 6 off deactivates the keylock switch and all
sensors except for the motor position sensor and the computer-present
sensor.
>>>>>>>>>>>>>>>>>>>>>>>>>>>>>>>>> CAUTION <<<<<<<<<<<<<<<<<<<<<<<<<<<<<<<<<
Be sure to turn configuration switch number 6 back on when troubleshooting
is complete to avoid possible data loss or damage to the system that may
occur during docking or undocking.
>>>>>>>>>>>>>>>>>>>>>>>>>>>>>>>>>>>>><<<<<<<<<<<<<<<<<<<<<<<<<<<<<<<<<<<<<<
7.1 Troubleshooting Tables
This section contains troubleshooting information for diagnosing the
following problems with the SmartStation:
o Battery charging
o Docking/undocking
o Enclosure alignment
o Hardware installation
o LEDs
o Power
o SCSI
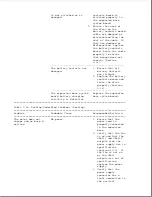
Table 7-1. Battery Charging Problems
===========================================================================
Problem
Probable Cause
Recommended Action(s)
===========================================================================
The battery charger
Spare battery pack is
No action is required.
LED on the expansion
already fully charged.
(Unless needed in the
base turns on briefly,
computer, leave in the
then turns off.
battery charging
compartment to maintain a
full charge.)
---------------------------------------------------------------------------
The battery charger
The spare battery pack
Remove the battery pack
LED on the expansion
is not the correct
and insert a Compaq LTE
base is flashing.
battery pack for this
Elite battery pack.
charger.
--------------------------------------------------
Summary of Contents for LTE Elite
Page 140: ...7 Remove the hard drive security clips by gently lifting up on them Figure 4 32 ...
Page 248: ...4 Remove the keylock from the outside of the bottom cover Figure 9 5 ...
Page 249: ...5 Slide the plastic keylock barrel out of the bottom cover Figure 9 6 ...
Page 269: ...3 Disconnect the harness extension cable from the system board Figure 9 26 ...
Page 297: ...5 Slide the switch board out of the switch frame Figure 9 52 ...
Page 304: ...5 Replace the eject switch and screw Figure 9 59 ...
Page 309: ...5 Replace the power switch and screw Figure 9 64 ...
Page 348: ...7 Unlock the expansion base keylock Figure D 3 ...
Page 369: ...9 Push the lever toward the back of the convenience base Figure D 16 ...
Page 373: ...5 Slide the computer toward you to remove it from the convenience base ...
Page 387: ......


