background image

Configuring the SAN Integrated Switch

3–9

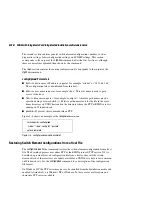
Specifying the Desired Status Policies

Use these steps to specify the status policies.

1. Log on with administrative privileges to the first switch element, using a Telnet 

connection.

login: admin
password: password

2. At the prompt, enter the 

switchStatusPolicySet 

command.

3. Specify the desired status policies. 

NOTE:  

To completely deactivate the alarm for a particular condition, enter 0


at the prompt for 

that condition and press the 

Enter

 key.

4. Repeat steps 1-3 for the remaining five switch elements in the SAN Integrated Switch.

Checking the Fabric for Port or ISL Issues

Use the 

islTopoShow 

command to make sure all switch elements in the SAN Integrated 

Switch are displayed. For complete information on the 

islTopoShow 

Telnet command, enter 

help islTopoShow

 from a Telnet prompt.

1. Log on with administrative privileges to the first switch element, using a Telnet 

connection.

login: admin
password: password

NOTE:  

These are the only switch elements connected to every other switch element in the 

group.

2. At the prompt, enter the 

islTopoShow 

command. This command provides general 

information about all switch elements in the group. The following example shows a 
fabric of 6 switch elements. 

SW1:admin>

islTopoShow

Switch ID

Domain

Worldwide Name

Name

01

231

10:00:00:60:69:12:0a:b9

SW1

02

232

10:00:00:60:69:12:09:b0

SW2

03

233

10:00:00:60:69:12:09:c0

SW3

04

234

10:00:00:60:69:12:04:3d

SW4

05

235

10:00:00:60:69:12:09:77

SW5

06

236

10:00:00:60:69:12:0b:c7

SW6

Summary of Contents for StorageWorks SAN Switch Integrated/32

Page 1: ...StorageWorks by Compaq Third Edition January 2002 Part Number AA RPDFC TE Compaq Computer Corporation SAN Switch Integrated 32 and SAN Switch Integrated 64 Installation and Hardware Guide ...

Page 2: ... warranties for Compaq products are set forth in the express limited warranty statements accompanying such products Nothing herein should be construed as constituting an additional warranty Compaq service tool software including associated documentation is the property of and contains confidential technology of Compaq Computer Corporation or its affiliates Service customer is hereby licensed to us...

Page 3: ...ext Conventions xii Symbols in Text xiii Symbols on Equipment xiii Rack Stability xiv Getting Help xv Compaq Technical Support xv Compaq Website xvi Compaq Authorized Reseller xvi Chapter 1 Overview Introduction 1 1 Features of the SAN Integrated Switch 1 2 Front Panel 1 3 ...

Page 4: ...es 3 2 Connecting the Serial Cable 3 3 Connecting Through a Workstation 3 5 Setting the IP Address 3 5 Connecting the Ethernet Cables 3 7 Modifying the Domain IDs 3 8 Specifying the Desired Status Policies 3 9 Checking the Fabric for Port or ISL Issues 3 9 Checking Each Switch Element for Port or ISL Issues 3 10 Resetting Factory Defaults 3 10 Saving and Restoring the Switch Element Configuration ...

Page 5: ...tch Element and Fabric for Port or ISL Issues 4 15 Chapter 5 Upgrading Firmware Downloading Firmware from the Compaq Website 5 1 Upgrading Firmware Using Web Management Tools 5 2 Upgrading Firmware Using a Telnet Command 5 4 Windows NT Intel Host 5 4 Windows NT Alpha Host 5 5 Compaq Tru64 UNIX Host 5 6 Appendix A Regulatory Compliance Notices Regulatory Compliance Identification Numbers A 1 Federa...

Page 6: ...ons A 7 Laser Product Label A 7 Laser Information A 7 Battery Replacement Notice A 8 Appendix B Electrostatic Discharge Precautions Against Electrostatic Discharge B 1 Grounding Methods B 2 Appendix C Specifications Weight Specifications C 1 Physical Dimensions C 2 Environmental Specifications C 2 GBICs C 3 Switch Element Specifications C 3 Switch Element Memory C 4 Power Supply C 4 Factory Defaul...

Page 7: ...7 Front and rear views of power cable Installation 2 14 Figure 3 1 Connecting the serial cable 3 4 Figure 3 2 Connecting the Ethernet cables 3 7 Figure 3 3 configUpload command example 1 3 13 Figure 3 4 configUpload command example 2 3 14 Figure 3 5 configDownload command example 1 3 15 Figure 3 6 configDownload command example 2 3 16 Figure 3 7 Dual SC fiber optic plug keyed connector 3 18 Figure...

Page 8: ......

Page 9: ...bre Channel Cabling Specifications 3 19 Table 3 8 Fibre Channel Cabling Part Numbers 3 19 Table 4 1 Group Information 4 13 Table 4 2 Cable Configuration for IS 32 4 16 Table 4 3 Cable Configuration for IS 64 4 17 Table C 1 Weight Specifications C 1 Table C 2 Dimensions for the SAN Integrated Switch C 2 Table C 3 Environmental Specifications C 2 Table C 4 Switch Element Specifications C 3 Table C 5...

Page 10: ......

Page 11: ...ventions Throughout this document the StorageWorks SAN Switch Integrated 32 and SAN Switch Integrated 64 will be referred to as follows Collectively both models will be called the SAN Integrated Switch Individually the models will be called the IS 32 or the IS 64 Each of the six individual switches comprising the SAN Integrated Switch will be referred to as one of the following A switch element Th...

Page 12: ...AN Switch Management Guide AA RMMJB TE Located on the StorageWorks SAN Switch Software CD Keys Keys appear in boldface A plus sign between two keys indicates that they should be pressed simultaneously USER INPUT User input appears in a different typeface and in uppercase FILENAMES File names appear in uppercase italics Menu Options Command Names Dialog Box Names These elements appear in initial ca...

Page 13: ...ext set off in this manner presents commentary sidelights or interesting points of information Symbols on Equipment These icons may be located on equipment in areas where hazardous conditions may exist Any surface or area of the equipment marked with these symbols indicates the presence of electrical shock hazards Enclosed area contains no operator serviceable parts WARNING To reduce the risk of i...

Page 14: ...ly marked with these symbols indicates that the component exceeds the recommended weight for one individual to handle safely WARNING To reduce the risk of personal INJURY or damage to the equipment observe local occupational health and safety requirements and guidelines for manual material handling Rack Stability WARNING To reduce the risk of personal injury or damage to the equipment be sure that...

Page 15: ...ored Outside North America call the nearest Compaq technical support phone center Telephone numbers for worldwide technical support centers are listed on the Compaq website Access the Compaq website by logging on to the Internet at http www compaq com Be sure to have the following information available before you call Compaq Technical support registration number if applicable Product serial number...

Page 16: ...ct as well as the latest firmware You can access the Compaq website by logging on to the Internet at http www compaq com storage Compaq Authorized Reseller For the name of your nearest Compaq authorized reseller In the United States call 1 800 345 1518 In Canada call 1 800 263 5868 Elsewhere see the Compaq website for locations and telephone numbers ...

Page 17: ...cking or 64 low latency ports each port is capable of delivering 100 megabytes per second MB s full duplex Cut through routing provides latency of less than 2 microseconds from switch port to switch port The SAN Integrated Switch consists of a 14U 25 inch high rack mountable enclosure with six integrated switch elements that are preconfigured with all necessary interswitch cabling for quick instal...

Page 18: ...Integrated Switch Features of the IS 32 and IS 64 include the following High data throughput All user ports are capable of the maximum Fibre Channel speed of one Gb s in a full Fibre Channel fabric architecture Factory configured with shortwave optical GBICs and ISL optical cables to provide either 32 or 64 user ports Each port can also accept longwave optical GBICs High availability Automatic dyn...

Page 19: ...2 shows the front panels of the IS 32 and IS 64 with all ISLs connected Figure 1 3 shows the logical view of the IS 32 and IS 64 user ports and ISLs Figure 1 1 Front panel features of a IS 32 or IS 64 port SAN Integrated Switch 1 RJ 45 Ethernet port used for switch management 6 2 GBIC modules 96 total 32 or 64 customer accessible ports the rest are used for ISLs 3 Self retaining screw 12 4 AC powe...

Page 20: ...the IS 32 and IS 64 Figure 1 3 Logical view showing ISLs and user ports on the IS 32 and IS 64 For a list of available user ports see Connecting the Fibre Channel Cables page 3 18 Front panel of IS 32 Front panel of IS 64 indicates user port interconnecting lines indicate ISLs ISL cable configuration on IS 32 ISL cable configuration on IS 64 SHR 2195A 1 2 3 4 5 6 1 2 3 4 5 6 SHR 2196A ...

Page 21: ...rated Switch A rack mounting kit is included with your SAN Integrated Switch Plan before you begin to rack mount the SAN Integrated Switch and observe the following guidelines When you install the SAN Integrated Switch in a closed or multirack assembly be sure the air temperature measured at the front panel does not exceed 40 C 104 F during operation The SAN Integrated Switch can be installed faci...

Page 22: ... the rack have reliable grounds do not rely on connection to a branch circuit such as a power strip Route and support the power cords to ensure that the switch elements move freely on the slide brackets without crimping or chafing the power cords or interfering with other equipment and cables installed in the rack CAUTION It is strongly recommended that the rack be mechanically secured to prevent ...

Page 23: ...x C Each switch element has its own universal power supply capable of functioning worldwide without voltage jumpers or switches The power supply is auto ranging in terms of accommodating input voltages and line frequencies and meets IEC 61000 4 5 surge voltage requirements Each AC power cord is inserted into the connector at the bottom of each switch element see Installing the SAN Integrated Switc...

Page 24: ...ng switch elements among multiple power sources Each of the two power sources is best protected by its own Uninterruptable Power Supply UPS The AC power source must meet these requirements A properly wired earth grounded AC outlet Voltage capability of 85 264 VAC Input voltage frequency of 47 63 Hz Power capability of 75W maximum per switch element 1 2 3 4 5 6 SHR 2197A PDU PDU ...

Page 25: ... pounds The use of a lift device is recommended to install safely the SAN Integrated Switch and to reduce the possibility of injury or product damage This procedure documents the use of a lift device 1 To release each of the six latches at the front of the crate and the two latches at the rear of the crate WARNING Brace the front panel of the crate before releasing the final latch otherwise the pa...

Page 26: ... Installation and Hardware Guide Figure 2 2 SAN Integrated Switch on pallet with crate cover removed 1 Pallet 2 SAN Integrated Switch 3 Box containing documentation kit and cables 4 Box containing mounting hardware 5 Screws which attach SAN Integrated Switch to pallet brackets two per bracket four brackets 1 2 3 4 5 SHR 2198A ...

Page 27: ...ling the SAN Integrated Switch 2 7 Identifying the Crate Contents The following items are included in the SAN Integrated Switch crate see Figure 2 3 Figure 2 3 Package contents 1 3 4 6 10 7 8 5 SHR 2199A 9 2 ...

Page 28: ...mounted to the same height as the top surface of the lift device c Remove the eight screws holding the SAN Integrated Switch to brackets on the pallet See Figure 2 2 d Slide the SAN Integrated Switch across from the pallet to the lift device Crate Contents Quantity 1 Fully configured SAN Integrated Switch 1 2 Fibre Channel SAN Switch 16 EL switch elements interconnected with ISLs 6 3 Left and Righ...

Page 29: ...as three square openings for mounting equipment The rail is positioned such that the top front screw is installed above the small round hole and the second screw below the round hole 1 Air flow 2 Rails in Rack 3 Left and Right Rack Mount Brackets 4 Left and Right Upper Rear Brackets straight section 5 Left and Right Upper Rear Brackets L section 6 Cage nuts 1 4 4 3 3 5 5 6 2 SHR 2200A ...

Page 30: ...Switch in such a way that cooling air of all components in the rack is flowing the same direction item 1 d Attach the left and right Rack Mount Brackets to the rails in the rack Use two 1 4 20 X 5 inch Phillips head screws to attach the front of each bracket Use four 1 4 20 X 5 inch Phillips head screws to attach the rear of each bracket e Tighten the length adjustment screws in each Rack Mount Br...

Page 31: ...ed Switch e Repeat steps c and d for the straight section of the left Upper Rear Bracket 4 Insert four cage nuts in the rails They are used to attach the Front Rail Brackets of the SAN Integrated Switch to the rails in the rack see Figure 2 6 a On the left front rail count up three square openings from the upper screw of the Rack Mount Bracket Insert the first cage nut b Measure 26 square openings...

Page 32: ...ing the spring loaded hinges b Using the lift device position the SAN Integrated Switch adjacent to the rack c Align the lift table top so it is level with the Rack Mount Bracket d Assign one person to guide the SAN Integrated Switch into place from the rear of the rack e Assign another person to simultaneously guide the SAN Integrated Switch off the lift and onto the shelf created by the Rack Mou...

Page 33: ...of the Upper Rear Brackets with the length adjustment screws b Secure the L section of the Upper Rear Bracket to the rail using a total of four 1 4 20 X 5 inch Phillips head screws two on the left and two on the right c Tighten the length adjustment screws in the brackets d Tighten the screws holding the bracket to the rail e At the front of the SAN Integrated Switch insert a total of four 10 32 X...

Page 34: ...l each of the six AC power cords see Figure 2 7 a Route each cord from the rear of the SAN Integrated Switch through the power cable channel b Insert the cable into the receptacle on the SAN Integrated Switch Figure 2 7 Front and rear views of power cable Installation 8 Replace the door of the SAN Integrated Switch 1 AC power cable 2 Power cable channel SHR 2202A 2 1 ...

Page 35: ...erial and Ethernet Cables page 3 2 Modifying the Domain IDs page 3 8 Specifying the Desired Status Policies page 3 9 Checking the Fabric for Port or ISL Issues page 3 9 Checking Each Switch Element for Port or ISL Issues page 3 10 Resetting Factory Defaults page 3 10 Saving and Restoring the Switch Element Configuration Settings page 3 11 Status Indicators page 3 17 Connecting the Fibre Channel Ca...

Page 36: ...h a router hub or concentrator Powering Up the Switch Elements The switch elements do not have power switches Connect each AC power cord from the switch element in the SAN Integrated Switch to a power source in order to power up You will see a steady green light indicating that power is on 1 Firmly seat each power connector into the power source If no light is showing power is not being supplied t...

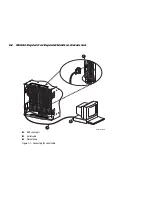
Page 37: ...q sales representative or authorized reseller use part number 230436 B21 This number replaces 188851 B21 IMPORTANT Keep the serial cable in a safe location If it is lost you can order another cable through your Compaq authorized reseller Table 3 1 lists the signal and description of the serial port pinouts To make a serial connection connect the serial cable provided in the kit to the switch eleme...

Page 38: ...and Integrated 64 Installation and Hardware Guide 3 4 SAN Switch Integrated 32 and Integrated 64 Installation and Hardware Guide Figure 3 1 Connecting the serial cable 1 DB9 serial port 2 Serial cable 3 Workstation 2 3 SHR 2203A 1 ...

Page 39: ...serial port on the workstation 5 On the workstation open a terminal emulation program such as HyperTerminal on Windows 95 or NT or TERM in a UNIX environment Configure as follows see Table 3 2 6 From the terminal emulator application log on to the first switch element switch element 1 through the serial connection Setting the IP Address Each switch element must have a valid IP address to enable an...

Page 40: ...d for the following Ethernet IP Address current Enter new Ethernet IP address defaults for switches 1 through 6 respectively are 10 77 77 77 10 77 77 76 10 77 77 75 10 77 77 74 10 77 77 73 10 77 77 72 Ethernet Subnetmask current Enter new Ethernet subnetmask default is 0 0 0 0 Fibre Channel IP Address current Enter new Fibre Channel IP address if desired Fibre Channel Subnet Mask current Enter new...

Page 41: ...r remote monitoring testing and management Figure 3 2 Connecting the Ethernet cables 1 Connect all six switch elements by Ethernet cable to the LAN 2 Access each switch element through the network connection You can manage the individual switch elements using Web Management Tools or Telnet commands For detailed information on Telnet commands and managing your switch elements refer to the Compaq St...

Page 42: ...r the default or a selected ID is already in use when the switch element is connected to the fabric the Domain ID is automatically reset to a unique value The Domain IDs in use can be determined by using the fabricShow command on a switch element connected to the larger SAN fabric 1 Log on with administrative privileges to the first switch element using a Telnet connection login admin password pas...

Page 43: ...e sure all switch elements in the SAN Integrated Switch are displayed For complete information on the islTopoShow Telnet command enter help islTopoShow from a Telnet prompt 1 Log on with administrative privileges to the first switch element using a Telnet connection login admin password password NOTE These are the only switch elements connected to every other switch element in the group 2 At the p...

Page 44: ...ange a password and forget it the password can be reset to the factory default To revert to factory default values 1 Power down the switch element by unplugging the power cord 2 Connect the serial cable from the host serial port to the switch element serial port 3 Power up the switch element by plugging in the power cord 4 Establish a connection between the host and the switch element using a term...

Page 45: ...e cfgClear Telnet command on the new switch element or by inserting the word clear into the configuration file immediately before the zoning lines Saving Switch Element Configurations to a Host File The configUpload Telnet command saves the switch element configuration to a host file The upload process uses either File Transfer Protocol FTP or the Remote Shell Daemon RSHD protocol TCP service 514 ...

Page 46: ...ive tools Appropriate permissions for the created folder NTFS volumes only must be set up to allow the user to have read and write privileges Uploading a Configuration Use these steps to upload configuration settings 1 From the workstation establish a Telnet connection to the switch element and log on with administrative privileges 2 Enter the switchDisable command to disable the switch element 3 ...

Page 47: ...any punctuation character is treated as a comment see Table 3 3 NOTE Elements enclosed in braces indicate zero or more occurrences of the enclosed elements The configuration file is written as three sections The first section contains the switch element boot parameters otherwise known as the switch element s identity with variables such as the switch element s name and IP address This section corr...

Page 48: ...pecified using a forward slash Relative path names look for the file in the user s home directory on UNIX hosts and in the directory where the FTP or RSHD server is running on Windows hosts passwd If present this command selects FTP Figure 3 4 shows an example of the configUpload command Figure 3 4 configUpload command example 2 Restoring Switch Element Configurations from a Host File The configDo...

Page 49: ...ch case the user is prompted for input including choice of FTP or RSHD If invoked with three parameters RSHD is used otherwise presence of the fourth parameter FTP password selects FTP Figure 3 5 shows an example of the configDownload command Figure 3 5 configDownload command example 1 A download may fail for one of the following reasons The switch element does not recognize the host name The host...

Page 50: ...n is added to the current configuration there may not be any conflicts If the current zoning configuration is to be replaced then the keyword clear may be inserted into the configuration file immediately before the zoning lines All licenses that are on the switch element will be retained and new ones will be added during the configDownload operation configDownload Parameters host A host name or IP...

Page 51: ...iagnostics or port disable command Flashes every two seconds Fast yellow 1 4 second intervals Error or fault with port Flashes every half second Steady green Online connected with device over cable Slow green 1 second intervals Online but segmented loopback cable or incompatible switch Flashes every two seconds Fast green 1 4 second intervals Internal loopback diagnostic Flashes every half second ...

Page 52: ... keyed and must be inserted into the GBIC module connector in proper alignment CAUTION The fiber optic cables are fragile and should not be bent to a radius of less than 0 5 inches Do not force the fiber optic plug into the GBIC module as this may damage the connector the GBIC module or both Verify that the fiber optic connector is clean free of dust or debris and correctly aligned before insertin...

Page 53: ...ts the cabling specifications for Fibre Channel cables Table 3 8 lists the Fibre Channel cable part numbers and length Table 3 7 Fibre Channel Cabling Specifications Cable Type Cable Specifications Maximum Length GBIC Module Multi mode fiber SC Duplex plug connectors 50 µm core diameter 125 µm cladding diameter duplex cable 1641 ft 500 m 780 860 µm without open fiber control non OFC Short wave fib...

Page 54: ...the factory installed short wave GBIC modules with long wave GBIC modules The storage subsystem host and other devices connect to the GBIC modules in the SAN Integrated Switch Cable connectors are keyed and must be inserted properly into the GBIC module connectors Remove the protective cover from the GBIC connector and make sure that the surfaces of all cable and GBIC module connectors are clean a...

Page 55: ...l lithium manganese dioxide a vanadium pentoxide or an alkaline battery There is risk of fire and burns if the battery is not handled properly To reduce the risk of personal injury Do not attempt to recharge the battery Do not expose to temperatures higher than 140 F 60 C Do not disassemble crush puncture short external contacts or dispose of in fire or water NOTE For information on diagnostics an...

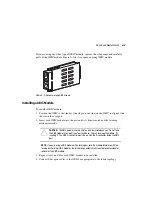
Page 56: ...ch Management Application page of the Web Management Tools the GBICs are identified differently depending on the type of GBIC and the supplier Some examples of the displays include ID for VIXEL short wave GBICs and SW for IBM shortwave GBICs CAUTION The GBIC module contains static sensitive components Use electrostatic discharge ESD precautions while handling the GBIC module Removing a GBIC Module...

Page 57: ... seated and the latching mechanism locks CAUTION The GBIC module is keyed and can only be inserted one way Do not force the GBIC module into a port if you feel resistance This can damage the module Try inverting it The GBIC D connector must line up with the D connector inside the GBIC port NOTE If you are using a GBIC module with a locking bar lock the module into place with the locking bar For ot...

Page 58: ...t be running the same firmware version To check the version log on with administrative privileges to the switch element using a Telnet connection At the prompt enter the version command For more information on this and other Telnet commands refer to the Compaq StorageWorks Fibre Channel SAN Switch Management Guide or enter the help command at the Telnet prompt For example to display information ab...

Page 59: ...itch and log on with administrative privileges b Enter sgroupShow at the Telnet prompt to display information about all the switches in the fabric This command lists the WWNs for each switch element and switch in the SAN For example this fabric has four switches with the following information NOTE The fabricShow command can be used to retrieve information about all the switches in the larger SAN f...

Page 60: ...cessary to power down the other switch elements that were connected to the switch element being replaced b If the serial cable is connected disconnect it from the switch element c Make sure both ends of each Ethernet cable are labeled with the switch element number then disconnect the Ethernet cable CAUTION The fiber optic cables are fragile and should not be bent to a radius of less than 0 5 inch...

Page 61: ...sten the switch element brackets to the SAN Integrated Switch item 1 b Carefully move the wiring harness out of the way so you can slide the switch element forward without bending the cables CAUTION A rack may become unstable if more than one component is extended Extend only one component at a time c Slide the switch element forward and remove from the SAN Integrated Switch 1 Self retaining screw...

Page 62: ... the four 8 32 x 312 Phillips panhead screws in each bracket setting the brackets and screws aside for the new switch element see Figure 4 4 Figure 4 4 The switch element with slide mounting brackets 7 Remove all the GBICs from the switch element which is being replaced See Removing a GBIC Module page 4 2 1 Bracket screws 8 8 32 x 312 Phillips panhead screws 2 Switch element slide mounting bracket...

Page 63: ...w in the oblong hole diagonal from the smallest hole iii Position and finger tighten the remaining two 8 32 x 312 Phillips panhead screws in the remaining two holes iv Tighten all four screws to a torque of 18 inch pounds c Repeat steps a and b with the second bracket on the other side of the switch element 3 Install the new switch element in the SAN Integrated Switch chassis a Orient the switch e...

Page 64: ... configuration information shown in Step 3 Page 3 6 c Verify that the address was set correctly by entering the IPaddressShow command 4 Set the Domain ID to the value used by the previous switch element if still available The default Domain IDs on the six switch elements shipped with the SAN Integrated Switch are 231 232 233 234 235 and 236 respectively NOTE If the Domain ID whether the default or...

Page 65: ... name required to access computer File Name usr switch firmware Enter filename or absolute path of firmware Protocol RSHD or FTP rshd Press Enter to use RSHD or enter FTP to use FTP protocol Password FTP password only displays if FTP protocol was selected d Restart the switch element by entering the Reboot command 6 Restore any unsaved switch element configuration If you saved the switch element c...

Page 66: ...D or enter FTP to use FTP protocol Password FTP password only displays if FTP protocol was selected d Reenable the switch element by entering the switchEnable command e Restart the switch element to implement the new profile and configuration by entering the reboot command Adding the New Switch Element to the Integrated Fabric Use these steps to add a new switch element 1 Connect the Ethernet cabl...

Page 67: ...he existing group information a Log on to the new switch element with administrative privileges using a Telnet connection b At the prompt enter the sgroupSet command c Enter the requested information at the prompt d Continue until all six switch elements are added to the group SAN Integrated Switch Model Matrix Diagram IS 32 Table 4 2 Page 4 16 Figure 4 5 Page 4 18 IS 64 Table 4 3 Page 4 17 Figure...

Page 68: ...at steps a through e for each of the remaining switch elements in the group NOTE Once the group has been set up on all six switch elements the group members are identified by WWN and changes in the domain IDs do not affect the group definition 7 Check the Fabric and Switch Element for Port or ISL issues See Checking the Fabric for Port or ISL Issues page 3 9 See Checking Each Switch Element for Po...

Page 69: ...locate the open ISL ports and the associated switch elements c Checking the color coded cable diagram inside your SAN Integrated Switch see Figure 4 5 and Table 4 2 for the IS 32 and Figure 4 6 and Table 4 3 for the IS 64 2 Make sure both ends of the new cable are labeled correctly 3 Line up the keyed cable connector with the notch in the GBIC of the appropriate port and switch element 4 Insert th...

Page 70: ... PORT 8 SW 1 PORT 5 SW 3 PORT 9 SW 1 PORT 6 SW 3 PORT 10 SW 1 PORT 7 SW 3 PORT 11 Blue SW 1 PORT 8 SW 4 PORT 8 SW 1 PORT 9 SW 4 PORT 9 SW 1 PORT 10 SW 4 PORT 10 SW 1 PORT 11 SW 4 PORT 11 Red SW 1 PORT 12 SW 5 PORT 8 SW 1 PORT 13 SW 5 PORT 9 SW 1 PORT 14 SW 5 PORT 10 SW 1 PORT 15 SW 5 PORT 11 Green SW 6 PORT 0 SW 5 PORT 12 SW 6 PORT 1 SW 5 PORT 13 SW 6 PORT 2 SW 5 PORT 14 SW 6 PORT 3 SW 5 PORT 15 G...

Page 71: ...SW 3 PORT 12 SW 1 PORT 11 SW 3 PORT 13 Blue SW 1 PORT 12 SW 4 PORT 12 SW 1 PORT 13 SW 4 PORT 13 Red SW 1 PORT 14 SW 5 PORT 12 SW 1 PORT 15 SW 5 PORT 13 Green SW 6 PORT 8 SW 5 PORT 14 SW 6 PORT 9 SW 5 PORT 15 Grey SW 6 PORT 10 SW 4 PORT 14 SW 6 PORT 11 SW 4 PORT 15 Orange SW 6 PORT 12 SW 3 PORT 14 SW 6 PORT 13 SW 3 PORT 15 Dark Blue SW 6 PORT 14 SW 2 PORT 14 SW 6 PORT 15 SW 2 PORT 15 ...

Page 72: ...ront of your switch The color diagram in conjunction with the Cable Configuration matrix Table 4 2 and Table 4 3 indicates the interconnectivity between the ports The cables themselves are also labeled with their port and switch numbers Figure 4 5 The ISL cabling diagram for an IS 32 Figure 4 6 The ISL cabling diagram for an IS 64 1 Switch element 1 2 Switch element 2 3 Switch element 3 4 Switch e...

Page 73: ...update the firmware on the new switch The firmware version can be determined by using The version command in Telnet The Switch Management Application page in Web Management Tools Refer to the Compaq StorageWorks Fibre Channel SAN Switch Management Guide for more information on Telnet commands and Web Management Tools Downloading Firmware from the Compaq Website To download the firmware from the Co...

Page 74: ...ls to download firmware upgrades To download the firmware 1 Copy the files RSHD EXE and CAT EXE to the root directory for example C on the host system These files are found in D DSGGB FIRMWARE NTINTEL RSHD EXE D DSGGB FIRMWARE NTINTEL CAT EXE D DSGGB FIRMWARE NTINTEL V2 x x where D is the drive letter for the CD and version 2 x x is the latest version of firmware 2 Double click RSHD EXE RSHD is a ...

Page 75: ...nter the path name where the firmware resides IMPORTANT You must use the UNIX style of forward slash for the path name NOTE When the firmware file is located in the same directory as the CAT EXE and RSHD EXE files the directory path can be omitted 9 Click the Download Firmware button The firmware is downloaded IMPORTANT Prior to downloading the firmware the RSHD EXE program must be running from th...

Page 76: ...ost To upgrade the firmware in a switch element use the StorageWorks SAN Switch Software V2 x x CD Use one of the following three procedures either Windows NT Intel Windows NT Alpha or Compaq Tru64 UNIX Windows NT Intel Host To load the firmware from a Compaq PC running Windows NT Intel 1 Copy the files RSHD EXE and CAT EXE to the root directory for example C on the host system These files are fou...

Page 77: ...witch restarts and copies the firmware into RAM Windows NT Alpha Host To load the firmware from an NT Alpha machine 1 Copy the files RSHD EXE and CAT EXE to the root directory for example C on the host system These files are found in D DSGGB FIRMWARE NTALPHA RSHD EXE D DSGGB FIRMWARE NTALPHA CAT EXE D DSGGB FIRMWARE NTALPHA V2 x x where D is the drive letter for the CD and Version 2 x x is the lat...

Page 78: ...ndow and click File then Exit 8 Click the Telnet window and enter the reboot command The switch restarts and copies the firmware into RAM Compaq Tru64 UNIX Host To load the firmware from a host running Compaq Tru64 UNIX 1 Mount the CD device by using the following command mount t cdfs r dev rz5c mnt where rz5c is the device name for the CD 2 Change to the CD directory by entering cd mnt 3 To copy ...

Page 79: ...2 x x where 16 140 32 60 is the IP address of the host system with the firmware image mary is the user to RSH and tmp V2 x x is the firmware image to be loaded into the switch flash ROM NOTE The quotation marks are very important in the firmwareDownload command line RSH without a password must be enabled for the user that RSH is executing under To enable RSH without a password add the switch IP na...

Page 80: ......

Page 81: ...liance Identification Numbers For the purpose of regulatory compliance certifications and identification your Compaq StorageWorks SAN Integrated Switch is assigned a Compaq series number The Compaq series number for this product is Series NA2104 The SAN Integrated Switch series number can be found on the product label along with the required approval markings and information When requesting certif...

Page 82: ... After the class of the device is determined refer to the corresponding statement in the sections below Class A Equipment This equipment has been tested and found to comply with the limits for a Class A digital device pursuant to Part 15 of the FCC Rules These limits are designed to provide reasonable protection against harmful interference when the equipment is operated in a commercial environmen...

Page 83: ...tates Only This device complies with Part 15 of the FCC Rules Operation is subject to the following two conditions 1 this device may not cause harmful interference and 2 this device must accept any interference received including interference that may cause undesired operation For questions regarding your product contact Compaq Computer Corporation P O Box 692000 Mail Stop 530113 Houston Texas 772...

Page 84: ... EMI connector hoods in order to maintain compliance with FCC Rules and Regulations Canadian Notice Avis Canadien Class A Equipment This Class A digital apparatus meets all requirements of the Canadian Interference Causing Equipment Regulations Cet appareil numérique de la classe A respecte toutes les exigences du Règlement sur le matériel brouilleur du Canada Class B Equipment This Class B digita...

Page 85: ...g European Norms the equivalent international standards are in parenthesis EN55022 1998 CISPR 22 Electromagnetic Interference EN55024 1998 IEC61000 4 2 IEC61000 4 3 IEC61000 4 4 IEC61000 4 5 IEC61000 4 6 IEC61000 4 8 IEC61000 4 11 Electromagnetic Immunity EN60950 IEC950 Product Safety Power Quality IEC61000 3 2 Harmonics and IEC61000 3 3 Voltage Fluctuations and Flicker Also approved under UL 1950...

Page 86: ...and maintenance Laser Safety Warnings WARNING To reduce the risk of exposure to hazardous radiation Do not try to open the laser device enclosure There are no user serviceable components inside Do not operate controls make adjustments or perform procedures to the laser device other than those specified herein Allow only Compaq authorized service technicians to repair the laser device Compliance wi...

Page 87: ... located on the surface of the Compaq supplied laser device This label indicates that the product is classified as a CLASS 1 LASER PRODUCT This label appears on a laser device installed in your product Laser Information Laser Type Semiconductor GaAIAs Wave Length 780 nm 35 nm Divergence Angle 53 5 degrees 0 5 degrees Output Power Less than 0 2 mW or 10 869 W m 2 sr 1 Polarization Circular 0 25 Num...

Page 88: ...t your Compaq authorized reseller or your authorized service provider WARNING Your switch contains either an internal lithium manganese dioxide a vanadium pentoxide or an alkaline battery There is risk of fire and burns if the battery is not handled properly To reduce the risk of personal injury Do not attempt to recharge the battery Do not expose to temperatures higher than 140 F 60 C Do not disa...

Page 89: ...y damage system boards or other static sensitive devices This type of damage may reduce the life expectancy of the device To prevent electrostatic damage observe the following precautions Avoid hand contact by transporting and storing products in static safe containers Keep electrostatic sensitive parts in their containers until the parts arrive at static free workstations Place parts on a grounde...

Page 90: ...nce in the ground cords To provide proper grounding wear the strap snug against the skin Use heel straps toe straps or boot straps at standing workstations Wear the straps on both feet when standing on conductive floors or static dissipating floor mats Use conductive field service tools Use a portable field service kit with a folding static dissipating work mat If you do not have any of the sugges...

Page 91: ...lement Specifications page C 3 Factory Default Settings page C 5 Weight Specifications Table C 1 describes the weight specifications of each aspect of the SAN Integrated Switch Table C 1 Weight Specifications Hardware Weight Chassis empty 65 Pounds Individual Switch Elements 20 Pounds Chassis with all six switch elements installed fully loaded with GBICs and fiber optic cables 200 Pounds ...

Page 92: ...Smallest Rack Space Height of SAN Integrated Switch 62 2 cm 24 5 in 14 Units Width 4 5 cm 17 5 in 19 inches Depth 62 2 cm 24 5 in 30 inches Table C 3 Environmental Specifications Specification Value Temperature operating 50 F to 104 F 10 C to 40 C at 3 km 9800 ft Temperature non operating 31 F to 147 F 35 C to 63 89 C Operating humidity 5 to 85 noncondensing 104 F 40 C Non operating humidity 95 RH...

Page 93: ...IP Complies with FC IP 2 3 of the FCA profile System architecture Nonblocking shared memory switch System processor Superscalar 33 MHz Intel i960RP Number of Fibre Channel ports 16 GBIC ports Fibre Channel port speed 1 0625 GB s full duplex Modes of operation Fibre Channel Class 2 service and Fibre Channel Class 3 connectionless service Aggregate switch I O bandwidth 16 Gigabytes per second full d...

Page 94: ...undancy Power Supply See Table C 5 for power supply requirements Table C 5 Power Supply Requirements Specification Value Total P S power 70W to 120W 70W convection without fan 120W with 30 CFM forced air with fan Max power 60 70W Input voltage 85 VAC minimum autoranging to 264 VAC maximum Input line frequency 47 Hz minimum to 63 Hz maximum Harmonic distortion Power factor correction per IEC1000 3 ...

Page 95: ...SW2 233 SW3 234 SW4 235 SW5 236 SW6 Ethernet Subnetmask 255 255 255 0 Fibre Channel IP address 0 0 0 0 Fibre Channel Subnetmask none Gateway address Varies with model Domain 1 BB credit 16 R_A_TOV 10000 E_D_TOV 2000 Data field size 2112 Non SCSI Tachyon mode 0 Disable device probing 0 VC Encoded address mode 0 Per frame route priorities 0 VC priorities 0 1 2 2 2 2 3 3 Disable fan frames 0 Reset to...

Page 96: ...tOnly 0 fabric ops mode SeqSwitching fabric ops mode longDistance fabric ops mode useCsCtl 0 route delayReroute iodset 1 route embeddedPortBcast 1 route stickyRoutes 0 rpc rstatd 0 rpc rusersd 0 Flags 0000 Syslogd_ip 0 0 0 0 op_mode 0000 vc_link_ctl 0000 vc_class2 0002 vc_class3 0003 vc_config C0 vc_multicast 0007 Frm collection piling Alt bb_credit 0000 Open bb_credit 0004 Send FAN frames yes Alw...

Page 97: ... addr 1033d9c0 Data size 00001b48 Magic 2112 OemLogoSet 1 Fakemodel 2 Software readable serial number Compaq switch serial number Supress F class 0 SYNC IO mode 0 Disable RLS probe OFF Open send CLS 0 rpc rapid 1 Translative mode Disable 0 Table C 6 Factory Default Settings Continued Parameter Compaq Default ...

Page 98: ......

Page 99: ...paq series number A 1 configDefault 3 10 configDownload 3 11 3 14 3 15 3 16 failure reasons 3 15 parameters 3 14 configUpload 3 11 3 12 failure reasons 3 12 connecting the storage subsystem and host 3 20 connections E port 1 2 Ethernet 1 3 FL port 1 2 F port 1 2 GBIC module 3 20 serial port 1 3 conventions naming xi text xii cooling requirements 2 2 cut through routing 1 1 D DB9 serial port 1 3 De...

Page 100: ...ull fabric capability 1 2 G getting help xv Gigabit Interface Converter 1 1 removing 4 2 replacing 4 2 slots 1 1 squeeze prong 4 3 squeeze prong illustrated 4 3 with a locking bar 4 2 GND signal 3 3 H help xv host remote Tru64 UNIX 5 6 Window NT Alpha 5 5 Windows NT Intel 5 4 HyperTerminal 3 2 3 10 I illustrations connecting a cable to a GBIC module 3 20 connecting the Ethernet cable 3 7 front pan...

Page 101: ...ower 2 3 resetting factory defaults 3 10 resetting IP address 3 10 RSHD protocol 3 11 3 13 3 14 3 15 RxData signal 3 3 S serial cable 3 3 serial port 1 3 connecting 3 3 pinouts 3 3 series number A 1 slow green indicator 3 17 slow yellow indicator 3 17 specifications dimensions C 4 switch C 3 squeeze prong Gigabit Interface Converter 4 3 status indicators 3 17 steady green indicator 3 17 steady yel...

Page 102: ......

Page 103: ......

Page 104: ......

Reviews: